Handmade Foiled Showered with Love Card

Mastering the Basics: How to Apply Foil to Your Handmade Cards

by Robin

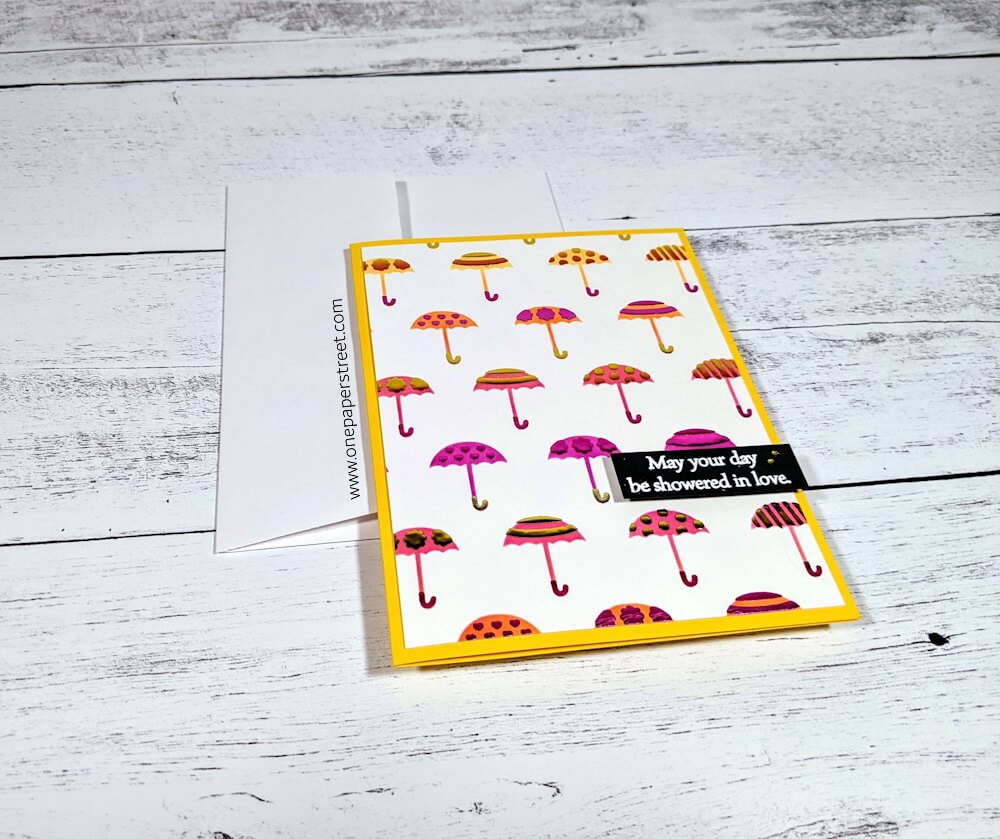
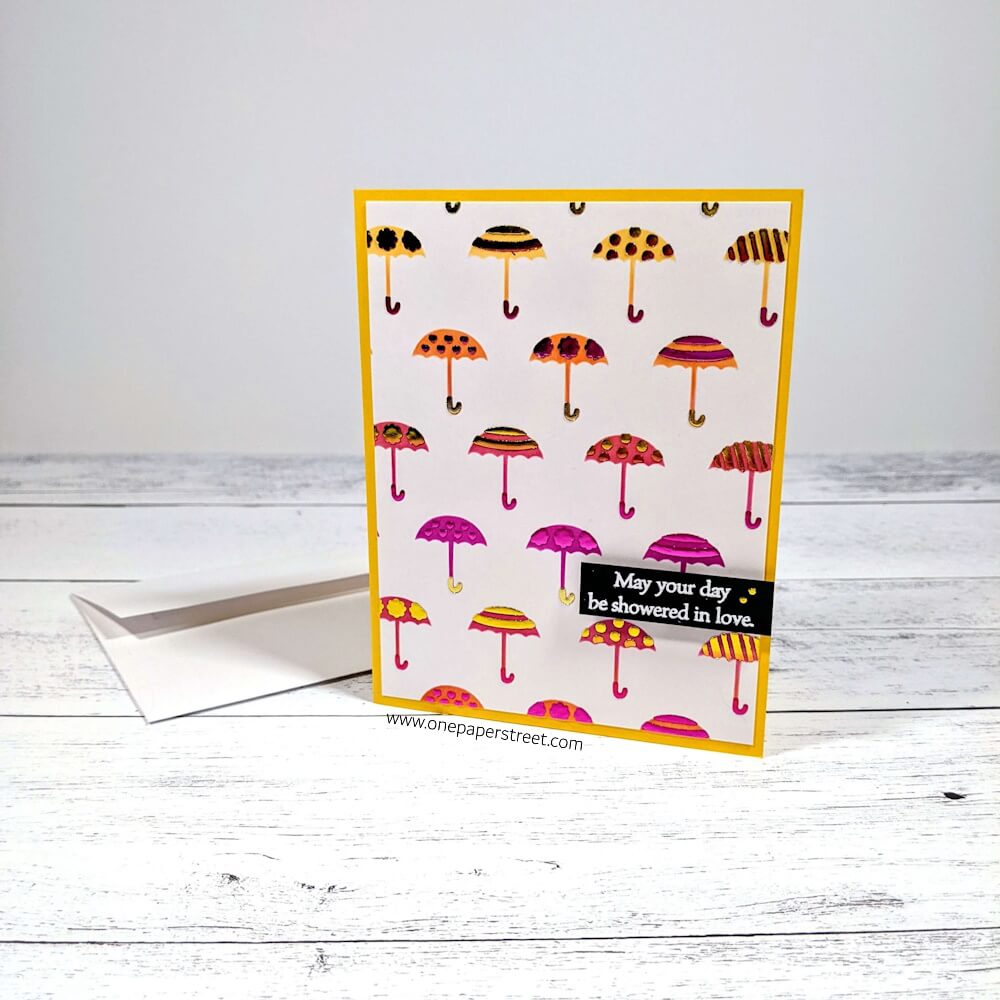
Ever wondered how to add foil to a handmade greeting card? Well, I’m in love with this card that I made recently, and I’m excited to share a step-by-step tutorial where we master the art of foiling and add some beautiful foil embellishments to this handmade card. In this guide, I’ll cover everything from ink blending to applying foil, and finally, adding those finishing touches to the design. So, let’s delve into the world of foiling and elevate your card making game!

Watch the Foiling Handmade Cards YouTube video here.

Materials Used:

This blog may use affiliate links when they’re available. If you choose to make a purchase through one of these links, I may receive a small commission at no cost to you. I don’t make recommendations lightly, and will only link to products I know and trust.

  • Umbrellas Layered Stencil Set – Scrapbook.com [Scrapbook.com]
  • Crafting Ink Blending Brush Set [Amazon]
  • Tiara – Catherine Pooler Mini Dye Ink Pad [Scrapbook.com]
  • Tiki Torch – Catherine Pooler Mini Dye Ink Pad [Scrapbook.com]
  • Party Dress – Catherine Pooler Mini Dye Ink Pad [Scrapbook.com]
  • Flirty Fuchsia – Catherine Pooler Mini Dye Ink Pad [Scrapbook.com]
  • Tattered Rose – Ranger Ink Distress Oxides Ink Pad [Scrapbook.com] [Amazon]
  • Showered In Love Stamp Set – Penny Black [Scrapbook.com] [Amazon]
  • Misti Stamp Tool Original Size Stamp Positioner [Amazon]
  • Essentials 20 Colors Cardstock Paper – Recollections [Amazon]
  • Neenah Classic Crest Solar White 80lb Cardstock [Scrapbook.com] [Amazon]
  • Lawn Fawn 100lb Black Licorice Cardstock [Scrapbook.com]
  • EK Tools Powder Tool [Scrapbook.com]  [Amazon]
  • Uchida Embossing Heat Tool with Stand [Scrapbook.com] [Amazon]
  • Wow! Embossing Powder – Super Fine Back and White Set [Amazon]
  • Scrapbook Adhesives Initially Repositionable Mounting Squares [Scrapbook.com] [Amazon]
  • 1/4-Inch Forever In Time 3D Pop Dots Square Dual-Adhesive Foam Mount [Amazon]
  • Distress Palette Knife Set – Ranger Ink [Scrapbook.com] [Amazon]
  • Transfer Gel DUO – Deco Foil [Scrapbook.com] [Amazon]
  • Summer Rainbow Deco Foil [Scrapbook.com] [Amazon]
  • Parchment Paper [Amazon]
  • Royal Sovereign 9″ Desktop Laminating Machine [Amazon] *Note: My laminator is no longer available, but this laminator comes highly recommended by many other paper crafters. 


Handmade Foiled Showered with Love Card

Foiling Tutorial:

Ink Blending Magic

I started this foiled design by securing a piece of Neenah Solar White cardstock beneath my umbrella stencil from Scrapbook.com. If you’re new to stenciling, you can also learn more about this technique here.

I blended a rainbow-like stencil pattern by utilizing four vibrant ink colors—Tiara, Tiki Torch, Party Dress, and Flirty Fuchsia from Katherine Pooler Inks. For those new to ink blending, remember to choose colors that are close to each other on the color wheel for a seamless transition. In my case, blending yellow into orange, into pink, into purple resulted in a fun and bright gradient look.

Tip: Want to learn more about ink blending? Find a step-by-step tutorial here


Transfer Gel Duo

Next, I lined up the second stencil on cardstock, securing it with magnets. The key to successful foil application lies in the Deco Foil Transfer Gel Duo. This gel can be used with a laminator or a die-cutting machine, so it’s a versatile tool for any card maker. Use a palette knife to apply the gel onto your cardstock.

After applying the gel, clean the stencil immediately with a gentle soap and water. It can be difficult to clean the stencil after the gel has dried. For best results, let the transfer gel sit overnight on the cardstock before applying the foil.

Tip: If your paper begins to buckle from the moisture of the gel, don’t throw it away. Depending on the type of paper you’re using, it may flatten as it dries. Using thicker paper (80 lb or higher) will yield better results. 


Handmade Foiled Showered with Love Card

Applying the Foil

With the transfer gel in place, it’s time to add the foil. I carefully placed the Summer Rainbow foil from Deco Foil on top of the umbrella design, enclosed it in a piece of folded parchment paper, and fed it through my laminator. If your laminator doesn’t get hot enough, sending it through for a second pass can do the trick. Alternatively, if you’re using a die-cutting machine, protect your project by enclosing it in a folded sheet of printer paper or parchment paper.


Embossing the Sentiment

To add a personalized touch, I embossed the Showered in Love stamped sentiment on black cardstock. Applying baby powder to the paper before stamping can help eliminate static.  I stamped the sentiment using tattered rose Distress Oxide ink. It’s known for drying slow, making it perfect for blending and embossing. After applying and heating the super fine white embossing powder from Wow, I trimmed the sentiment, added 3D foam tape to the back, and placed it on the card.

Finishing Touches

To complete the card, I added two foil dots to the sentiment. Applying transfer gel, waiting for it to dry, and gently pressing foil using pressure from my fingers resulted in a subtle yet stunning detail. I chose a yellow card base to complement the vibrant umbrella colors, creating a visually appealing contrast.

And there you have it! A beautifully foiled and stamped handmade card. I hope you enjoyed this tutorial as much as I enjoyed creating it. For more card-making inspiration, sign up to my email list to receive my latest tutorials directly in your inbox.  You can also find me on YouTube, Instagram, and Pinterest! Or shop my handmade cards here!


You may also like

Leave a Comment