
Trying to find a fun and creative hobby? Well, card making is definitely worth considering! Not only does it allow you to express your creativity, but it’s also a great way to make personalized gifts for friends and family. However, if you’re new to card making, it can be overwhelming to know where to start and what to buy. That’s why I put together this beginner’s guide to help you get started with card making. In this post, I’ll cover everything you need to know to create your first project with confidence. So, let’s get started!
Note: This blog may use affiliate links when they’re available. If you choose to make a purchase through one of these links, I may receive a small commission at no cost to you. I don’t make recommendations lightly, and will only link to products I know and trust.
What is card making?
Card making is a form of paper crafting. It is the art of creating handmade greeting cards. There are many different techniques that you can use to make a handmade greeting card. Common techniques include stamping, embossing, inking, foiling, die cutting, watercolors, etc.
It can also be considered a form of mixed media art because you can mix multiple techniques and mediums to make a unique design. But don’t let that scare you! Everyone has their own style, and you can make cards with any techniques that inspire you!

Why should I consider card making as a hobby?
The number one reason why I started card making, and why I still do it today, is because it’s a wonderful creative outlet. I find that card making helps me relax. It allows me to express my creativity and keeps me feeling inspired. Here’s why!
You’re only limited by your imagination: Are you someone who feels intimidated by traditional art practices like drawing? If so, don’t worry! There are so many stamps, stencils, embellishments, and other supplies out there, that the sky is the limit for you. You can create your own style based on the techniques and supplies that you enjoy!
Complete a card in one sitting: Card making projects are usually much smaller than scrapbook pages and other types of paper crafting projects. Because of their small size, you can typically create a card in one session!
Share your creativity by gifting your cards to friends and family: Card making is the gift that keeps giving. Not only do you get to have fun making the card, but you also get to give that card to someone you care about and let them enjoy your hard work too! I have so many family members who have kept my cards over the years. I’ve heard friends say that they’ve framed a card and hung it on their wall. It really is a wonderful way to bring joy to others.
Learn a new skill: Exploring a new creative skill can be so much fun and making your first project can feel so rewarding. As you start to learn more techniques and try new things, you may just find that you’re hooked!
What supplies do I need to start card making?
as a card making beginner, you might be wondering what supplies you need to get started. Well, you don’t need much, but there are a few things that can help you kick off your first few projects. I’ve listed them below and linked to a few products to help give you some ideas.
Side Note: This blog may use affiliate links when they’re available. If you choose to purchase through one of these links, I may receive a small commission at no cost to you. I don’t make recommendations lightly, and will only link to products I know and trust.
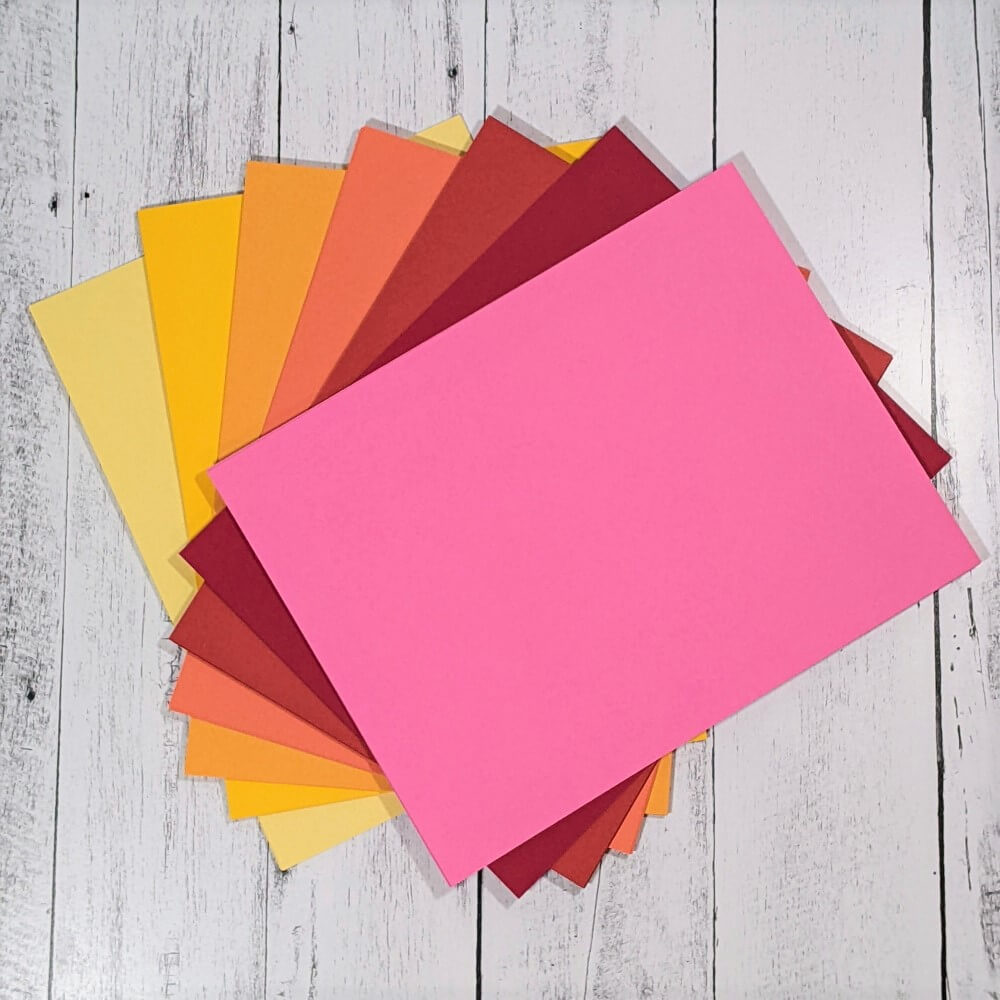
Cardstock:
Cardstock is a staple for card making. You will use it to make your card base, to stamp your sentiments, and much more. You can choose to buy pre-cut and scored card bases, or you can buy a pack of 8.5×11 inch assorted paper sheets and cut/score the card base yourself. It’s up to you!
When you shop for cardstock, I recommend looking for paper that is anywhere between 65 lbs-110 lbs in weight. Anything less than 65 lbs, and the paper is going to be too flimsy for a card base, and your ink could bleed through. Anything above 110 lbs and the paper will likely be too thick to cut and fold easily.

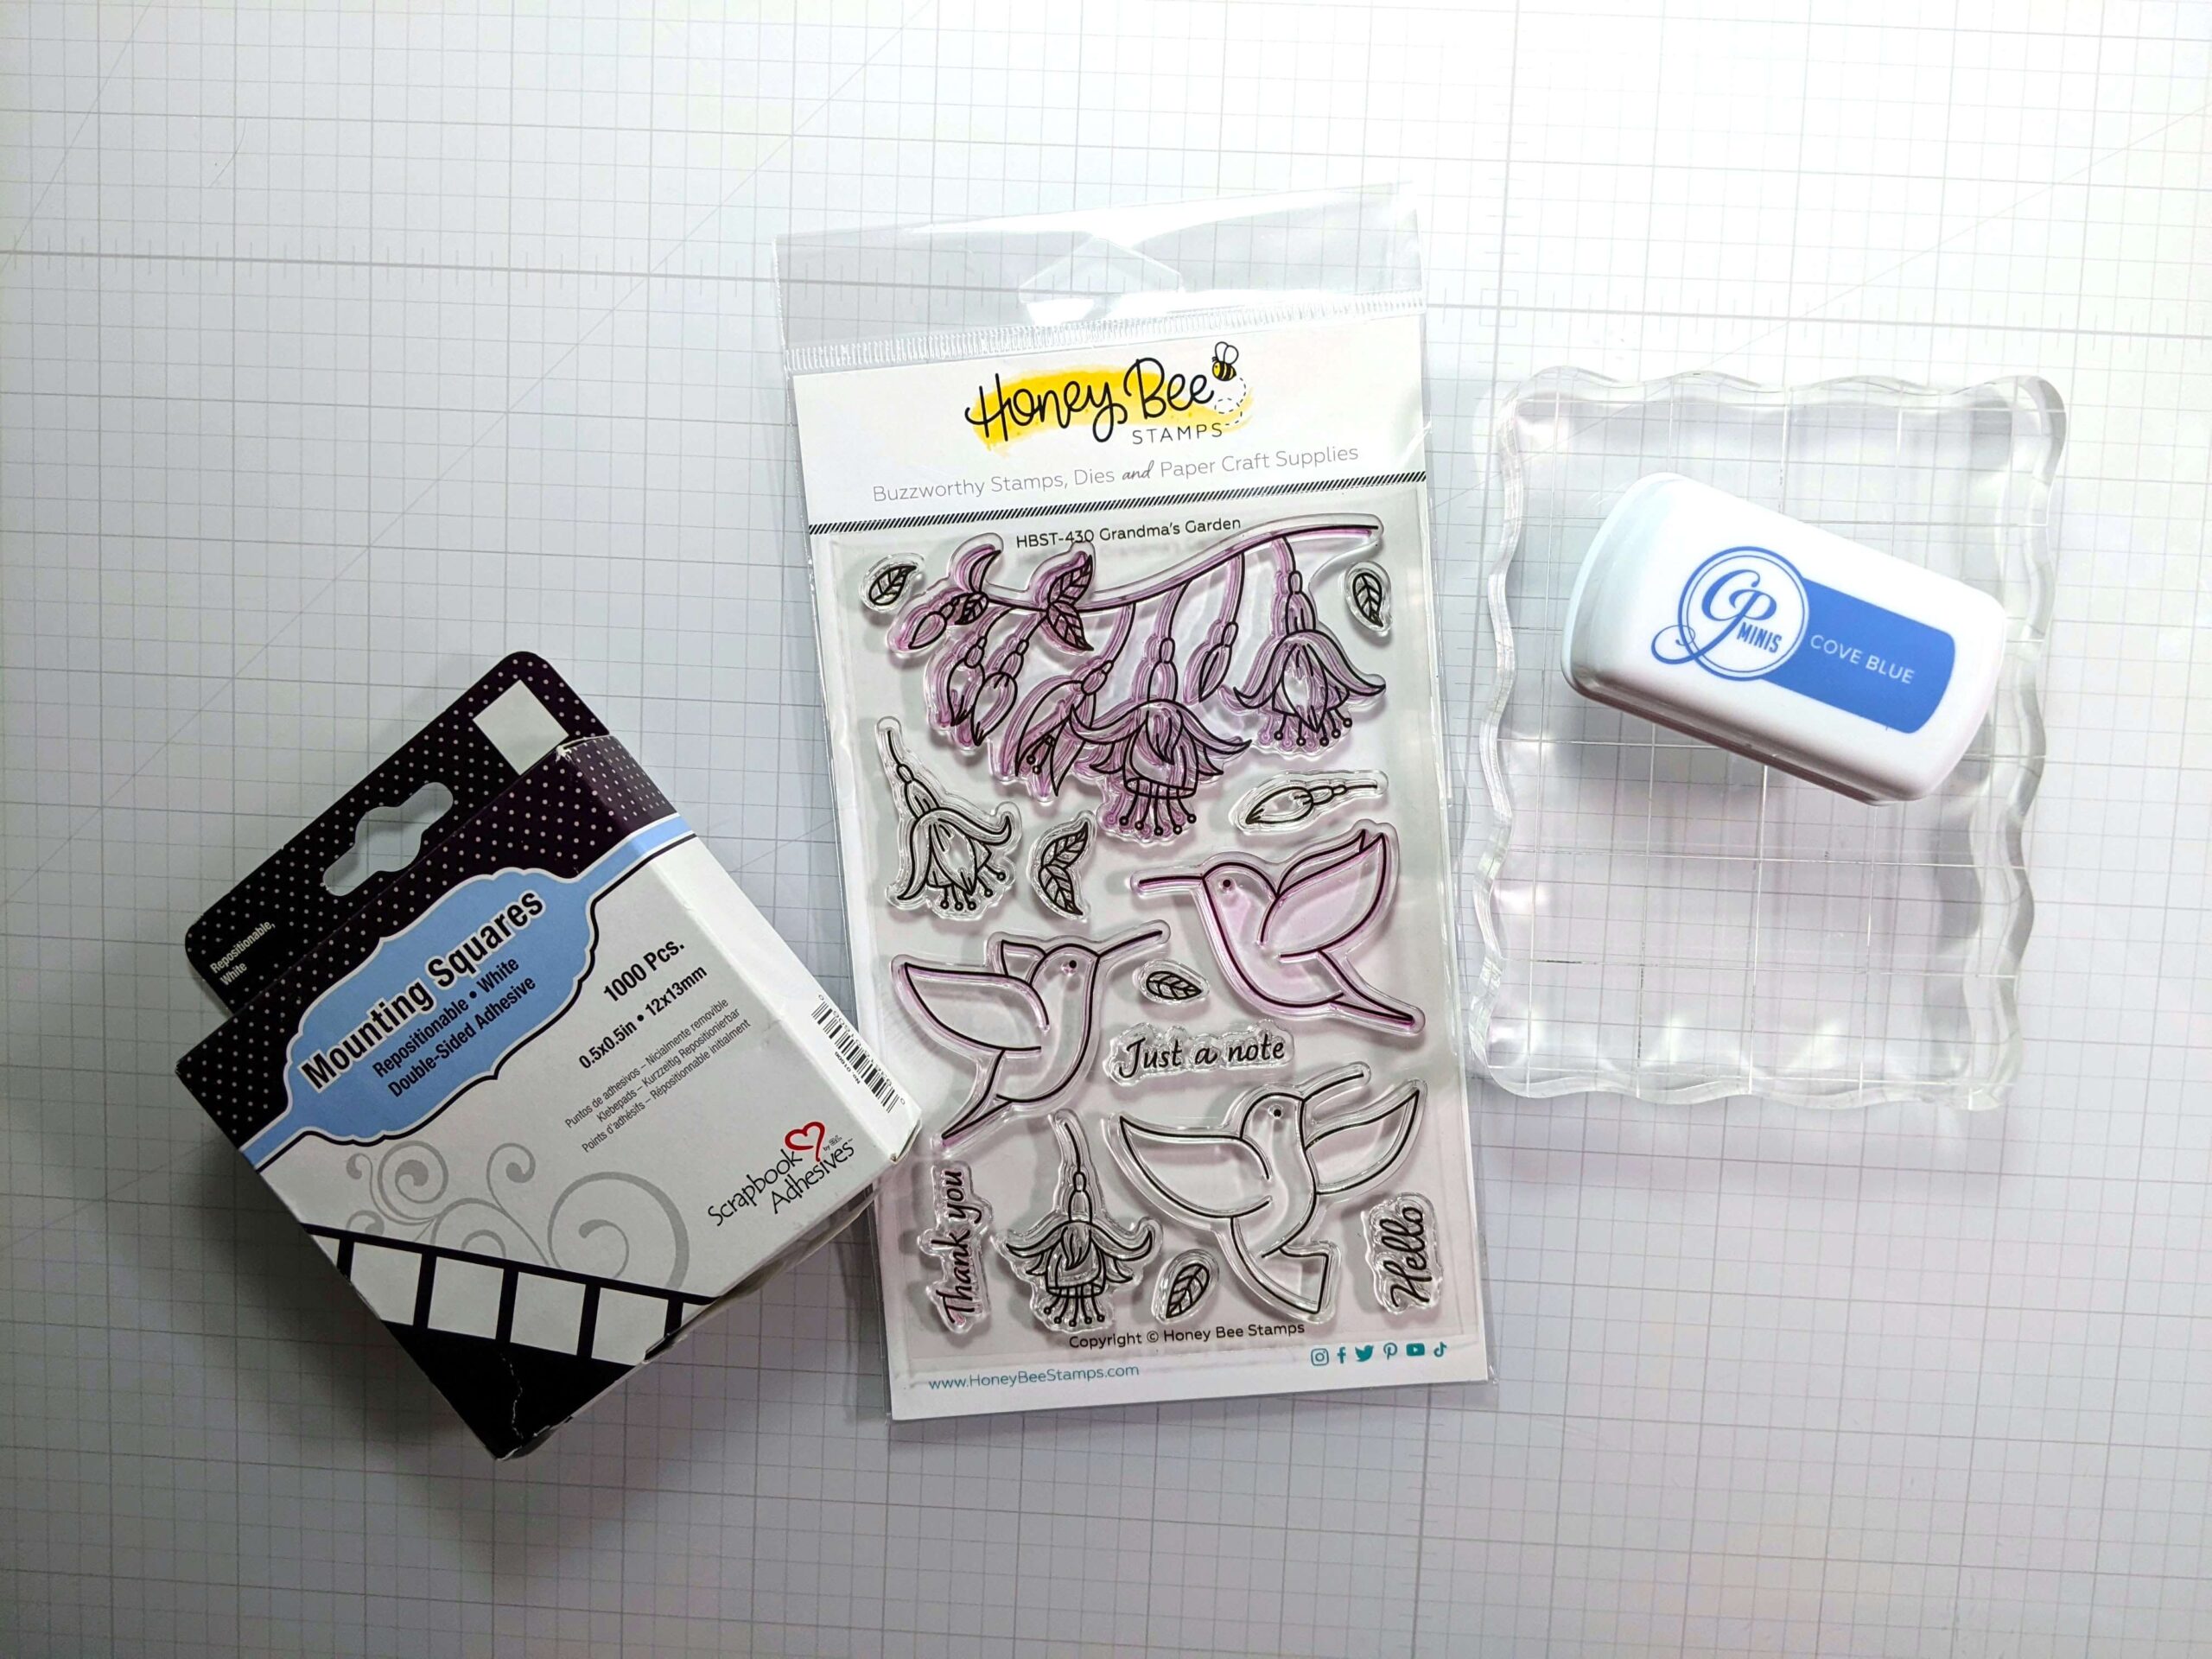
Stamps:
Stamping is one of the easiest card making techniques to learn as a beginner. Consider getting a versatile stamp set that has both images and sentiments, so you can use one stamp set to make a full design. This will allow you to see if you like the craft without investing too much money upfront.
Acrylic Block:
Stamps are flexible and flimsy. So you have to stick them to something flat and sturdy to get a good impression. Many people will use an acrylic block. If you’re on a budget you could also try the bottom of a glass water cup. But be careful not to drop it!
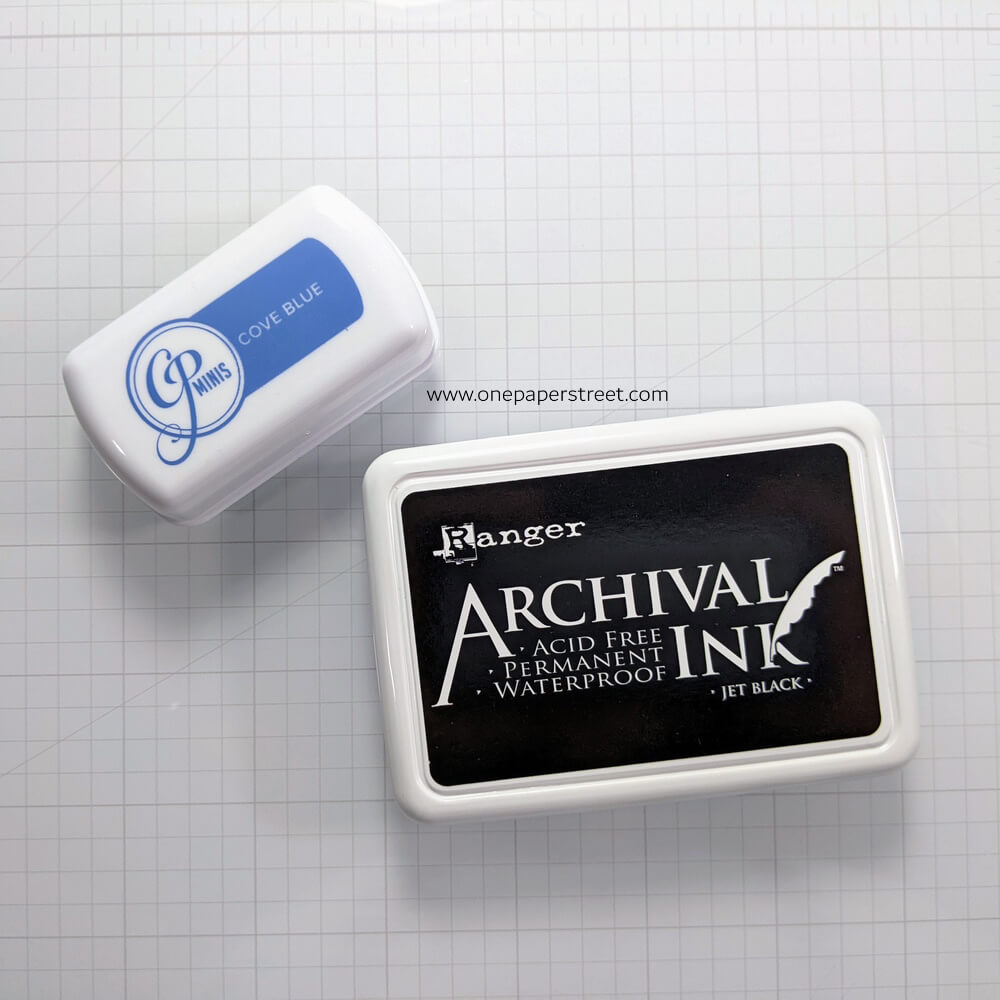
Ink:
If you’re stamping, you’ll need ink. I recommend archival ink or dye ink to beginners. Archival ink dries quickly, tends to be permanent and waterproof, and it’s easy to find in most craft stores. It is more difficult to clean off your stamps though. So if you choose archival ink, I recommend getting some cleaning solution as well.
Dye ink, on the other hand, dries a little slower and is not waterproof. However, it’s very easy to clean your stamps with a little water and some gentle soap if needed. Both types of ink will stain if you drop it on your carpet or your clothes. So be careful!
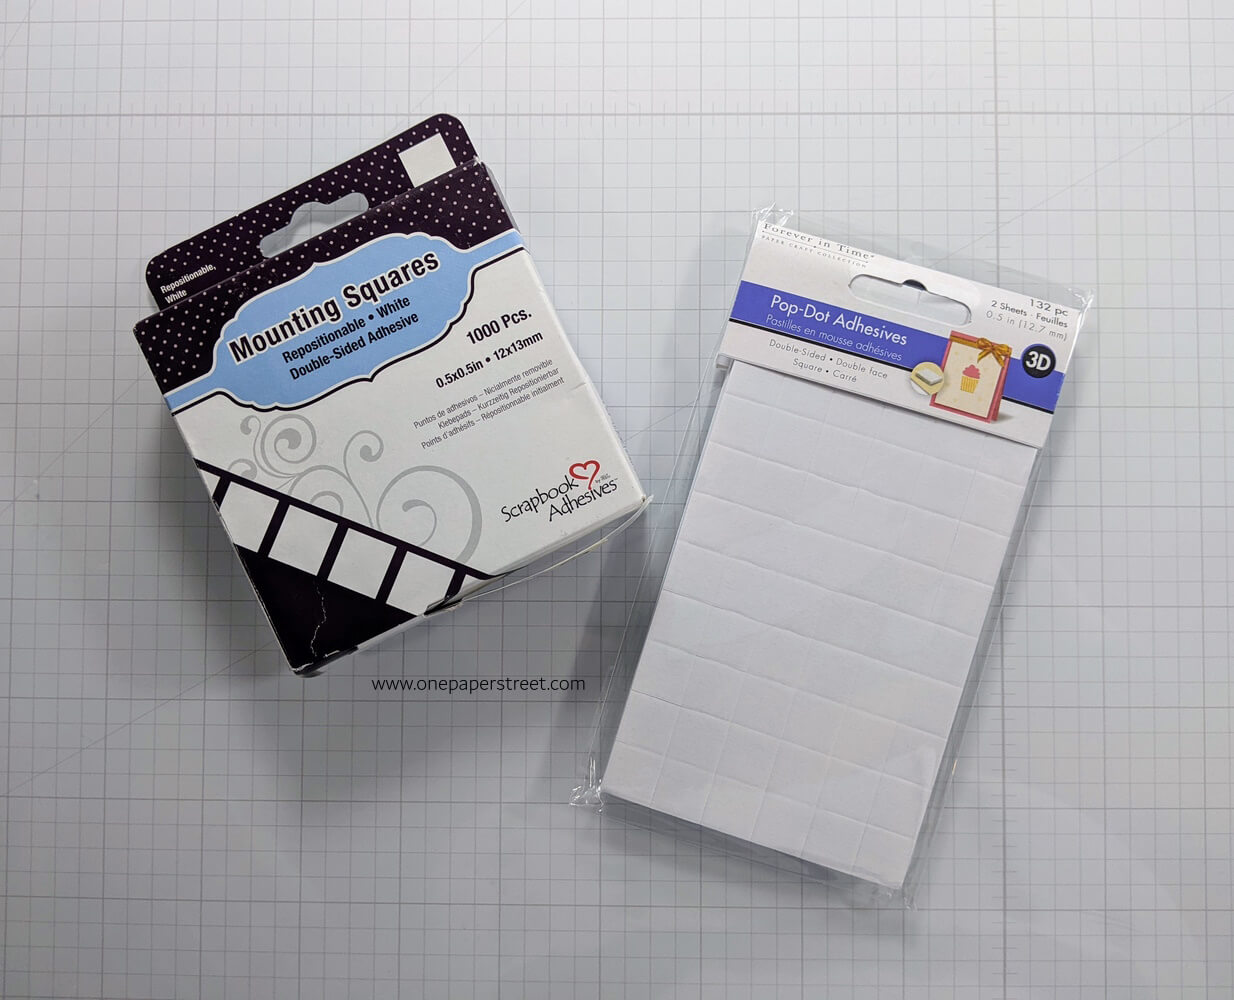
Adhesive:
Glue or adhesive is essential to card making. You will inevitably want to stick your stamped paper onto your card base, and you will need something to hold it in place. There are two types of adhesives I recommend when you’re getting started as a beginner card maker. Choose one type to start with and see how you feel!
Mounting squares are flat double-sided adhesive squares that can be permanent or repositionable. You just place it on the back of your stamped image and apply it to the card base. Press firmly (but carefully), and your design will stay in place. Foam tape is another type of adhesive. However, foam tape is three-dimensional. When you use foam tape, your stamped design will lift about 1/8th inch off the page. It gives a different effect than the flat mounting squares.
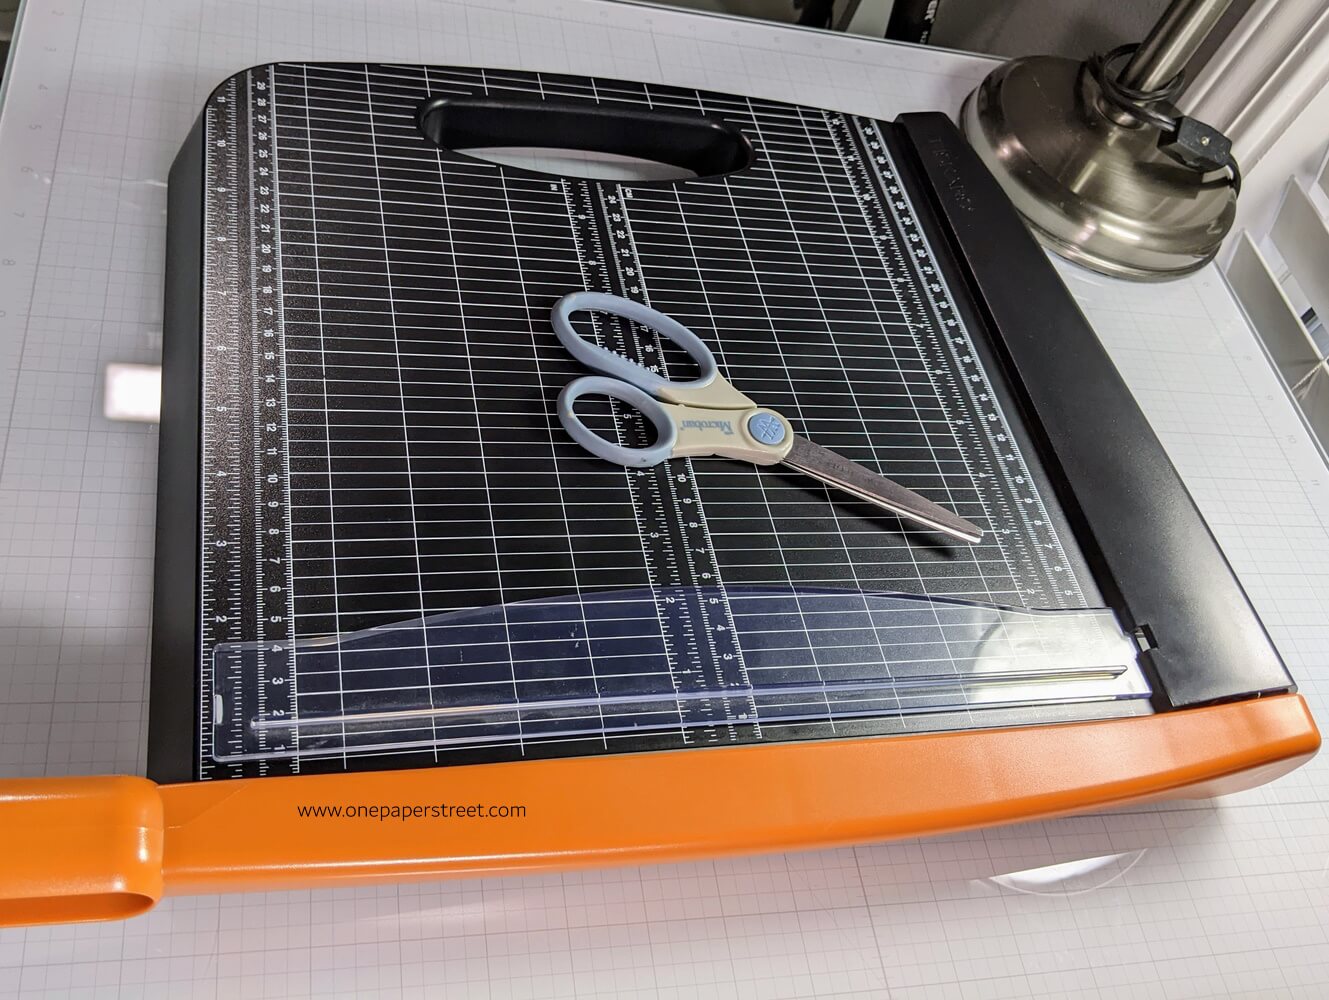
Paper Trimmer/Scissors:
If you’re cutting your card bases yourself, a paper trimmer is a must. It helps you get clean straight lines while you cut your paper. If you’re buying your card bases pre-cut, you may be able to get away with just having a pair of scissions to cut out your stamped images as you’re getting started.
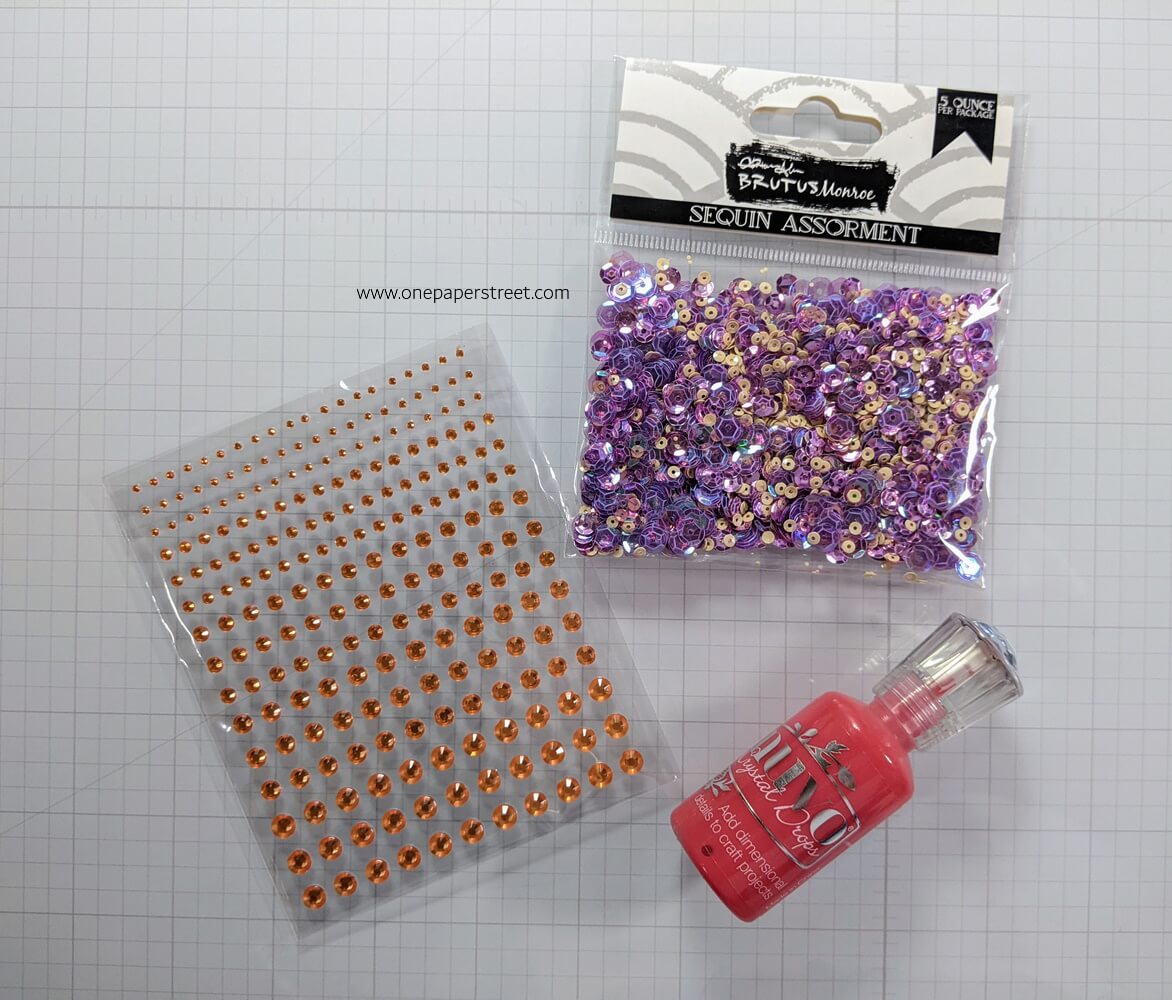
Embellishments (optional):
Things like sequins, rhinestones, and enamel dots are things that add some accent designs to the card. They are what we call embellishments. These things are optional but can add a really nice touch to your design. If you’re thinking about purchasing embellishments, I suggest starting with something that already has adhesive on the back. Like enamel dots or rhinestone stickers.
Markers/Colored pencils (optional)
If you have markers or colored pencils around your house, go ahead and grab them! Color in your stamped design! Remember. If you bought dye ink, it is not compatible with wet mediums like markers. If you don’t have coloring tools, just skip that step!
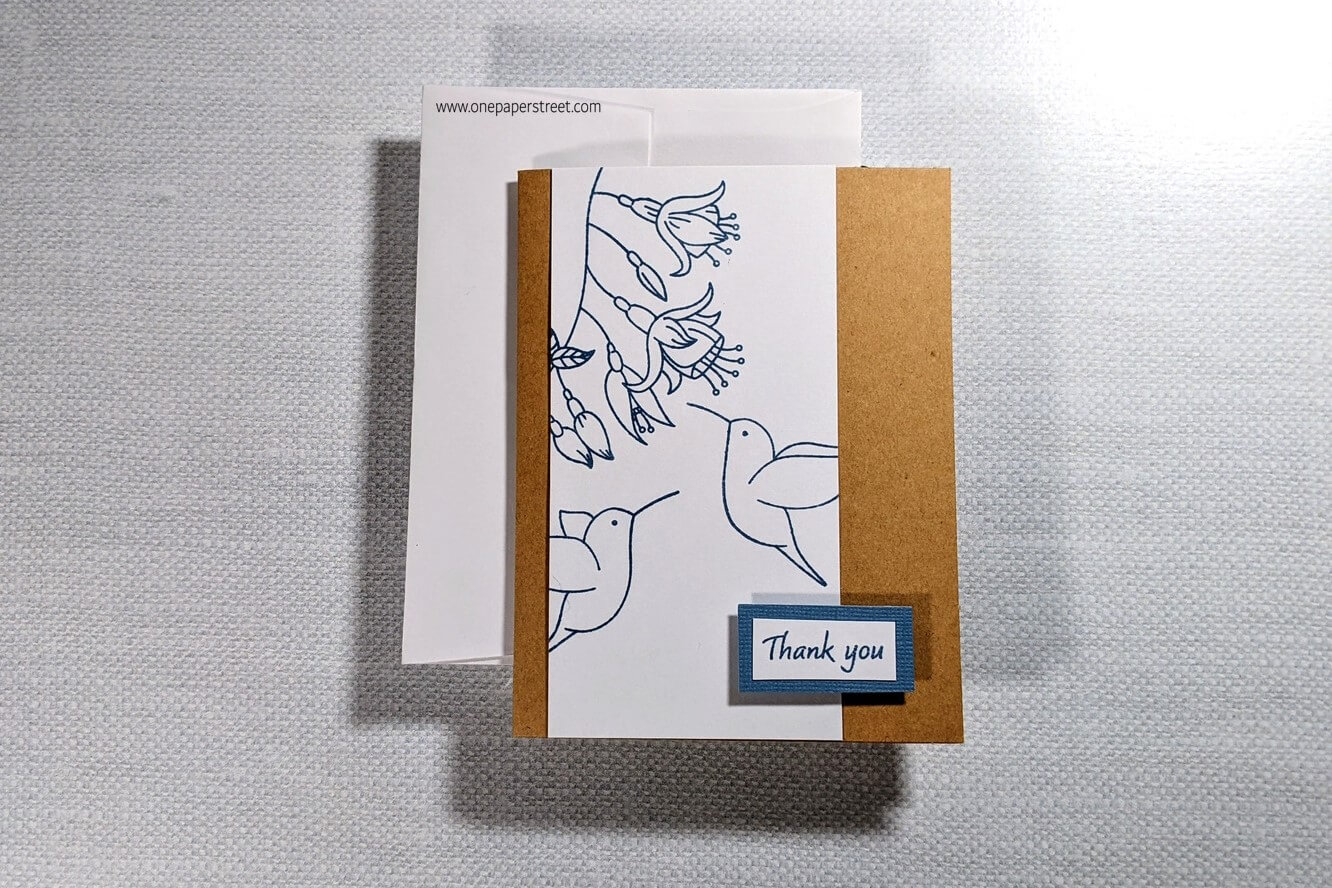
I created this thank you card as a simple example. It’s been made using only the basic the supplies mentioned in this article.
How do I get started with card making?
Ok, so we’ve covered what card making is, and what you to get started as a beginner. Next, let’s discuss what to do with those supplies once you have them!
Step 1. Cut your card base and fold it in half.
Grab your pre-cut card base, or trim an 8.5×11 inch sheet of paper in half to be 8.5×5.5 inches. That is your card base. Fold it in half to make an A2-sized greeting card that will be 4.25×5.5 inches.
Step 2. Place your stamp on the acrylic block.
Lay your stamp face down and pick it up with your acrylic block. Applying it to the block this way helps the stamp keep its shape.
Step 3. Prime your stamps as needed.
Stamps never have a clean impression right out of the packaging. So you have to use them a few times before they will give you a good image. This is called stamp priming.
Once you’ve primed it, stamp the image a few times. It takes practice to press the stamp down flat and to get a clean image. Once you have a few images on your cardstock, pick the one you like the best for your design. If you’re looking to color your design, do so here.
Step 4. Cut out your stamped design and stick your stamped image to your card base.
Take your time to cut your stamped design. You can also use your paper trimmer if you have one. Have fun with it, and get ready to use your adhesive. Place your mounting squares or foam adhesive on the back of your stamped image and apply it to your card base.
Step 5. Add a sentiment and optional embellishments.
Repeat steps 2-6 with the stamp you chose for your sentiment. If you chose to purchase some embellishments, add them to your card to finish off the image.
And congratulations on making your first card! You can branch out with supplies and various designs from here, but this is your starting point. Again, the most important part of this process is to have fun. Not everything will go your way when you’re starting out, but remember that messing up can also be a learning experience. Enjoy the creative journey.
I hope you enjoyed this beginner’s card making guide to getting started. Learn even more beginner card making tips here. Check it out, and follow me on Instagram or Pinterest for the latest updates! You can also shop the handmade cards that I’ve designed here.