
Sending a thank you card is a simple yet powerful way to express gratitude, and giving a handmade card can make it even more special. But, what if you find that you don’t have time to make something elaborate? Well, don’t worry! In this post, I’ll show you how to create stylish and simple thank you cards in just a few minutes. So let’s get started!
Watch this Easy Thank You Card YouTube video here.
Thank You Card Materials:
This blog may use affiliate links when they’re available. If you choose to make a purchase through one of these links, I may receive a small commission at no cost to you. I don’t make recommendations lightly, and will only link to products I know and trust.
- BIGkick Machine – Sizzix [Scrapbook.com] [Amazon]
- 12×12 Scoring Board – EK Tools [Amazon]
- Fiskars Recycled Bypass Trimmer, 12 Inch [Amazon]
- Outside In Stitched Rectangle Stackables Die Set – Lawn Fawn[Scrapbook.com] [Amazon]
- Oversized Thank You – Print Dies – Waffle Flower Crafts [Scrapbook.com] [Waffle Flower Crafts]
- Ebony Black Nuvo Crystal Drops [Scrapbook.com] [Amazon]
- Kraft Cardstock Paper – Recollections [Amazon]
- Neenah Classic Crest Solar White 80lb Cardstock [Scrapbook.com] [Amazon]
- Scrapbook Adhesives Initially Repositionable Mounting Squares [Scrapbook.com] [Amazon]
- Tombow MONO Aqua Liquid Glue [Scrapbookpal.com] [Amazon]

Easy Thank You Card Tutorial:
Step 1. Keep your card making materials simple.
The key to this design is keeping it simple. Use minimal colors, embellishments, and supplies. Here, I’ve used the oversized thank you print die set from Waffle Flower Crafts and paired it with the outside-in stitched rectangles stackable die set from Lawn Fawn.
First, I’ve placed my rectangle stackable die over a piece of 5.5 x 4.25-inch white cardstock. Next, I put the thank you die and its outline inside the rectangle, making sure it’s perfectly centered. I also recommend using washi tape to keep everything in place. Once the two dies had gone through my Sizzix die-cutting machine, I removed all of the die-cut pieces.

Step 2. Apply the background and sentiment onto the card base.
Once the die cuts have been created, it’s time to apply the background to the card base. I chose a piece of kraft cardstock for my base. Again, I centered everything, but this time on my card base. I used Scrapbook Adhesive mounting squares to secure the background. Then I added the sentiment in the open center space I used some Tombow mono liquid glue to secure it. I also like to set a stamp block on top of it for a minute to let the liquid glue dry.
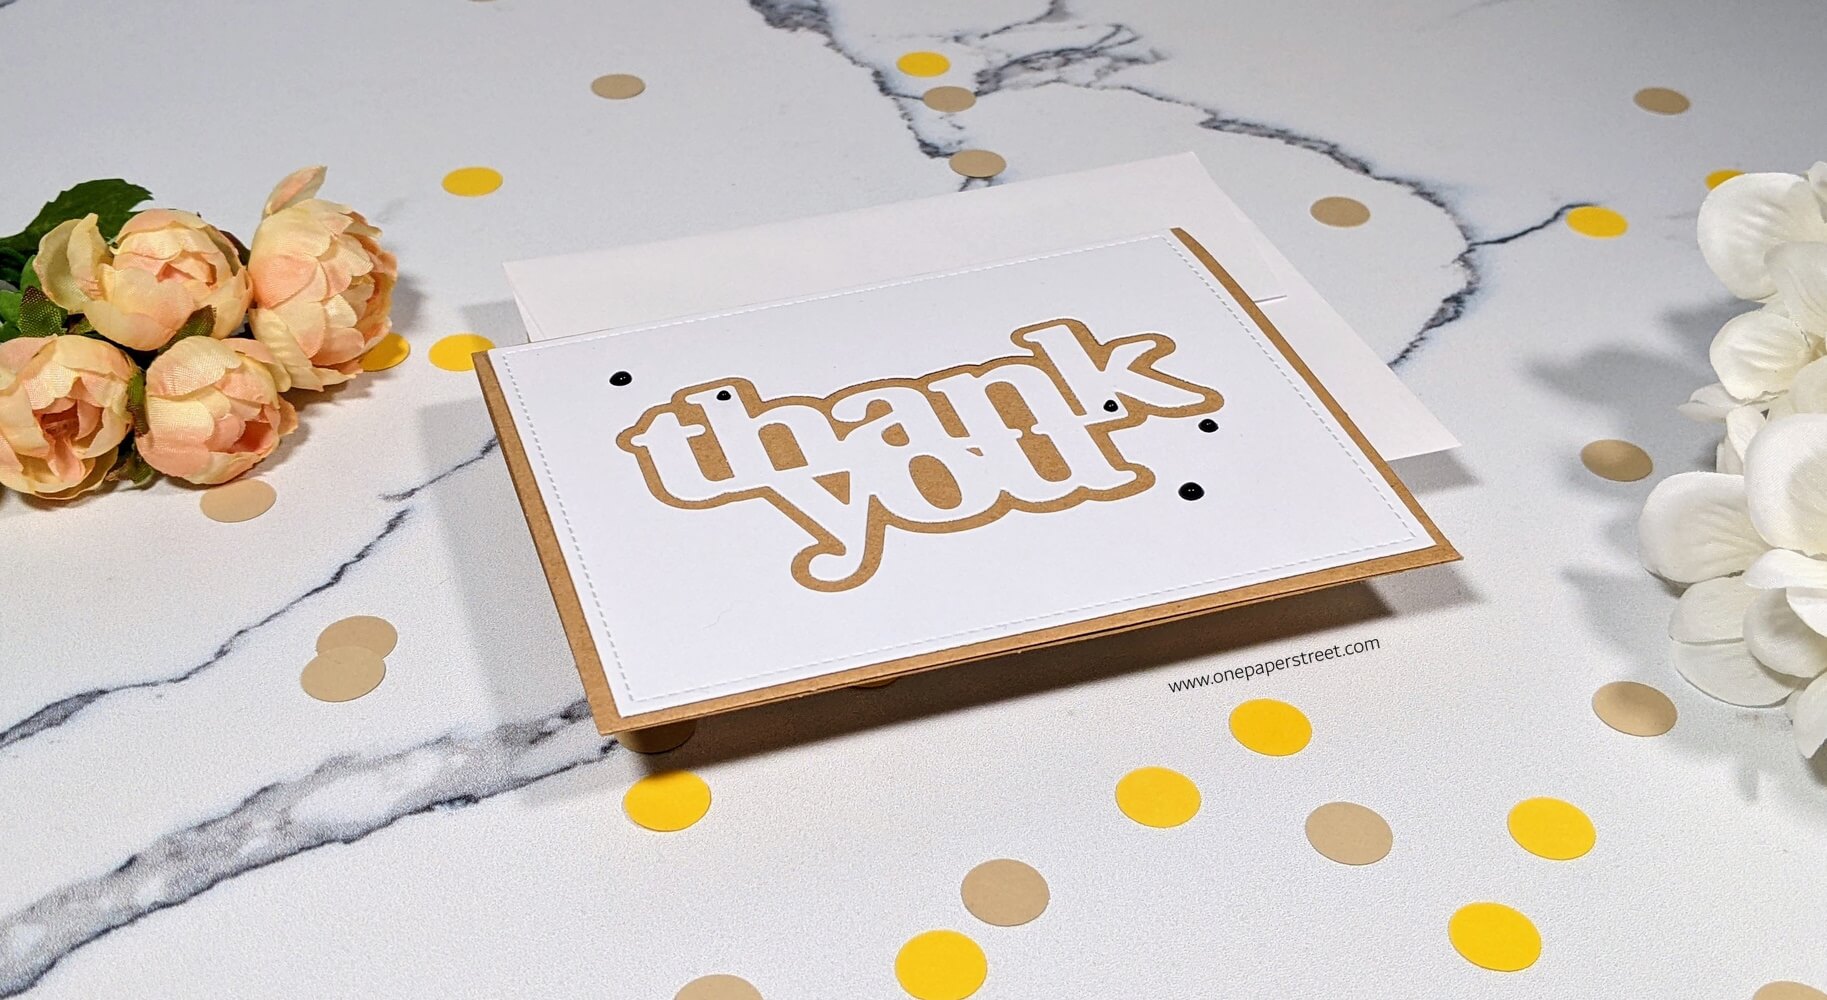
Step 3. Add some embellishments, if you want.
Now, you could stop here, or you could add some embellishments. I chose to add a few ebony black Nuvo Drops to the finished card because I thought it added a nice touch to the design.
And that’s it! You can make your own thank you card design by replicating these steps with your own dies and supplies!
I hope you found this tutorial to be helpful. And if you’re looking for more thank you card ideas, I encourage you to check out this simple floral thank you card. And remember that you can always stay updated on the newest tutorials by subscribing to my weekly Creative Inspiration emails. sign up using the sidebar on the right. You can also follow me on Instagram or Pinterest, or shop the handmade cards I’ve designed here.