
Inlaid die cutting is such a cool technique. But what happens when you don’t own, or can’t find the right die for your project? Well, you turn to your Cricut machine of course! In this tutorial, I’m gonna walk you through how you can still do inlaid die cutting with a Cricut machine instead of a die and still get the desired effect.
Materials Used:
This blog may use affiliate links when they’re available. If you choose to make a purchase through one of these links, I may receive a small commission at no cost to you. I don’t make recommendations lightly, and will only link to products I know and trust.
- Cricut Explore Air 2 Machine [Cricut] [Amazon]
- Adhesive Cricut Cutting Mat, Standard Grip [Scrapbook.com] [Cricut] [Amazon]
- Basic Tool Set – Cricut [Cricut] [Amazon]
- 12×12 Scoring Board – EK Tools [Amazon]
- Fiskars Recycled Bypass Trimmer, 12 Inch [Amazon]
- Trim Slant Tip Tweezers [Amazon]
- Nuvo Crystal Drops – Dark Walnut [Scrapbook.com] [Tonic Studios] [Amazon]
- Simply White Nuvo Crystal Drops [Tonic Studios]
- Recollections Cardstock Paper, Essentials 20 Colors [Amazon]
- Neenah Classic Crest Solar White 80lb Cardstock [Scrapbook.com] [Amazon]
- Floral Patterned Cardstock
- White Foam Sheets – Time 4 Crafts [Amazon]
- 6×6 Double-Sided Adhesive Sheets [Scrapbook.com]
Cricut Images Used:
I started this inlaid die cutting card by using the Cricut Design Space to make a template for this design. If you don’t have the Cricut desktop software, it is free and can be downloaded here. They have an app too, but the desktop version is less buggy.
- Cricut Sans Font


Looking for more ways to master your Cricut Machine? Find more tips here.
Cricut Inlaid Die Cutting Tutorial:
Step 1. Create a template in the Cricut Design Space
Using the Cricut Design Space, I used the Cricut Sans font to create the HAPPY BIRTHDAY sentiment. Then, I detached the sentiment (split each letter apart, so each letter is its own image). Next, I reattached the letters that I wanted to share a line so that they would remain the same size, and stay perfectly aligned as I worked.
So, I attached the letters that made HAPPY, then BIRTH, then DAY. I started making them larger as needed to fit the template size. Once the sizing and spacing were correct, I reattached the three lines to make one image and centered it on my template.
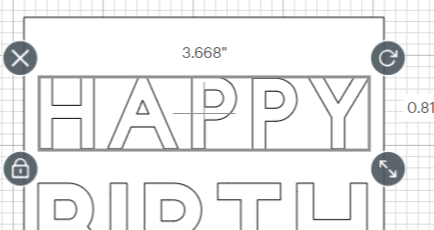
Lastly, I had to attach my sentiment words to the white square in my template, so my Cricut machine would know exactly where to cut the words on my cardstock.
Step 2. Cut the image using a Cricut machine.
Once the template is made, I used my Cricut Explore Air 2 machine to cut out the design. The template was configured to cut each letter in sentiment and to cut the white rectangle around it as well. Then, I cut the exact same design using two different sheets of paper. The first was on some Neenah Classic Crest solar white 80lb cardstock. The second was a floral patterned sheet of paper.
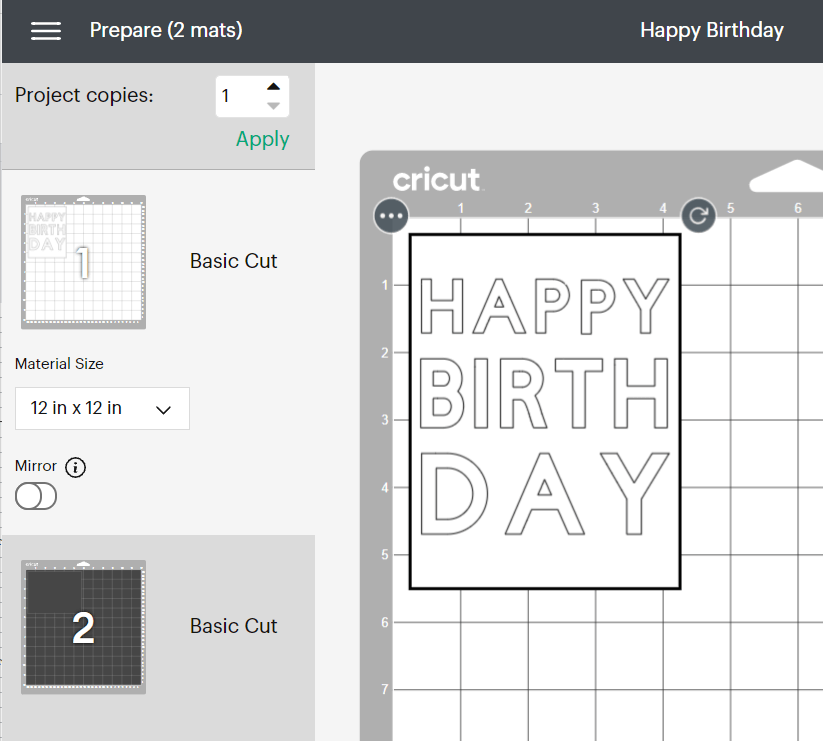
Note: The second black layer just gives me a visual of what the finished card will look. I don’t cut it out.
Step 3. Assemble the Dies in their backgrounds
When I peeled the paper away from my Cricut mat, I was careful not to throw any of the pieces from inside the rectangle away. Those will be needed very shortly. Next, I grabbed a sheet of adhesive tape and trimmed it to be 5 x 3.75 then pulled the backing off one side.
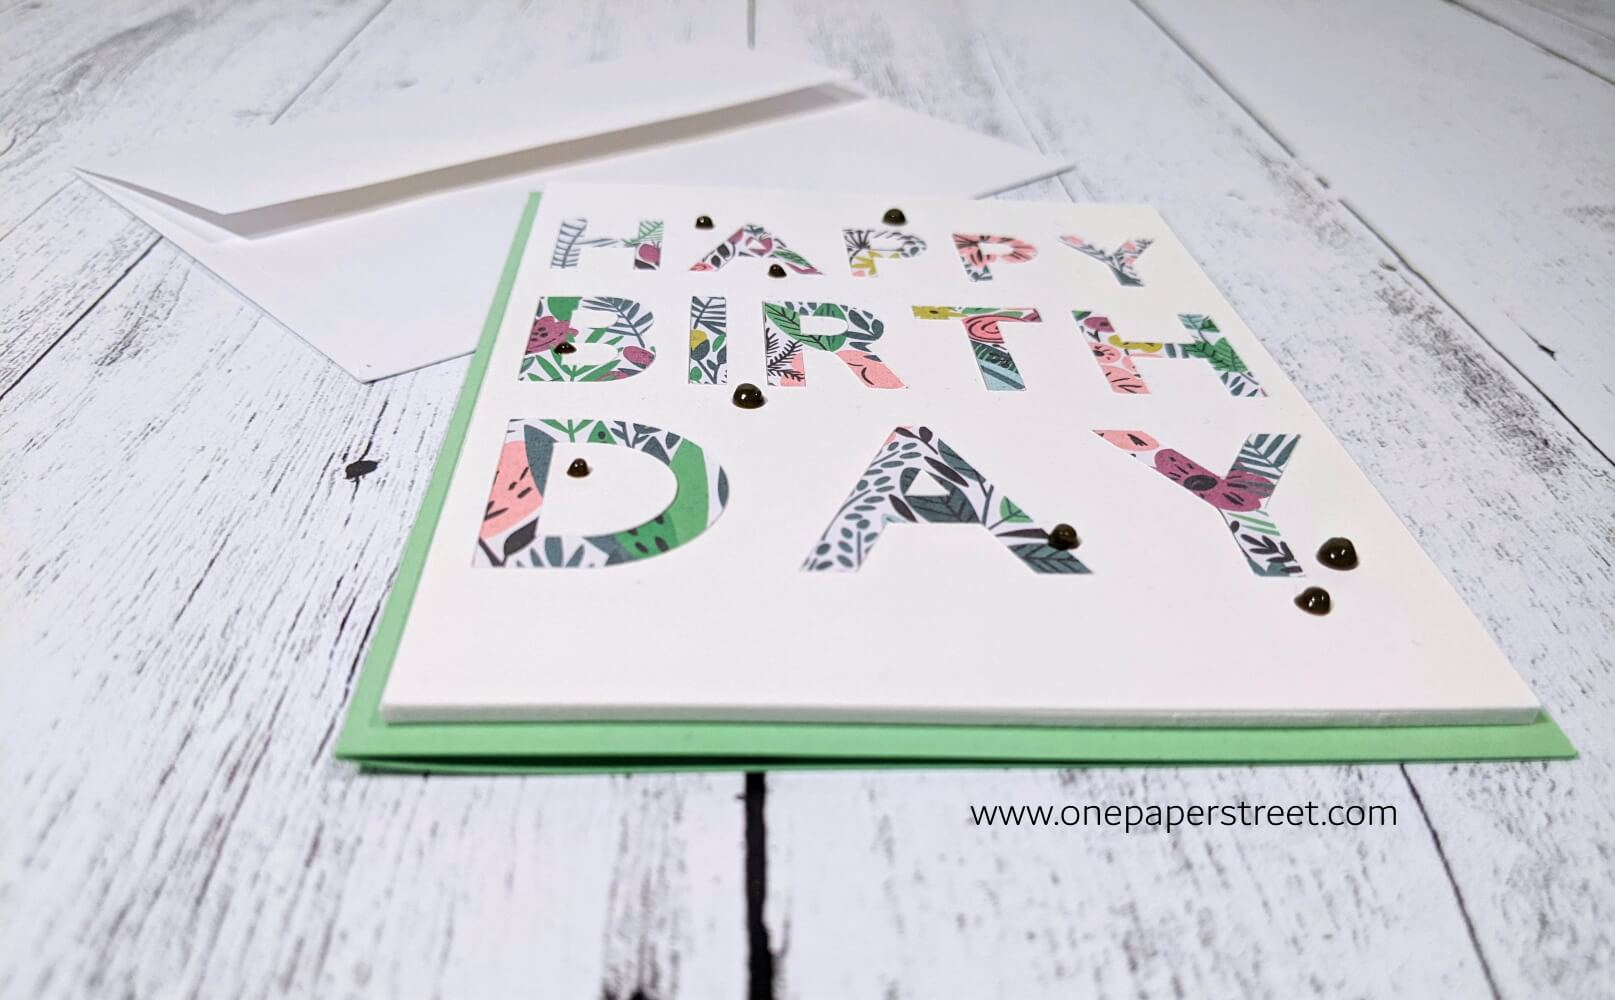
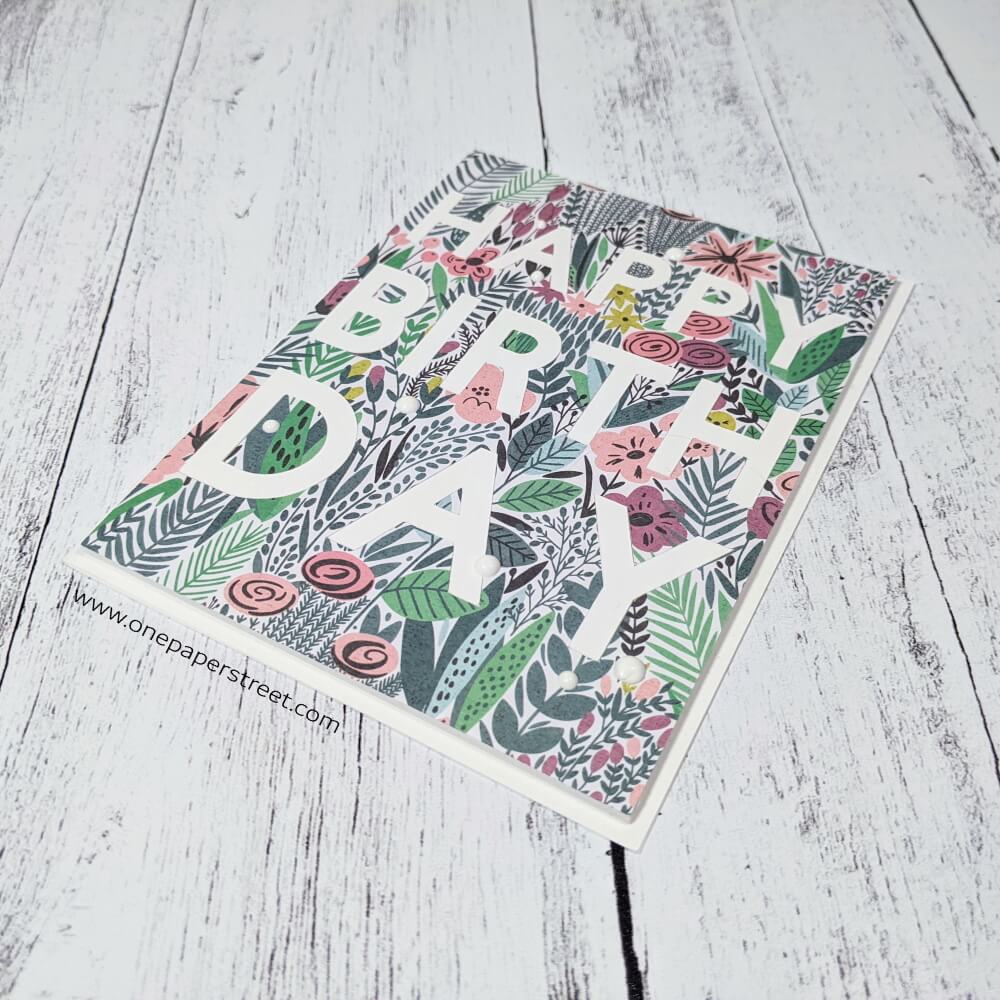
I then placed the adhesive side of the tape on the back of the happy birthday rectangle. This allowed me to flip the rectangle over and insert the inlaid letters into the rectangular base. As I was placing the letters back in I used the floral letters on the white cardstock, and the white letters in the floral cardstock to create a contrasting background for each of the cards.
Step 4. Add the Cricut inlay die cut design onto a card base.
After all the letters were secure, I peeled the backing off of the other side of the adhesive tape and placed the cardstock onto a foam sheet that was a quarter-inch larger than the cardstock. Then, I used my trimmer to remove the excess foam from the design and placed it onto the card base so that the design would pop off the page and give the card a little extra dimension.
Step 5. Add Nuvo drops to embellish the card.
Finally, I finished the card up by adding some Nuvo Drops around the sentiment. I added Simply White drops to the floral card and Dark Walnut drops to the white card. The same process was used for both cards that you see here, again creating some contrast. And since I was able to repurpose all the letters and the backgrounds I didn’t really waste any paper in the process.

I hope you found this tutorial helpful! Leave a comment below, and let me know about your experience with inlaid die cutting. Here’s another Cricut tutorial that uses the sentiment as a focal point. Check it out, and follow me on Instagram, Facebook or Pinterest for the latest updates! You can also shop all the handmade cards that I’ve designed here.