")
Let’s talk watercolors. Making a watercolor galaxy card can make you feel excited about making an abstract painting, or anxious about mixing colors and possibly messing up! Well, today we’re taking some of the guesswork out of watercolor galaxies and walking you through how you can make your own galaxy card! So keep reading to learn more about this trendy card making technique.
Watch the Valentine’s Day Watercolor Galaxy Card YouTube video here.
Materials Used:
This blog may use affiliate links when they’re available. If you choose to make a purchase through one of these links, I may receive a small commission at no cost to you. I don’t make recommendations lightly, and will only link to products I know and trust.
- Sakura Koi Watercolor Field 48 Color Sketch Set [Amazon]
- ScotchBlue Painter’s Tape – 1.88-Inch by 60-Yard [Amazon]
- HB Pencil – General Semi-Hex Graphite Drawing Set [Blick] [Amazon]
- Grafix Incredible White Mask Liquid [Blick] [Amazon]
- Grafix Incredible Nib [Blick] [Amazon]
- Golden Fleece Synthetic, Round, Size 12 [Cheap Joe’s Art Supply]
- Uni-Ball Gel Impact White Rollerball Pen [Amazon]
- Faber-Castell Kneaded Eraser with Case [Blick] [Amazon]
- EK Tools EK Scoring Board 12×12 [Amazon]
- Fiskars Recycled Bypass Trimmer, 12 Inch [Amazon]
- Neenah Classic Crest Solar White 80lb Cardstock [Scrapbook.com] [Amazon]
- Scor-Pal Scor-Tape – 1/8″X27 Yards [Amazon]
Looking for more watercolor tutorials? Click here.
Watercolor Galaxy Card Tutorial:
Step 1. Prep the watercolor paper.
I started this watercolor galaxy card by picking out my paper first. Using the Kilimanjaro 140 lb coldpress watercolor paper was perfect for this project because I planned to use a lot of water for this painting. Heavier coldpress paper is great for a wet on wet technique. After that, I taped all four sides of the paper down to a flat board to keep it from buckling or warping as I painted.
Step 2. Lightly draw on the sentiment and mask it.
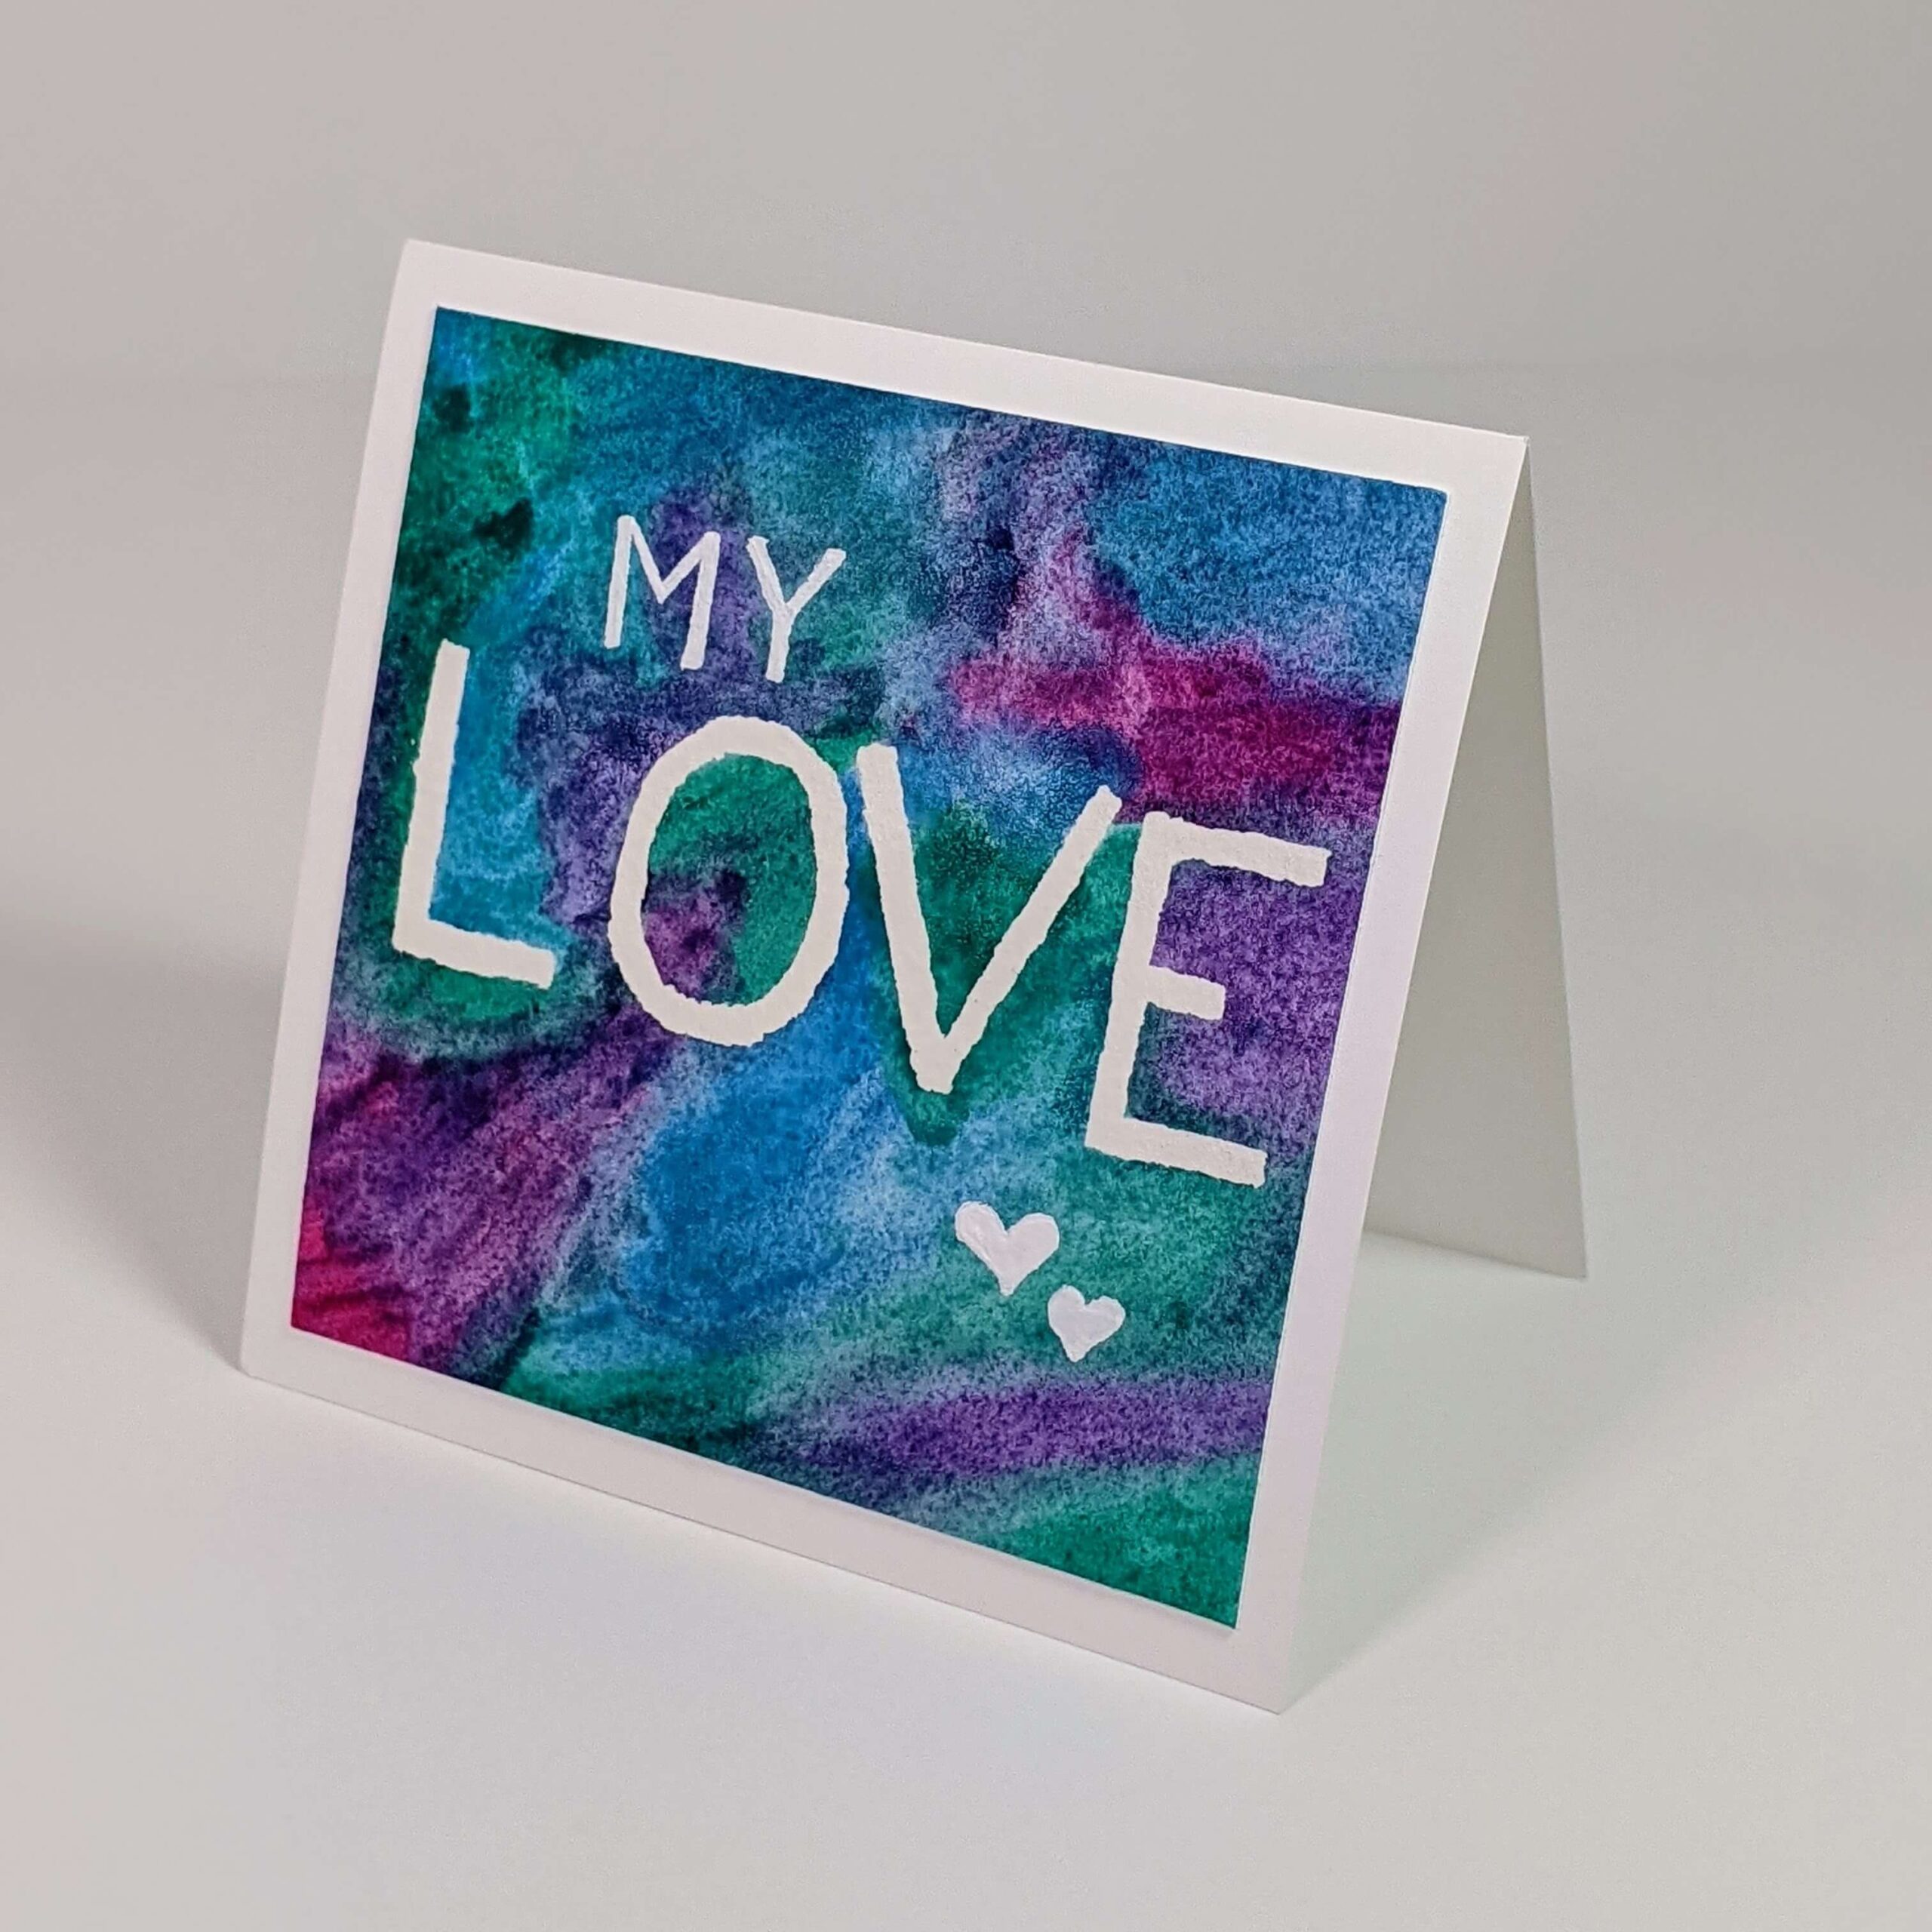
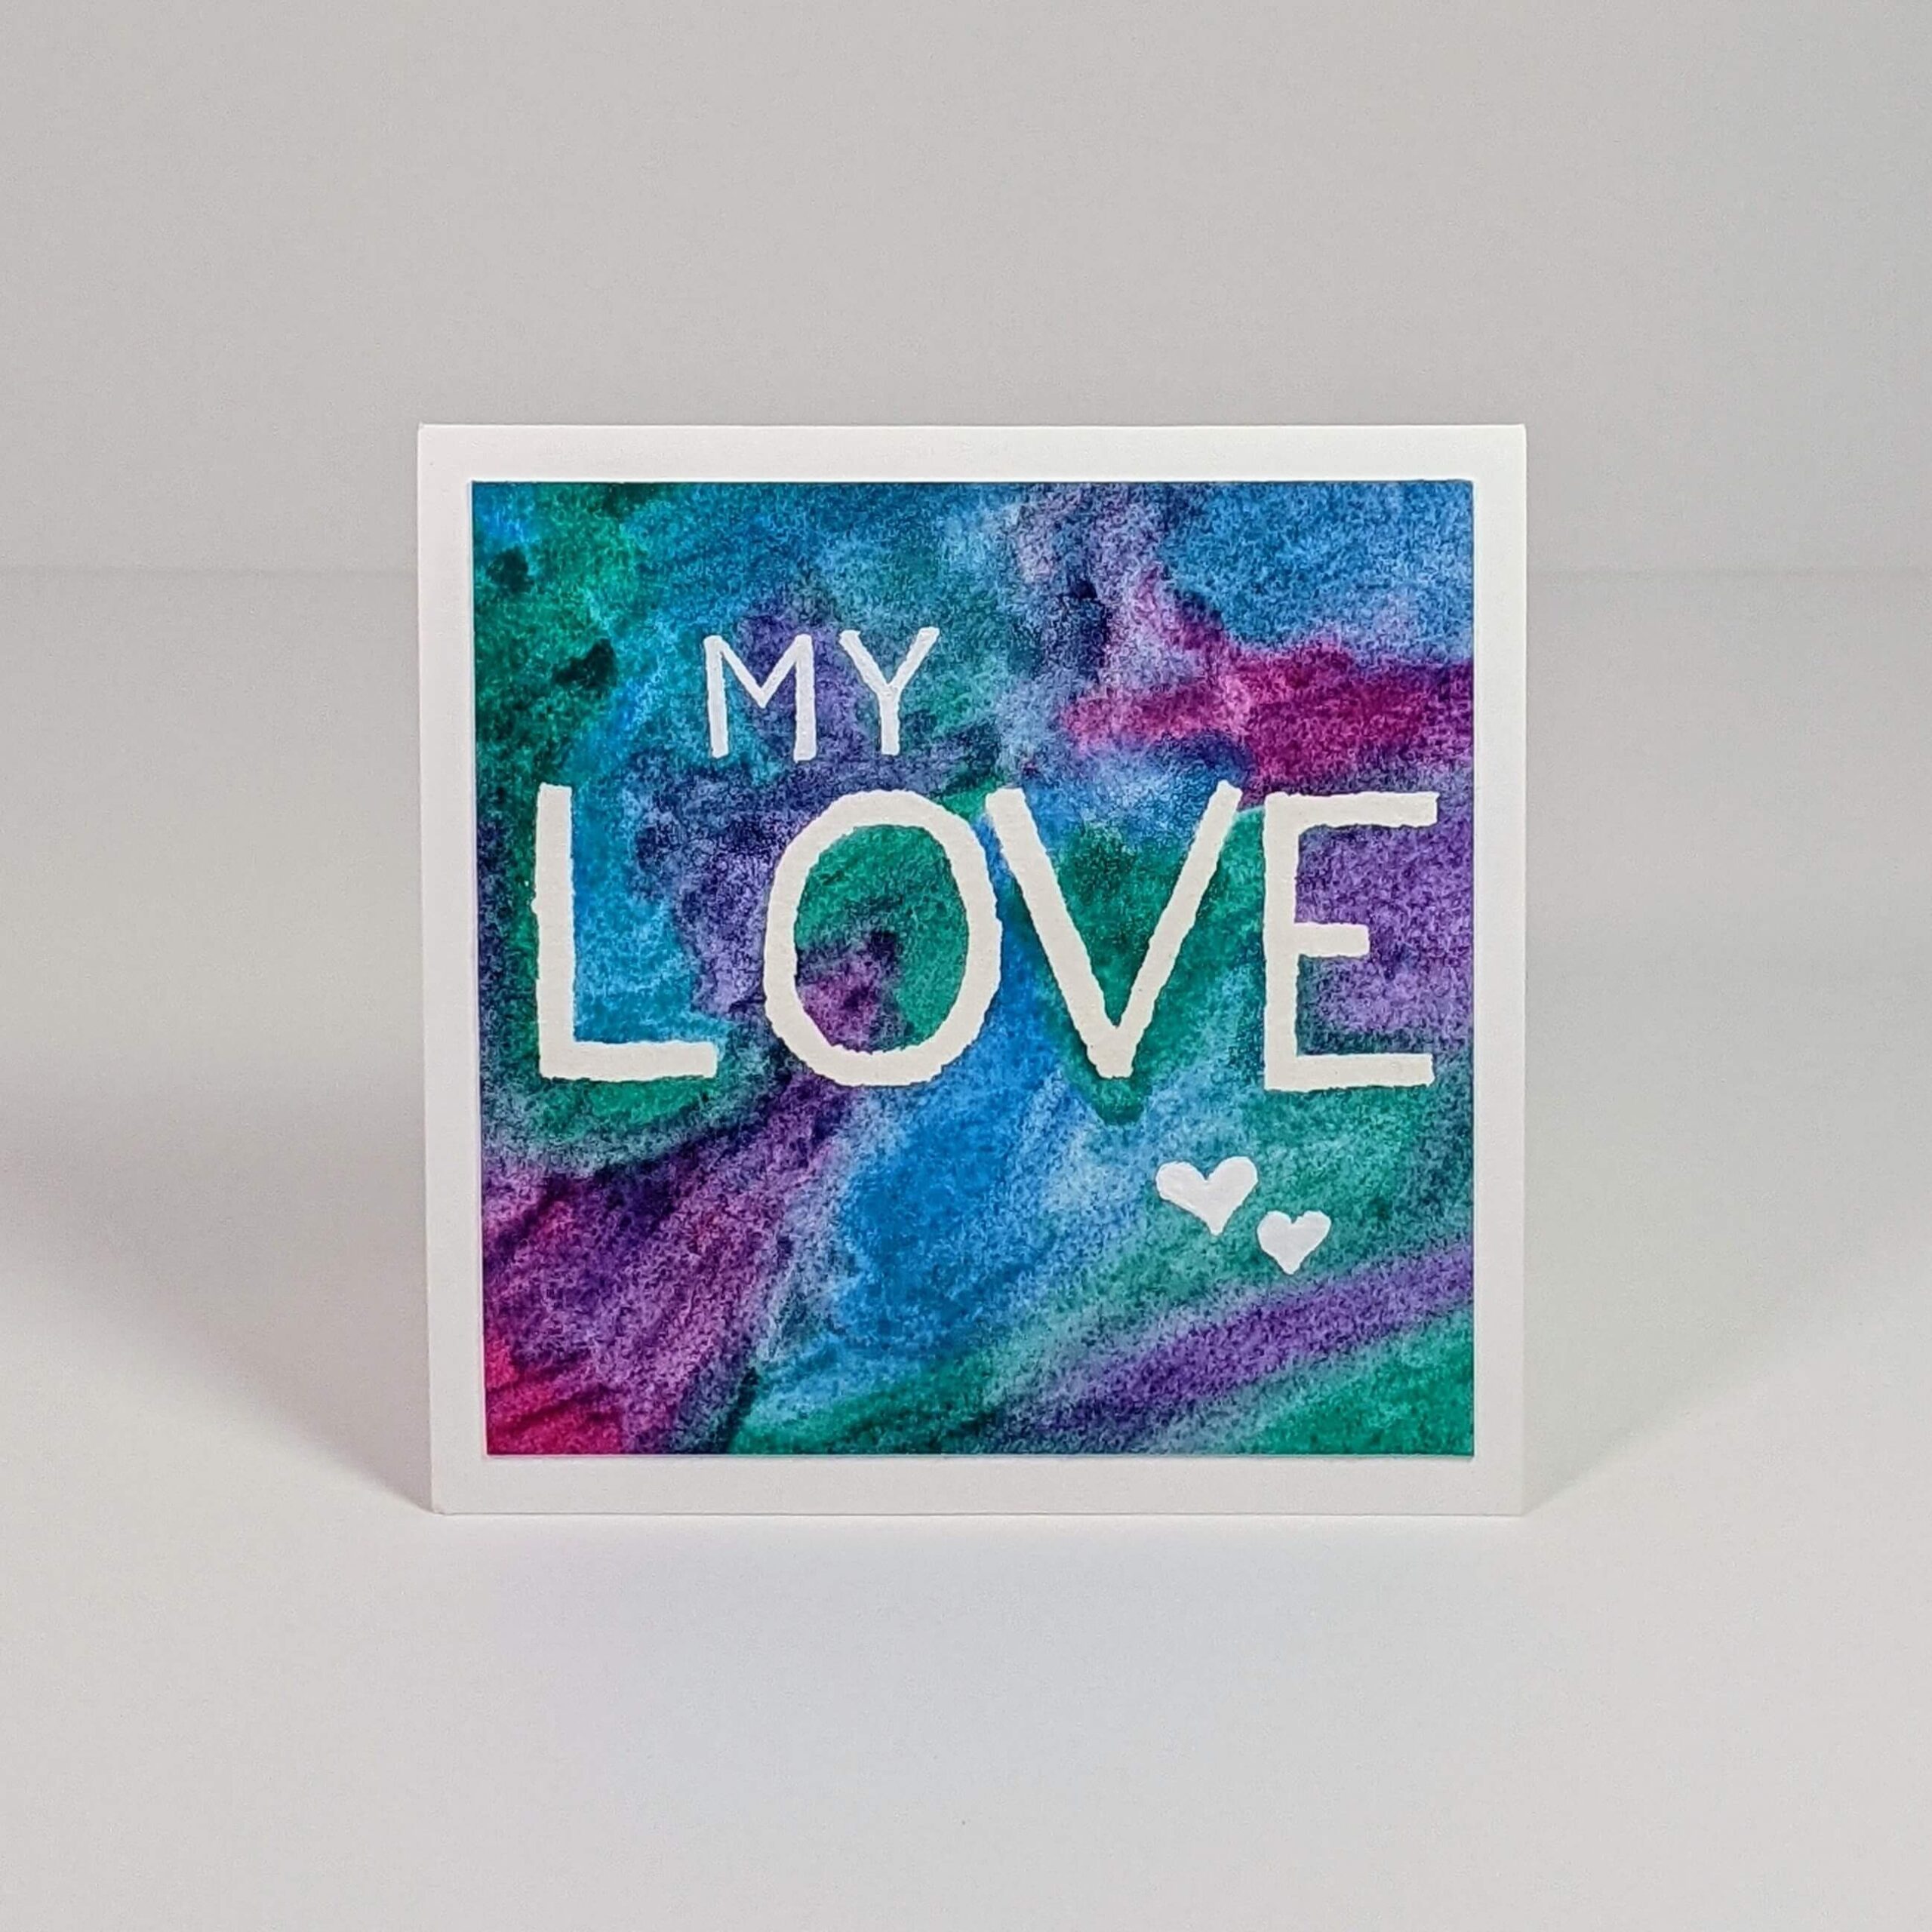
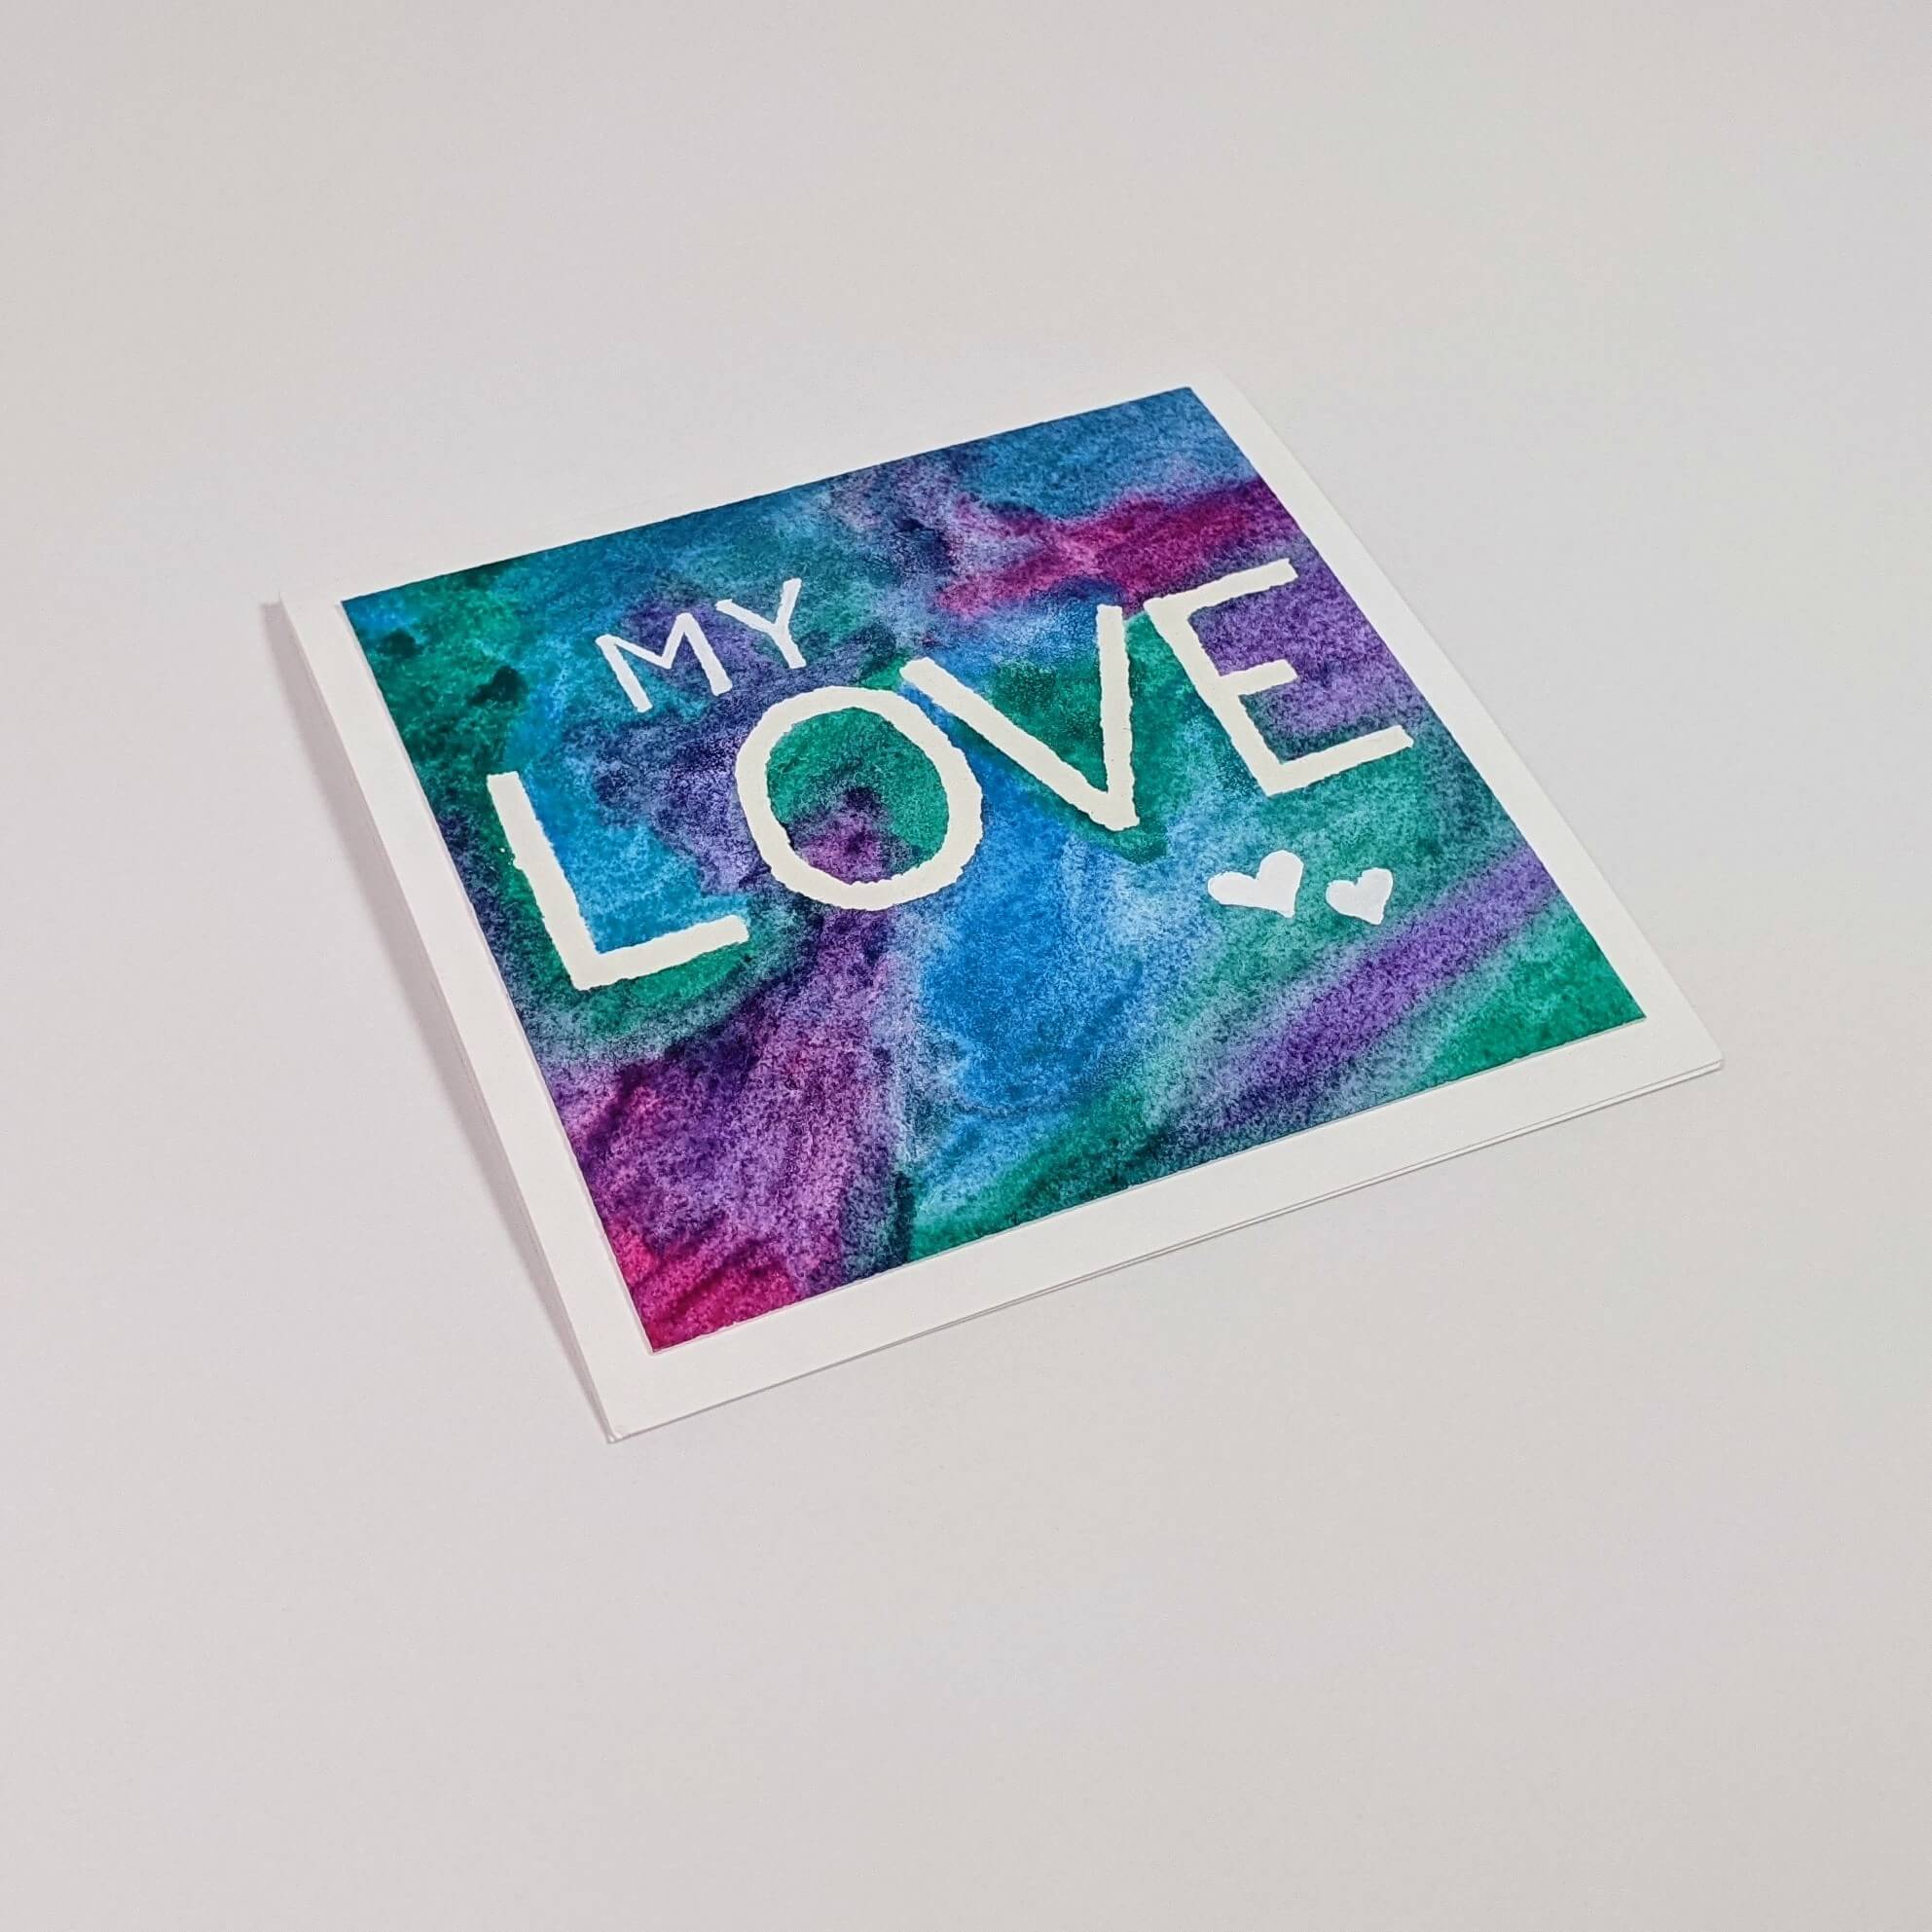
Next, I very lightly wrote the word LOVE in the middle of the watercolor paper with an HB drawing pencil. Then I covered up the word with masking fluid so that I would be able to keep that section of the paper completely white as I paint around the rest of it.
Step 3. Apply water for a wet on wet technique.
Once my paper was prepped and the masking fluid was dry, I used a large round brush to apply a thin coat of water over the entire sheet of paper. This would allow the paints to move around the paper and bleed together in a really beautiful way once I started to apply it.
Step 4. Create the watercolor galaxy.
I used my Koi Field Sketch palette to create this watercolor galaxy, and focused on using really bright, like colors. So I used some turquoise, some blue, purple, and pink for this design. As I started to apply the paint, I also tried to put like colors near each other. For example, turquoise and blue go very well together because they are near each other on the color wheel. You’ll notice that I also put them near each other on the card. If you mix complementary colors (colors that are across from each other on the color wheel) like pink and turquoise, you will get a dull muddy color, so I tried to keep complementary colors apart from each other.
Step 5. Apply the watercolor galaxy design to the card base.
Once my watercolor galaxy was completely dry, I used a kneaded eraser to gently remove the masking fluid. I then used a Uni-Ball gel pen to add the word “My” above “Love” and two hearts below it. Lastly, I removed the painter’s tape and trimmed my watercolor galaxy painting to be 4.25 x 4.25 in size. Then I adhered it to a Neenah Solar White 80lb square card base to finish off the design!
I hope this tutorial was helpful. If you’re looking for more Love or Valentine’s Day cards you can find them here. And don’t forget to follow me on Instagram, Facebook, or Pinterest for the latest updates! You can also shop all the handmade cards that I’ve designed here.