")
I think many of us tend to make cards using the colors that we like the most. For example, I really enjoy bright colors like pinks, yellows, and oranges. And I tend to stay away from more muted tones like black and brown because they’re not as bright. However, these can be really great colors when you’re trying to create a more masculine themed card. So for today’s tutorial, we’re looking at how to make a simple masculine card using some darker, more muted tones.
Watch the Simple Masculine Card YouTube video here.
Materials Used:
This blog may use affiliate links when they’re available. If you choose to make a purchase through one of these links, I may receive a small commission at no cost to you. I don’t make recommendations lightly, and will only link to products I know and trust.
- Sizzix BIGkick Machine [Scrapbook.com] [Amazon]
- EK Tools EK Scoring Board 12×12 [Amazon]
- Feather No.55 Switch-Blade Shear, 5.5 Inch [Amazon]
- Fiskars Recycled Bypass Trimmer, 12 Inch [Amazon]
- Trim Slant Tip Tweezers [Amazon]
- Stained Glass – Hero Arts Stencil Pair [Amazon]
- Crafting Ink Blending Brush Set [Amazon]
- Seedless Preserves – Ranger Ink Distress Oxides Ink Pad [Scrapbook.com] [Amazon]
- Aged Mahogany – Ranger Ink Distress Oxides Ink Pad [Scrapbook.com] [Amazon]
- Hickory Smoke – Ranger Ink Distress Oxides Ink Pad [Scrapbook.com] [Amazon]
- Lawn Fawn – Magic Color Slider Die Set [Scrapbook.com] [Amazon.com]
- Sticro 5 Sizes Self-adhesive Rhinestone Sticker 4950 Pieces [Amazon]
- Recollections Cardstock Paper, Essentials 20 Colors [Amazon]
- Neenah Classic Crest Solar White 80lb Cardstock [Scrapbook.com] [Amazon]
- Scrapbook Adhesives Initially Repositionable Mounting Squares [Scrapbook.com] [Amazon]
- 6×6 Double-Sided Adhesive Sheets [Scrapbook.com]
- Washi Tape
Looking for more masculine themed cards? Check them out here.
Simple Masculine Card Tutorial:
Step 1. Pick masculine colors for ink blending.
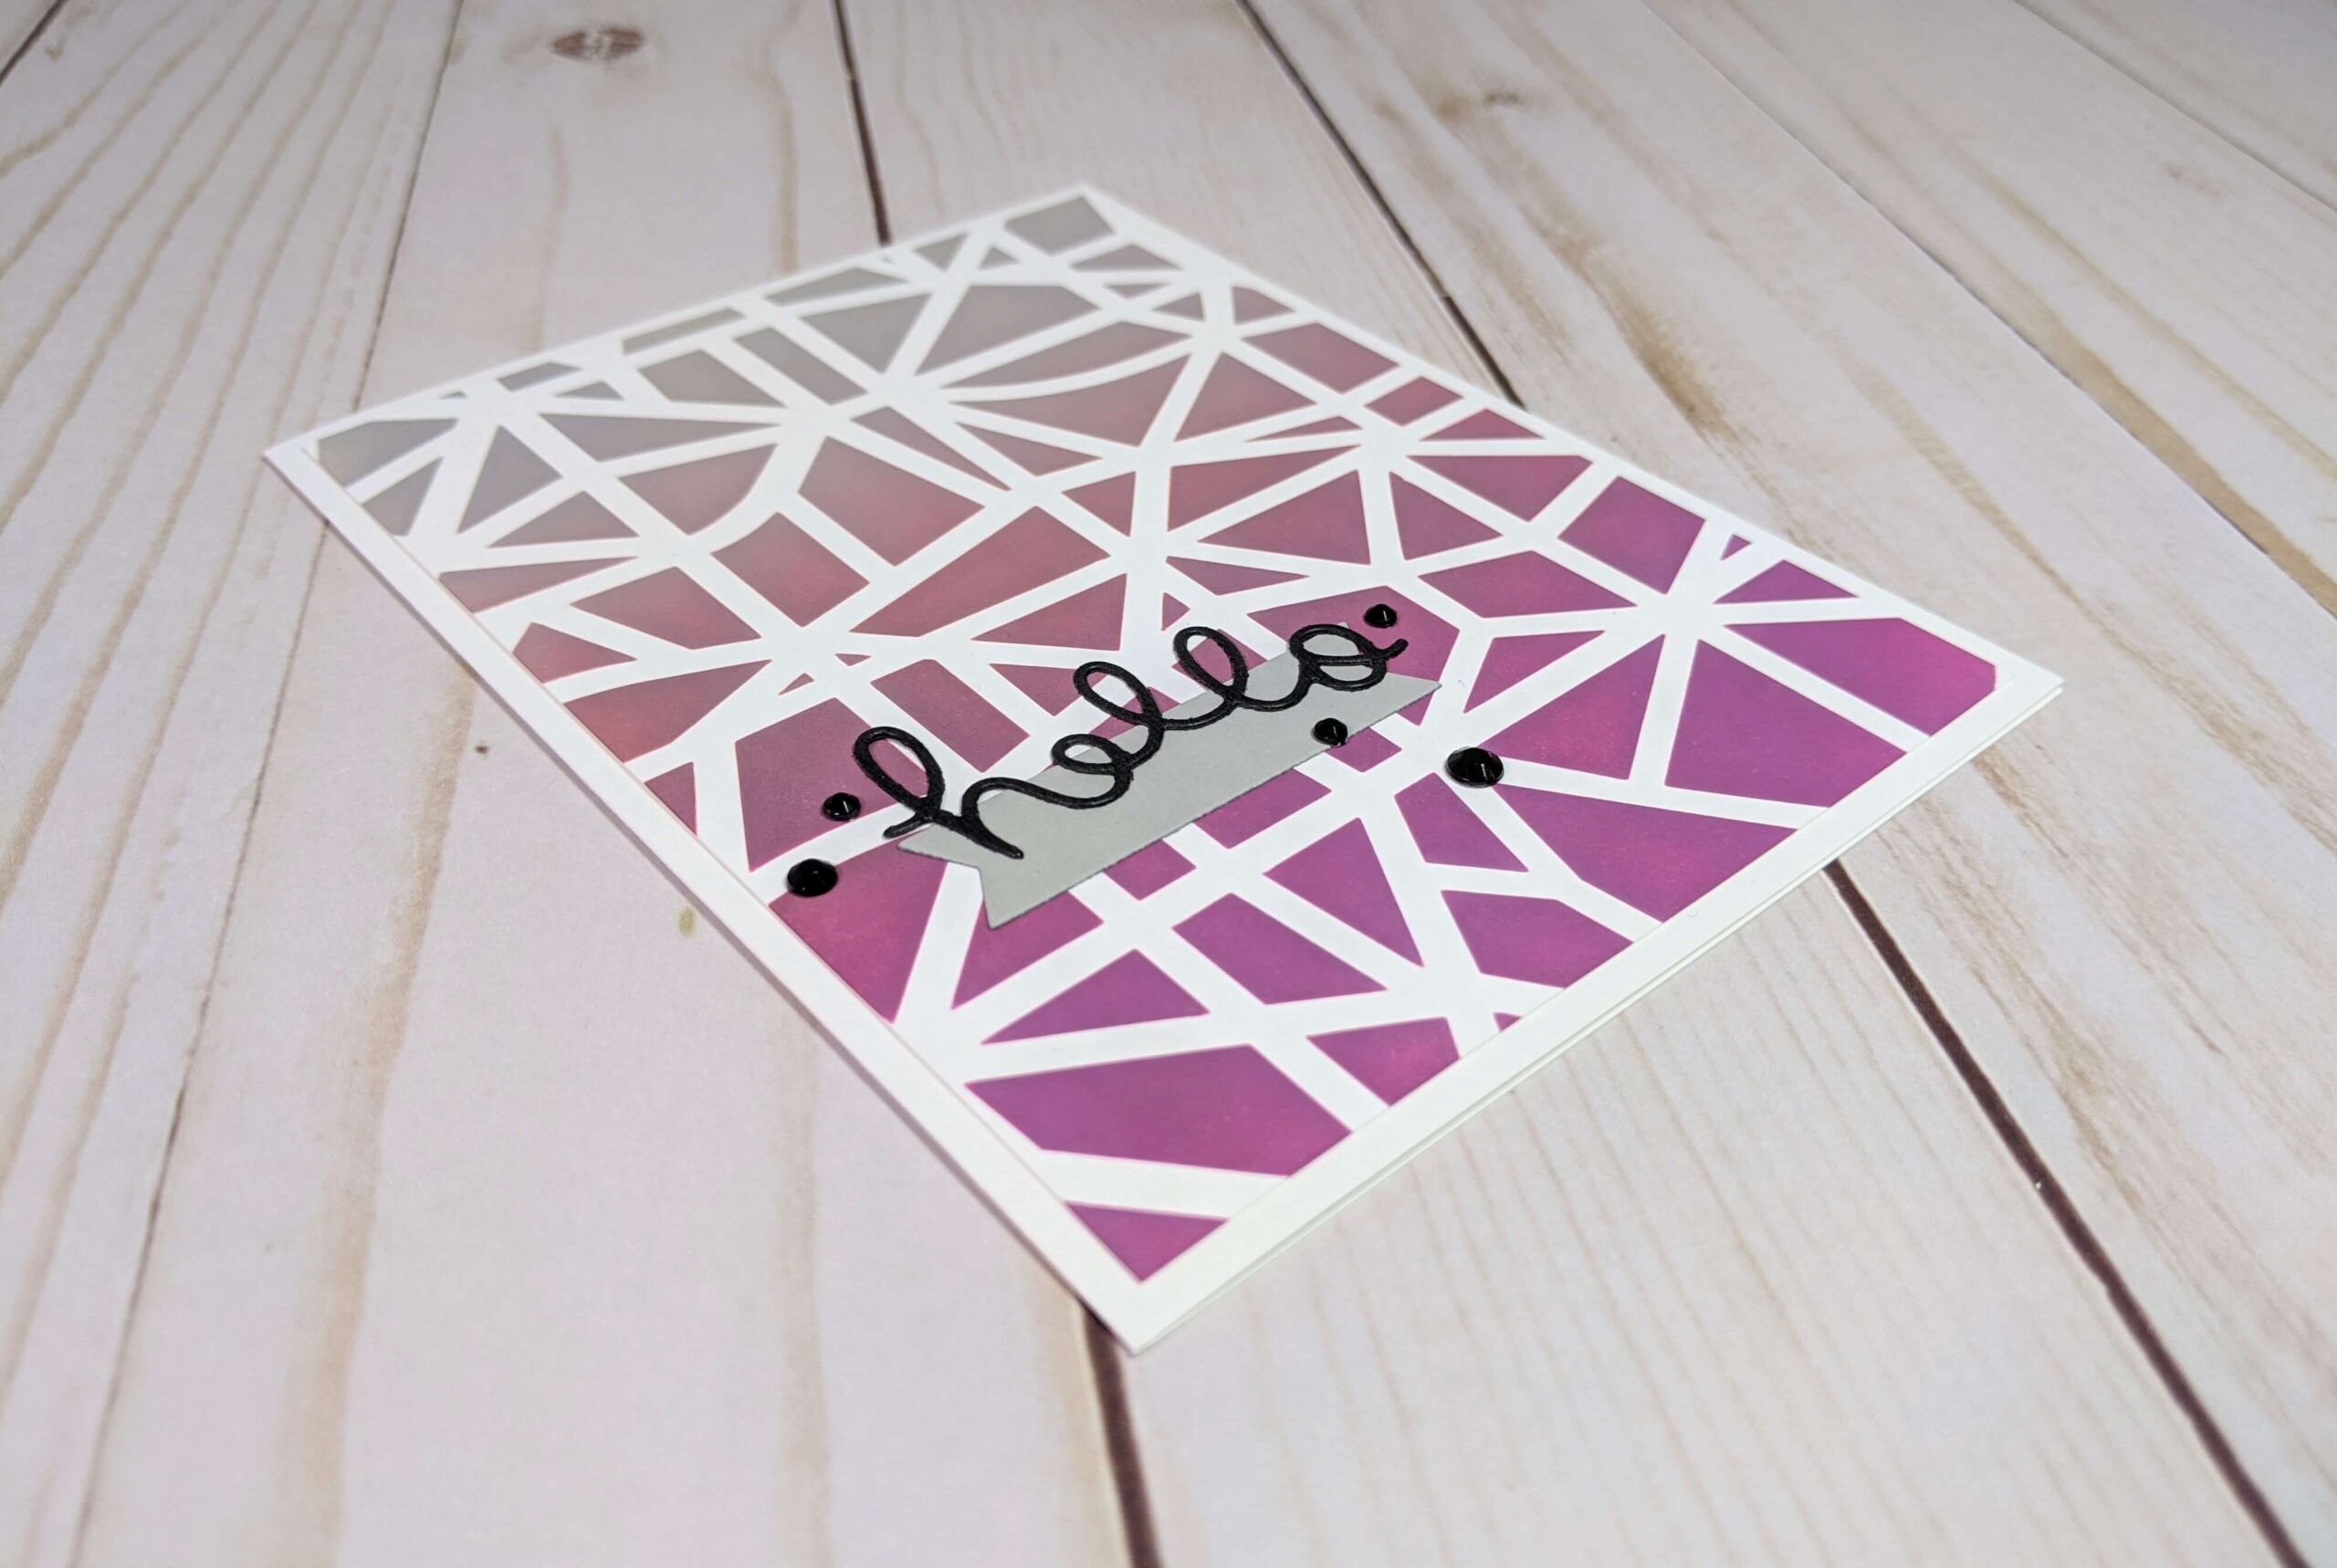
I started this simple masculine card by picking out my distress oxide ink colors. I chose to go with hickory smoke, aged mahogany, and seedless preserves because I love the way they blend together. I also grabbed the stained glass hero arts stencil pair to use for this card background. Then I cut a piece of 5.5 x 4.25 sheet of Neenah solar white cardstock to make the background on this design. I then used some washi tape to keep the paper in place on the stencil.
Step 2. Blend background using a stencil.
Next, I started blending the ink. Starting with the hickory smoke distress oxide ink, I worked it into the paper with a large blending brush and moved in circles to evenly apply the ink. Then I used the aged mahogany and another clean blending brush to work it into the paper. I began near the middle of the page and blending up as I moved towards the hickory smoke. I got a good blend by alternating colors and just using what I had on the brushes to soften the lines. I repeated this same process with my seedless preserves then peeled the paper off of the stencil for the final reveal!
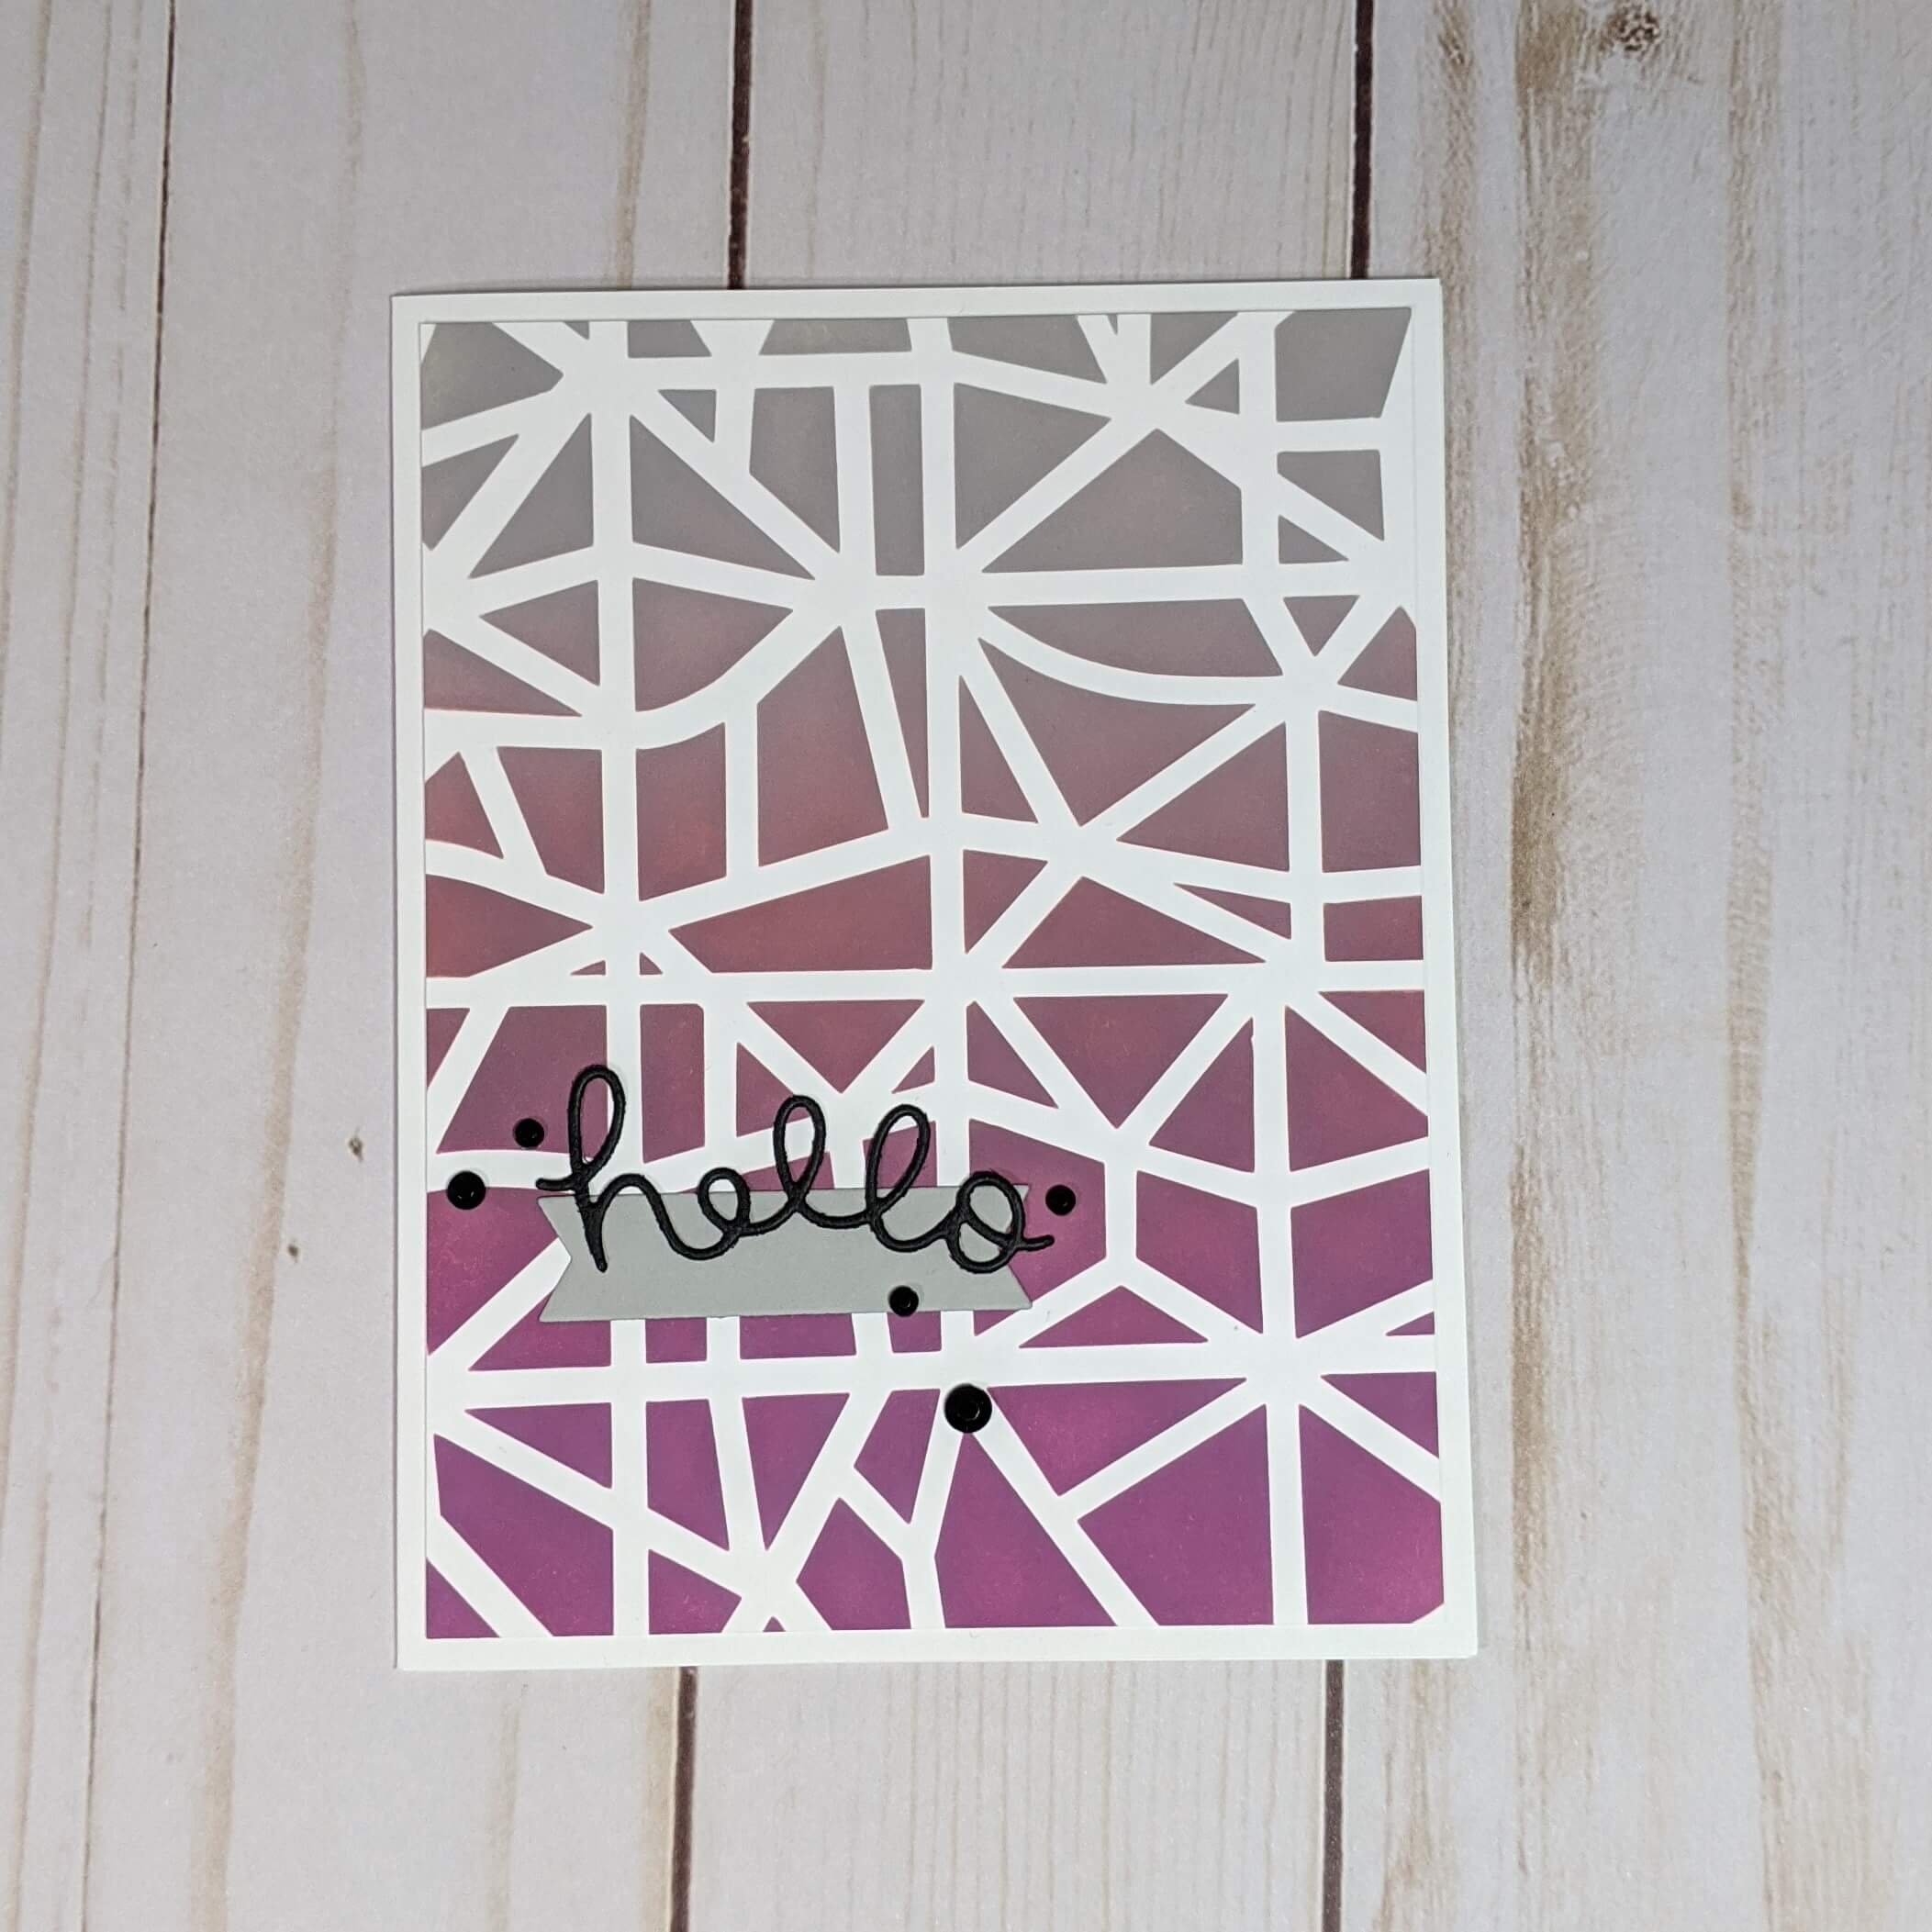
Step 3. Cut out the sentiment.
Once the background was trimmed down and adhered to my A2 Neenah solar white card base, I used the banner and hello sentiment dies from my Lawn Fawn magic color slider die set to create the accent and sentiment. I placed some black cardstock on a sheet of double-sided adhesive before I ran the sentiment through my BIGkick machine. This made it so much easier to stick to the card!
Step 4. Add embellishments.
Lastly, I placed the banner on the lower left side of the card and added the hello sentiment over top. To put some finishing touches on the card I also added some black rhinestones to make the sentiment pop a little. I love how simple this masculine card was, and I would encourage you to give it a try too!

I hope you hope you enjoyed this simple masculine card tutoral! Need something quick? Find out how to make a masculine card in 10 minutes. And don’t follow me on Instagram, Facebook, or Pinterest for the latest updates! You can also shop all the handmade cards that I’ve designed here.