
Stamping and watercolors are two of my favorite mediums to play around with. So it’s only natural that I would enjoy pairing stamping with watercolors.
Art doesn’t have to be complicated. If you’re someone who’s struggling to start a project because you’re staring at a blank page, try starting with a stamp instead. I love painting flowers, so I started this project with a floral stamp, then went back in to paint it. I’ll walk you through how I did it! Keep reading to find the materials list and a simple tutorial.
Materials Used:
This blog may use affiliate links when they’re available. If you choose to purchase through one of these links, I may receive a small commission at no cost to you. I don’t make recommendations lightly, and will only link to products I know and trust.
- EK Tools EK Scoring Board 12×12 [Amazon]
- Feather No.55 Switch-Blade Shear, 5.5 Inch [Amazon]
- Fiskars Recycled Bypass Trimmer, 12 Inch [Amazon]
- Misti Stamp Tool Original Size Stamp Positioner [Amazon]
- Stamp Shammy – Lawn Fawn [Scrapbook.com] [Amazon]
- Friendly Bunch Stamp Set – The Stamp Market [Scrapbook.com]
- EK Tools Powder Tool [Scrapbook.com] [Amazon]
- Premium Embossing Ink Pad – Clear [Scrapbook.com]
- Recollections Cardstock Paper, Essentials 20 Colors [Amazon]
- Ranger Archival Ink Pad, Jet Black [Scrapbook.com] [Amazon]
- Uchida Embossing Heat Tool with Stand [Scrapbook.com] [Amazon]
- Wow! Embossing Powder – Super Fine Back and White Set [Amazon]
- Craft Specialties Double Sided White Foam Tape – 1/2″ X 36 Yards – 1/16″ Thick [Amazon]
- Scor-Pal Scor-Tape – 1/8″X27 Yards [Amazon]
- Sakura Koi Watercolor Field 48 Color Sketch Set [Amazon]
- Fabriano Artistico – Extra White 140 lb. Cold Press Paper [Amazon]
- Size 4 Black Velvet Round Brush Silver Brush Limited 3000S8 [Amazon] [Blick]
- Size 8 Black Velvet Round Brush Silver Brush Limited 3000S8 [Amazon] [Blick]
- Cloth or Rag (to wipe your brush on)
- Cup of Water
Stamping with Watercolor Tutorial:
Step 1: Stamp the watercolor paper.
I started this stamping with watercolor technique by adding the floral image from the Friendly Bunch stamp set onto some Fabriano Artistico Extra White 140 lb. cold press watercolor paper. This was a more difficult feat than you might think because the watercolor paper is thick and textured. So, I used my Misti stamping tool to position the stamp on the paper just right. This allowed me to stamp the archival ink three or four times without messing up the image. Once the image was stamped I let it dry for a couple of hours before I applied any paint. This isn’t strictly necessary, but it’s meant to ensure that the ink wouldn’t smear.
2. Add watercolors to the design.
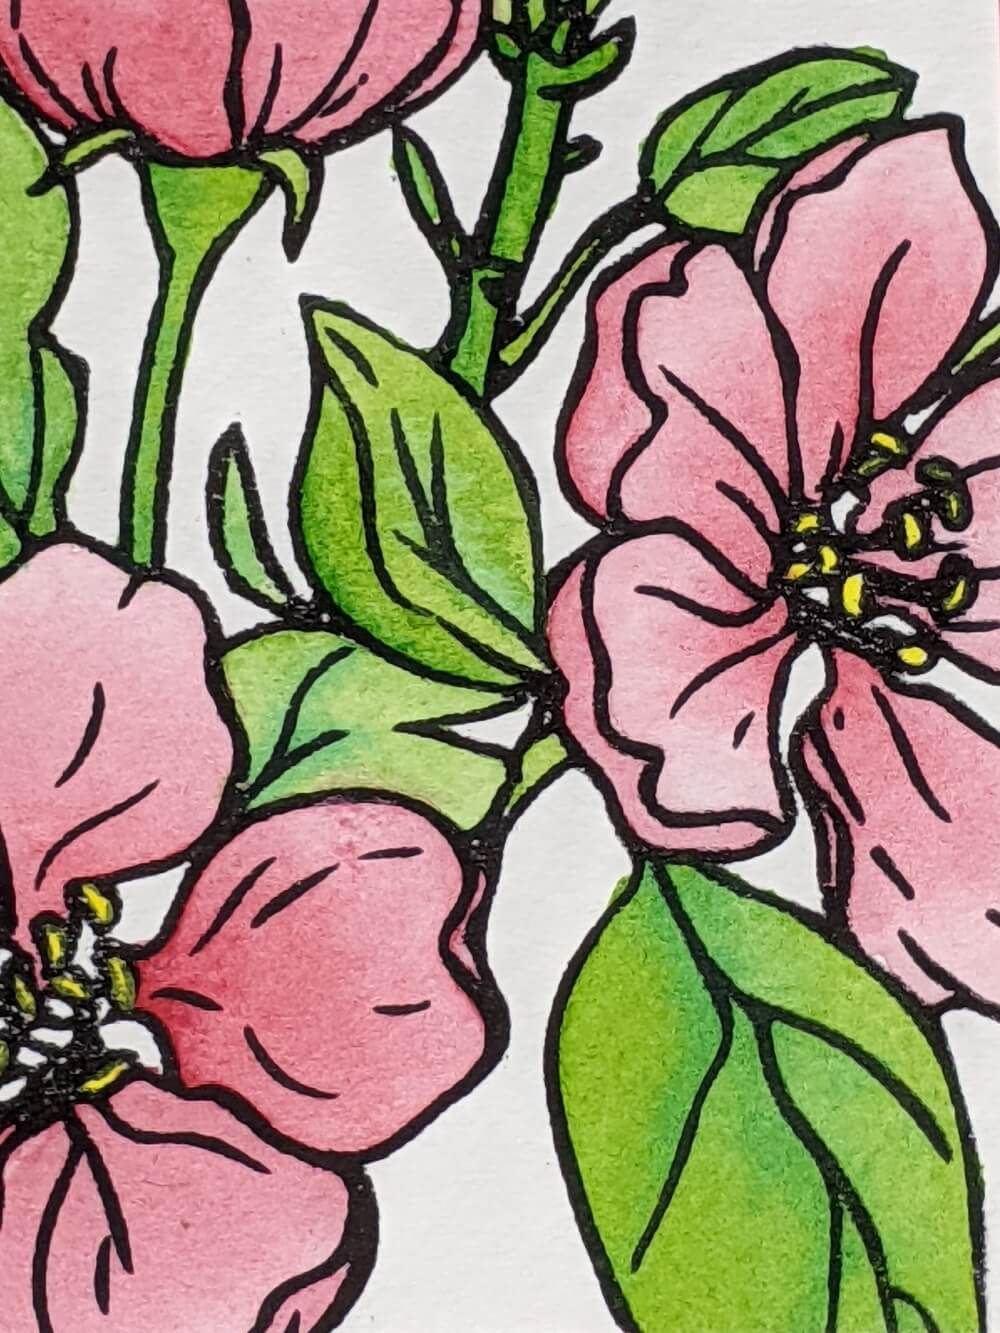
I started the watercolor painting process by working on the pedals of each flower first. Using a pale raspberry tone in the interior area of the petals, I pushed the watercolor paint out a little bit to the outside of the pedals so the very edges would look lighter than the interior. If I felt like I didn’t get the right intensity the first time I could let the flowers dry and then go over it a second time to get a deeper color.
Next, I moved to the leaves. I used two tones of green watercolor paint here. The lighter areas of the leaves are kelly green, and the darker colors near the veins are forest green. Both colors were applied while the paper was wet so that the forest green could naturally blend into the kelly green. Again, I went back through and reapplied paint to add dimension in any of the areas that needed more color after the first layer had dried.
3. Create and emboss the sentiment.
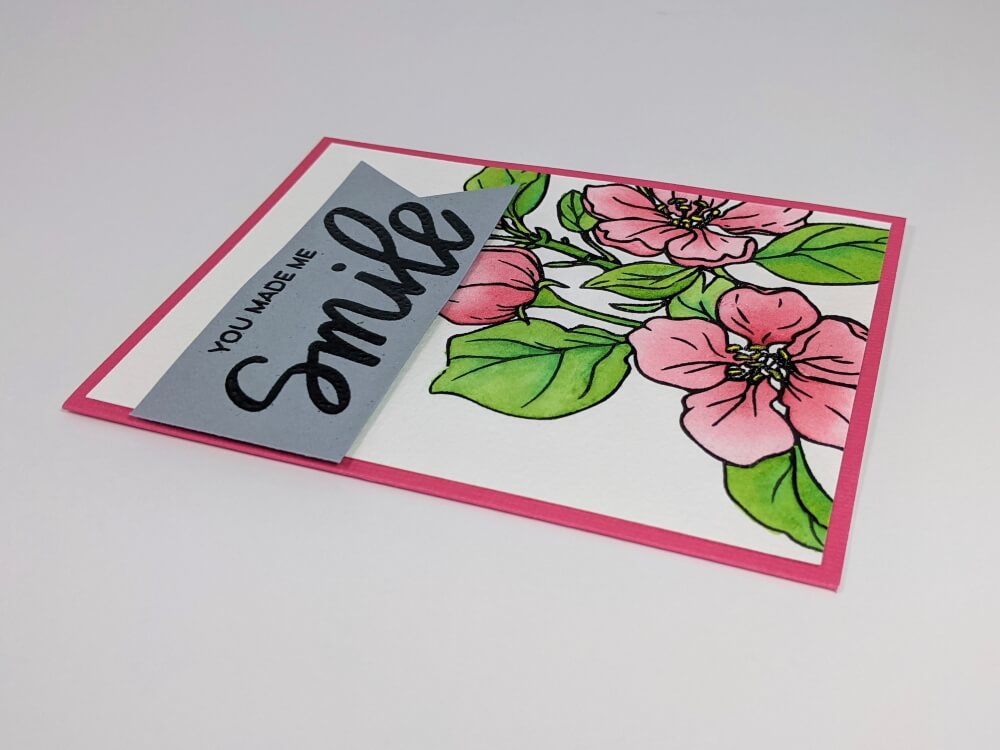
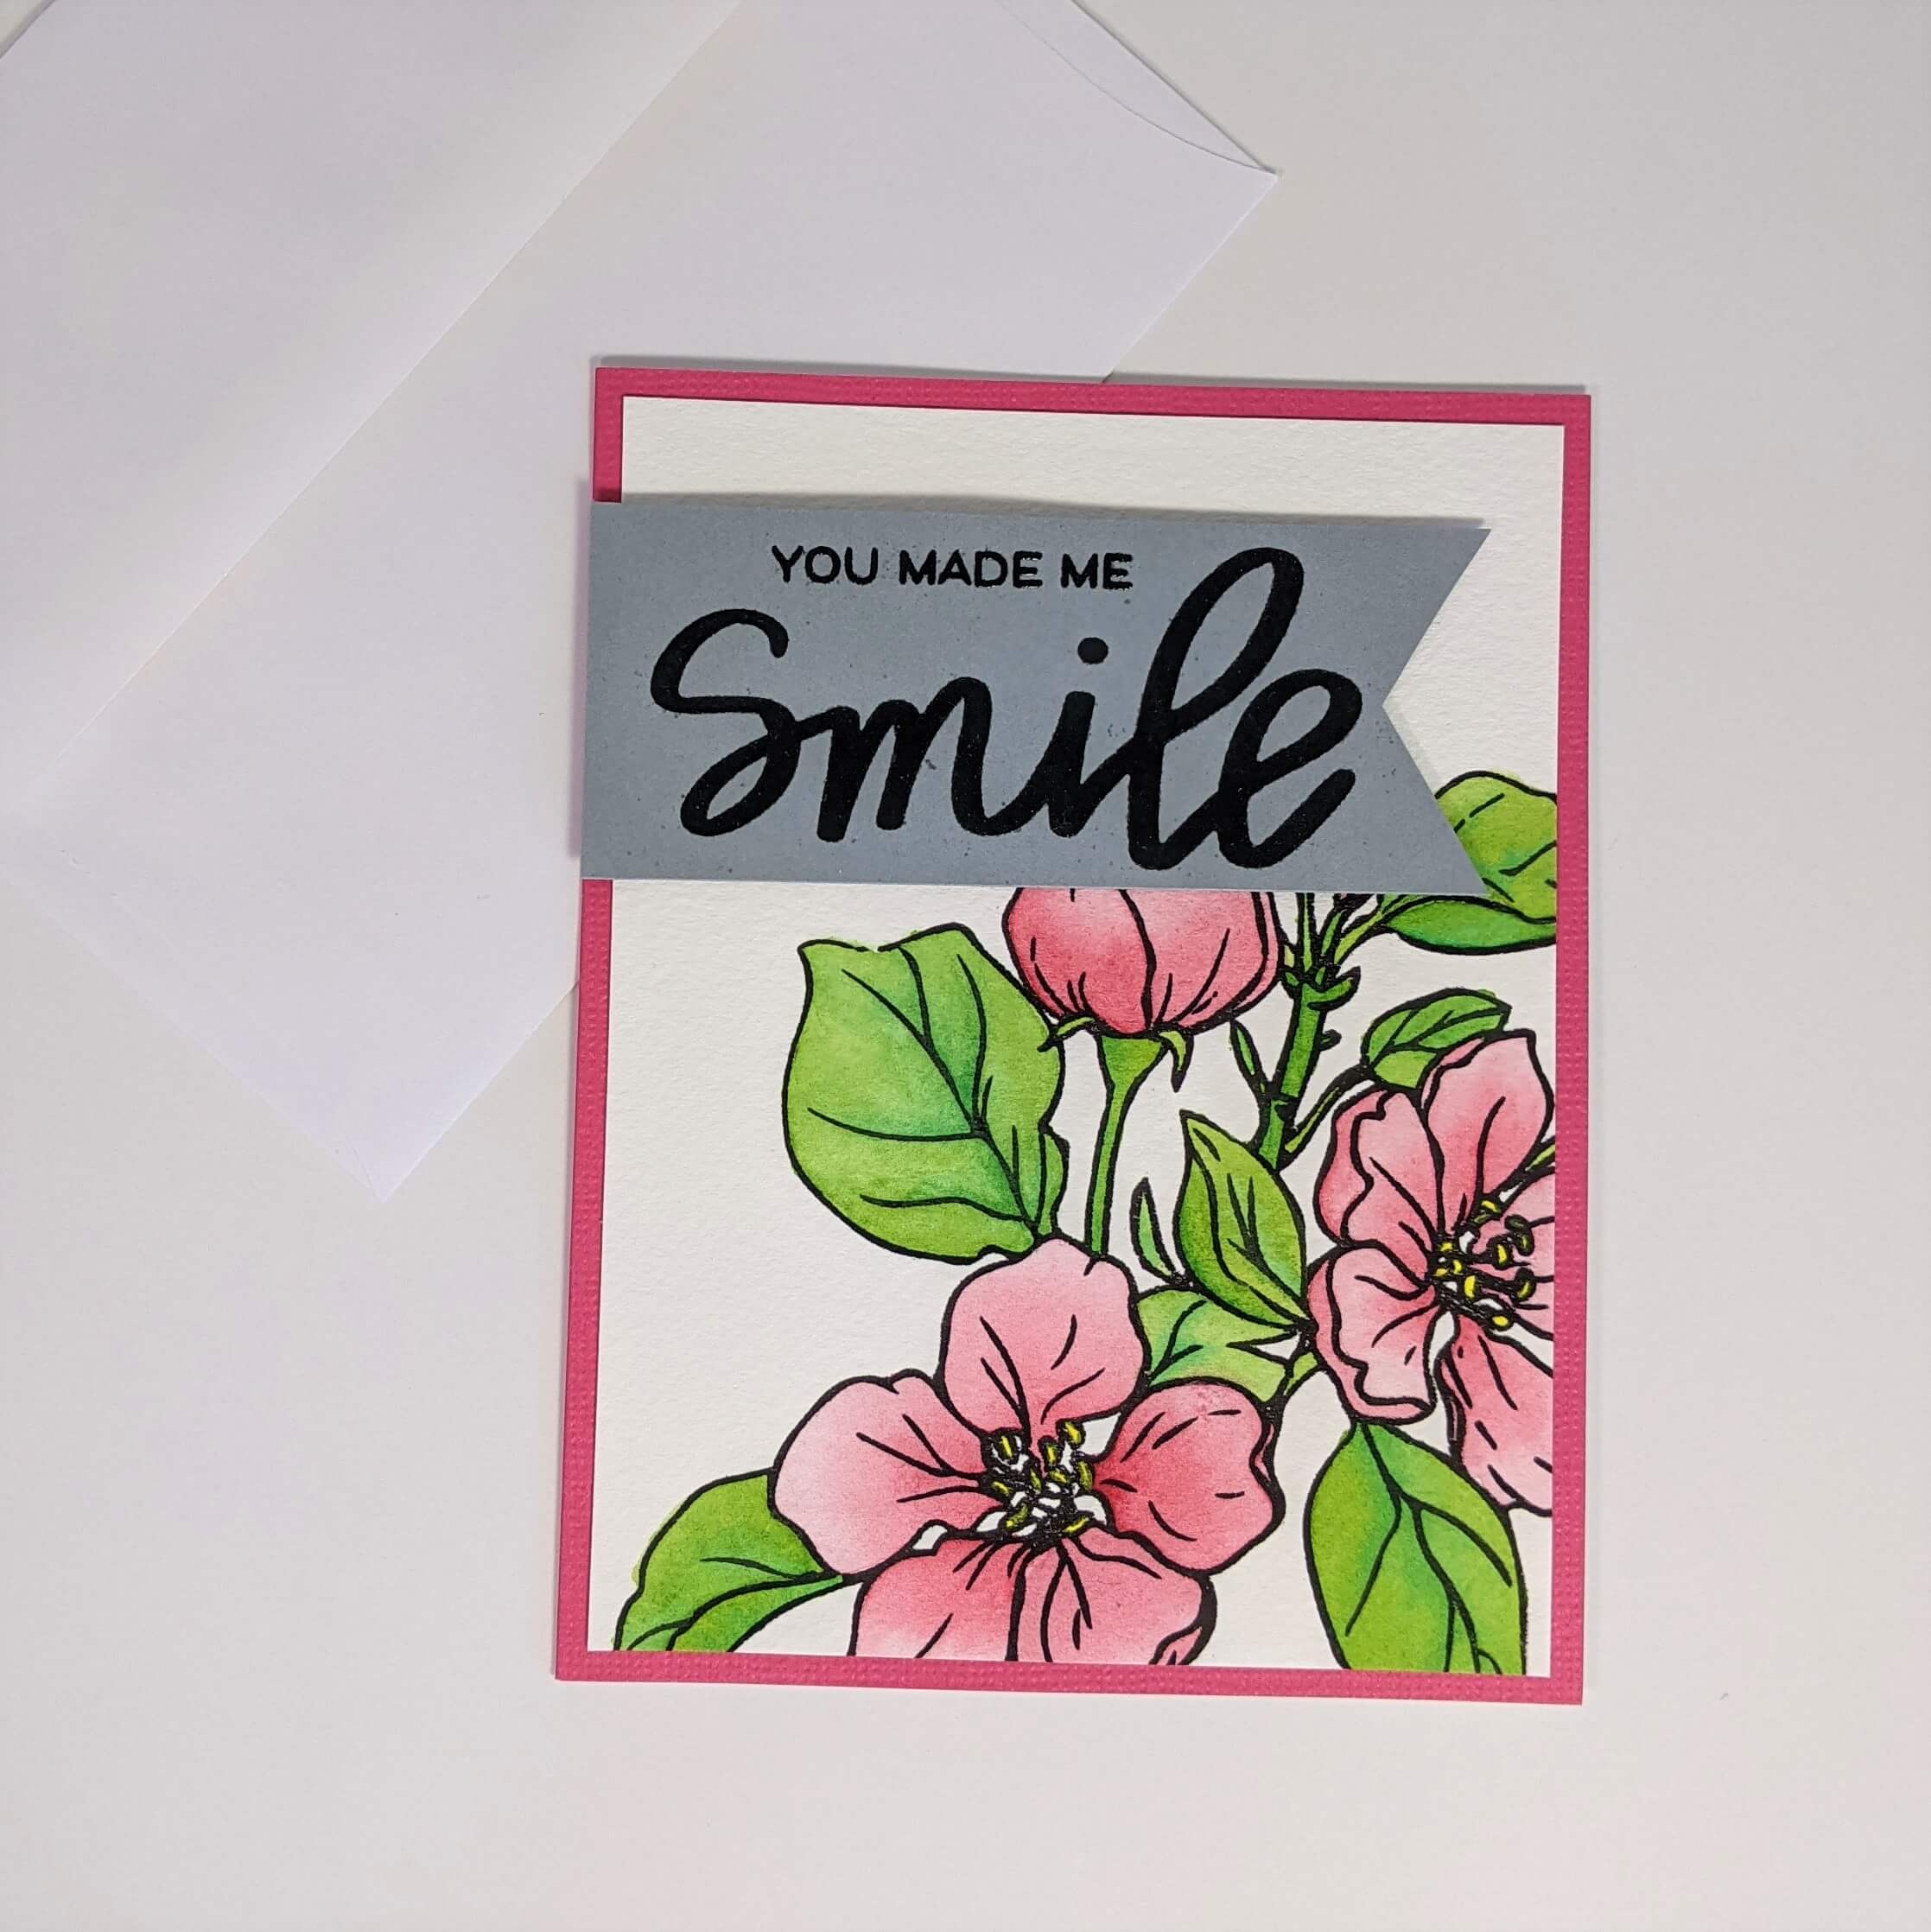
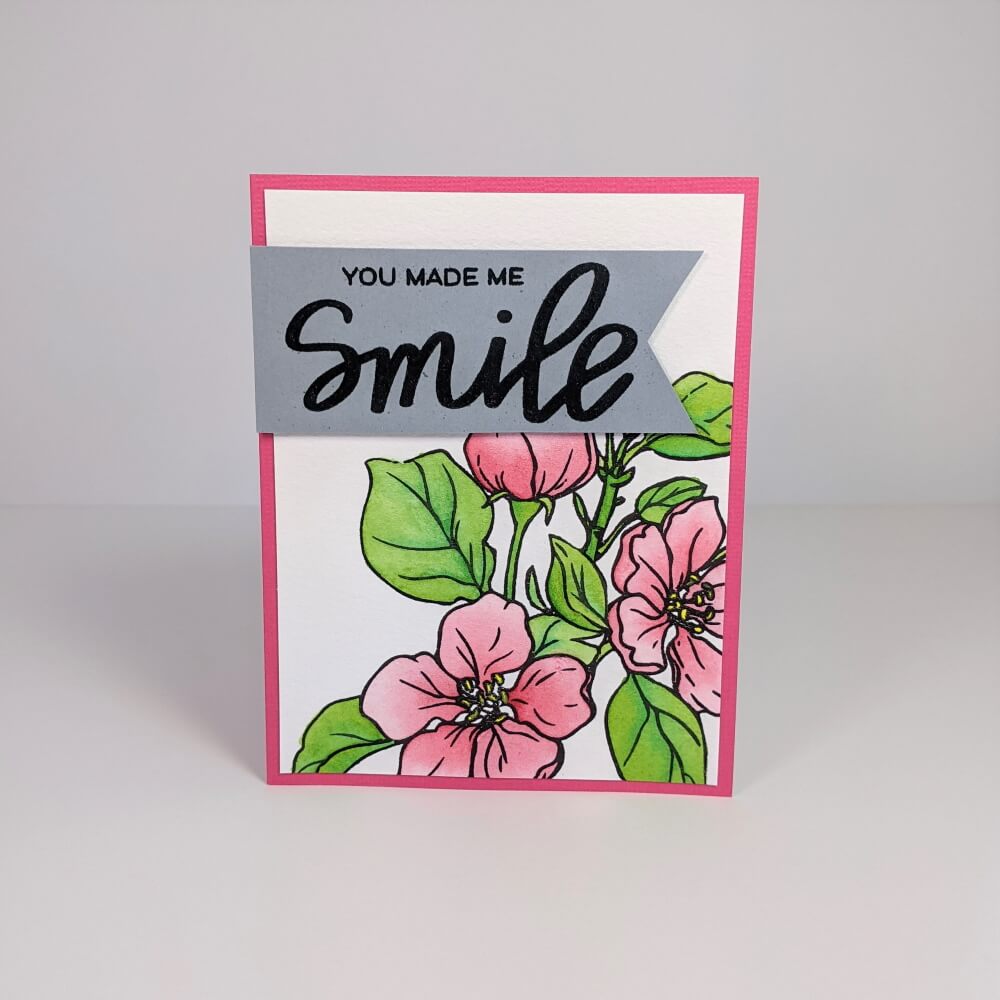
After the watercolor painting had fully dried, I trimmed the stamped watercolor image to be 5.25 by 4 inches. Then, I applied the image to the front of an A2 card so that the stamped watercolor floral design was on the lower right-hand side.
I created the sentiment banner by applying some baby powder to gray cardstock (to remove any static) and stamping the “you made me smile” sentiment from the same stamp set onto that cardstock. Then I trimmed the cardstock to be about 1.5 inches wide and added black embossing powder to the sentiment. I melted the embossing powder using my heating tool and applied the banner to the left side of my card using some foam adhesive.
That’s it for today’s tutorial. I hope you enjoyed this stamping with watercolor technique. You can also find more watercolor tutorials here! Check it out, and follow me on Instagram, Facebook or Pinterest for the latest updates! You can also shop all the handmade cards that I’ve designed here.