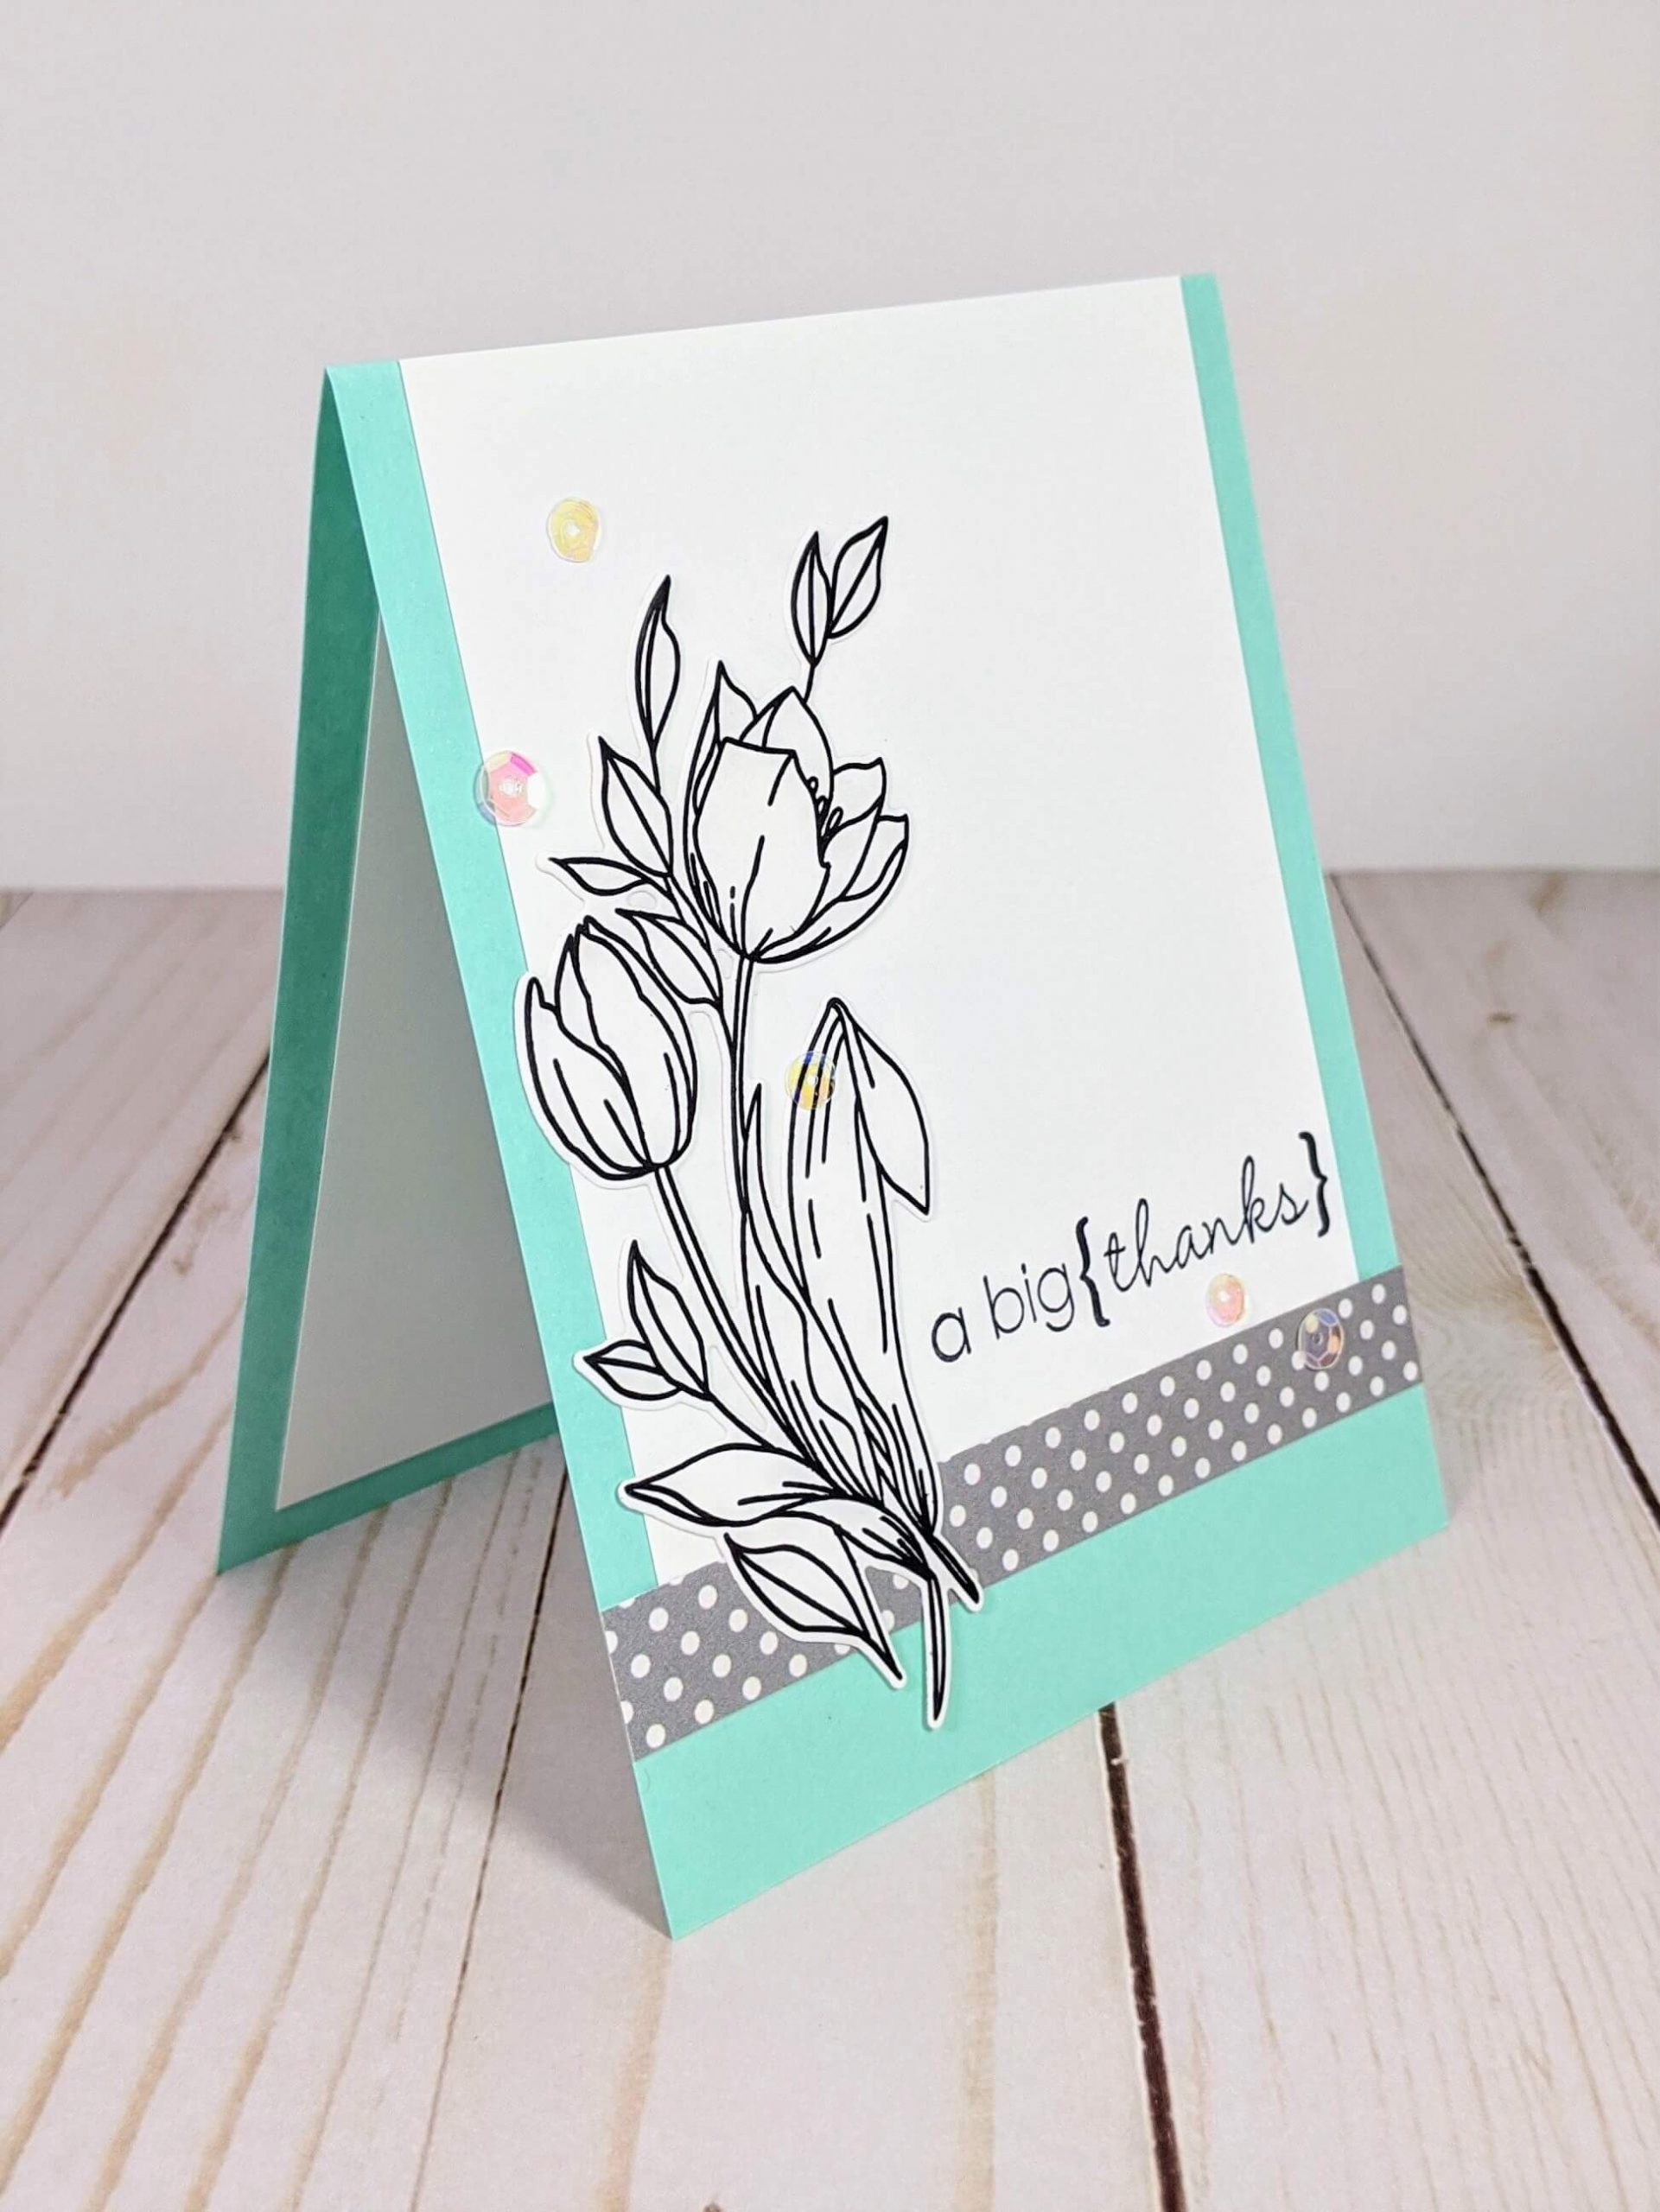
Sometimes less is more, so I really wanted to make a card that felt minimal in design but would still be flattering. This tulip stamp from Waffle Flower Crafts has also been my go-to floral stamp lately, so I felt like the perfect focal point for the card and it’s just so beautiful. Overall, this Mint and Gray Thanks with Tulips card was simple and fun to make! See the tutorial and materials I used below.
Materials Used:
This blog may use affiliate links when they’re available. If you choose to make a purchase through one of these links, I may receive a small commission at no cost to you. I don’t make recommendations lightly, and will only link to products I know and trust.
Sizzix BIGkick Machine [Scrapbook.com] [Amazon]
EK Tools EK Scoring Board 12×12 [Amazon]
Feather No.55 Switch-Blade Shear, 5.5 Inch [Amazon]
Fiskars Recycled Bypass Trimmer, 12 Inch [Amazon]
Omnigrid 4-6-12-Inch Marking Ruler Trio [Amazon]
Trim Slant Tip Tweezers [Amazon]
Misti Stamp Tool Original Size Stamp Positioner [Amazon]
Lawn Fawn Stamp Shammy [Scrapbook.com] [Amazon]
Ranger Archival Ink Pad, Jet Black [Scrapbook.com] [Amazon]
Waffle Flower Crafts – Tulip Stamp Set [Scrapbook.com] [Waffle Flower Crafts]
Waffle Flower Crafts – Tulip Die Set [Waffle Flower Crafts]
Waffle Flower Crafts – Tulip Stamp and Die Set Combo [Scrapbook.com] [Waffle Flower Crafts]
5mm Mix 15 Colors Rainbow Cup Sequin [Amazon]
Recollections Cardstock Paper, Essentials 20 Colors [Amazon]
Neenah Solar White Cardstock [Scrapbook.com] [Amazon]
Tombow MONO Aqua Liquid Glue [Scrapbookpal.com] [Amazon]
Scrapbook Adhesives Initially Repositionable Mounting Squares [Scrapbook.com] [Amazon]

Looking for more quick and easy card making tutorials? Find them here.
Mint and Gray Thanks with Tulips Tutorial:
Step 1. Create the mint card base.
When making this card I first trimmed my mint cardstock to be 4.25 x 11-inches, then scored it in half to make an A2 sized card base. I also trimmed a piece of Neenah solar white cardstock down to 3.75 x 4.5 inches in size. I positioned it at the top of the card base and secured it in place using Scrapbook Adhesives mounting squares.
Step 2. Stamp and cut the Waffle Flower Crafts tulip.
Next, I placed a second sheet of Neenah solar white cardstock on my Misti stamping tool and grabbed my Waffle Flower Crafts tulip stamp set. The tulips in this set are just beautiful, so I stamped one of them down using Ranger archival ink. I also used the matching die set and my Sizzix Big Kick machine to cut the image out.

Step 3. Add the sentiment and embellish the design.
Finally, I added a strip of gray polka-dotted cardstock overlapping the bottom of the solar white paper, stamped the words “a big {thanks}” on the panel, and placed the tulip overtop of both. Lastly, I finished the card off with some iridescent sequin.
If you enjoyed this tutorial, please consider and following me on Instagram, Facebook, or Pinterest for the latest updates! You can also shop all the handmade cards that I’ve designed here.