Today’s tutorial will show you how to make a watercolor Christmas card. This Christmas card is especially unique because I used a Cricut machine to draw out the ornament design. Cricut markers aren’t waterproof, so I have to use a special hack to make it work. Keep reading to find out how I did it.
Materials Used:
This blog may use affiliate links when they’re available. If you choose to make a purchase through one of these links, I may receive a small commission at no cost to you. I don’t make recommendations lightly, and will only link to products I know and trust.
- Cricut Explore Air 2 Machine [Cricut] [Amazon]
- Adhesive Cricut Cutting Mat, Standard Grip [Scrapbook.com] [Cricut] [Amazon]
- Basic Tool Set – Cricut [Cricut] [Amazon]
- Cricut Marker Converter [Amazon]
- Sakura Pigma 05 Micron Blister Card Ink Pen Set [Amazon]
- EK Tools EK Scoring Board 12×12 [Amazon]
- Feather No.55 Switch-Blade Shear, 5.5 Inch [Amazon]
- Fiskars Recycled Bypass Trimmer, 12 Inch [Amazon]
- Trim Slant Tip Tweezers [Amazon]
- Assorted Pink Buttons [Amazon]
- 1/4″ Wide Ribbon – Aquua
- Canson XL Series Mix Paper Pad [Amazon]
- Recollections Cardstock Paper, Essentials 20 Colors [Amazon]
- Best Creation Inc Glitter Cardstock – Silver [Scrapbook.com]
- Scor-Pal Scor-Tape – 1/8″X27 Yards [Amazon]
- Tombow MONO Aqua Liquid Glue [Scrapbookpal.com] [Amazon]
- Sakura Koi Watercolor Field 48 Color Sketch Set [Amazon]
- ScotchBlue Painter’s Tape – 1.88-Inch by 60-Yard [Amazon]
- Golden Fleece Synthetic, Flat, 1 inch [Cheap Joe’s Art Supply]
- Golden Fleece Synthetic, Round, Size 12 [Cheap Joe’s Art Supply]
- A Cloth or Rag (to wipe your brush on)
- A Cup of Water
Cricut Images Used:
Merry Christmas Draw Background (Photo Fun – Holiday Memories)
Watercolor Christmas Card Tutorial:
Step 1. Use an adapter to draw the Christmas image.
First I found this Merry Christmas background in the Cricut design space and I thought it would look perfect as a watercolor Christmas card design. But, as I mentioned above Cricut markers aren’t meant to be used with watercolors, so they bleed if you try to use them like that. Instead, I had to think outside the box and use a Sakura micron pen to draw the images.
This was honestly the most difficult part of this watercolor Christmas card. The problem with using a micron pen in the Cricut Explore Air 2 is that it wasn’t designed to fit. So what’s a girl to do? Well, I had to use a marker adapter to fit the pen into the machine. I’ve done this with other projects, like the birthday cupcakes card, and I talk about adapters in more detail in the Master Your Cricut Machine post.
Anyway, once I had the adapter in place, I needed to make sure that the tip of the pen wasn’t too close to the paper otherwise it would press down too hard when the machine was running, and it would break. It took some finagling but I finally got the pen right where I wanted it. Then I fed some Canson XL mixed media paper into the machine and let the marker draw the image.
Step 2. Tape the paper to a flat surface.
Once the Christmas image had been drawn, I peeled the paper off of the cutting mat. I wanted to paint it before I trimmed the paper so I used painter’s tape to secure all four sides of the image onto a flat surface. This kept the paper from warping during the painting and drying process.
Step 3. Begin layering paint on the Watercolor Christmas card design.
Next, I grabbed my Sakura Koi watercolor paint set and got to work! If you’ve ever made a galaxy watercolor painting then this part of the tutorial may feel familiar to you. I dipped my 1-in flat brush into the water getting plenty of water on it. Then, I applied the water to my mixed media paper. This process is known as the wet on wet technique and it helps colors spread out and blend together as they dry.
Once my entire paper was wet I started applying the watercolors! I painted the ornaments first, applying a very light base color on each of them then letting the watercolors bleed outside of the ornament so it looked like there was a little aura around each one.
Step 4. Add more details.
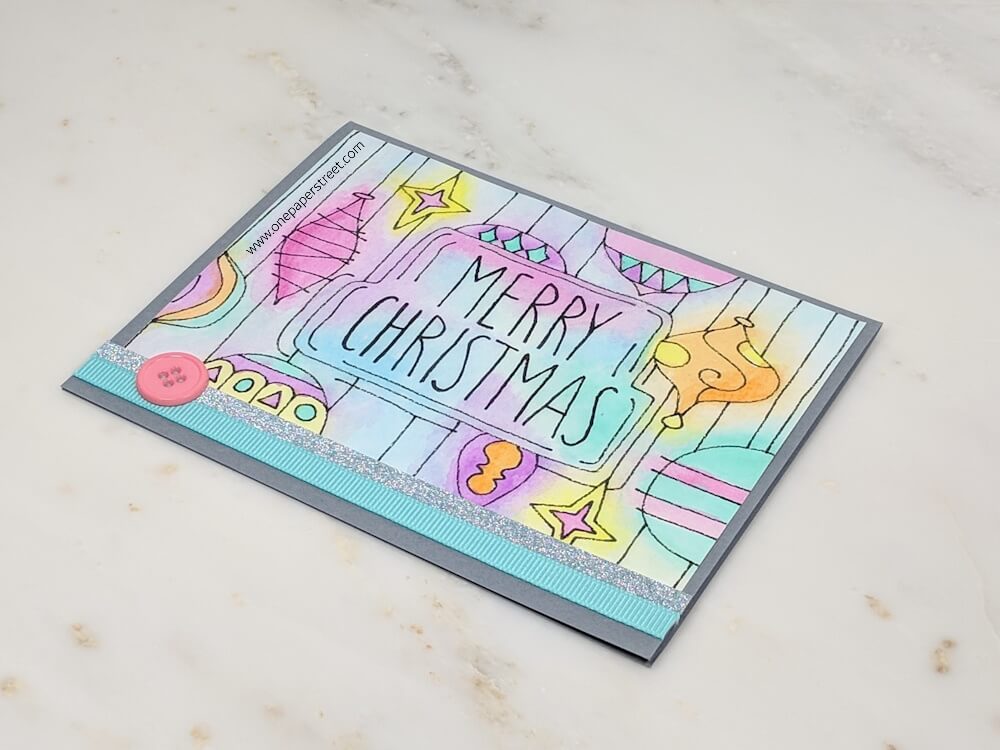
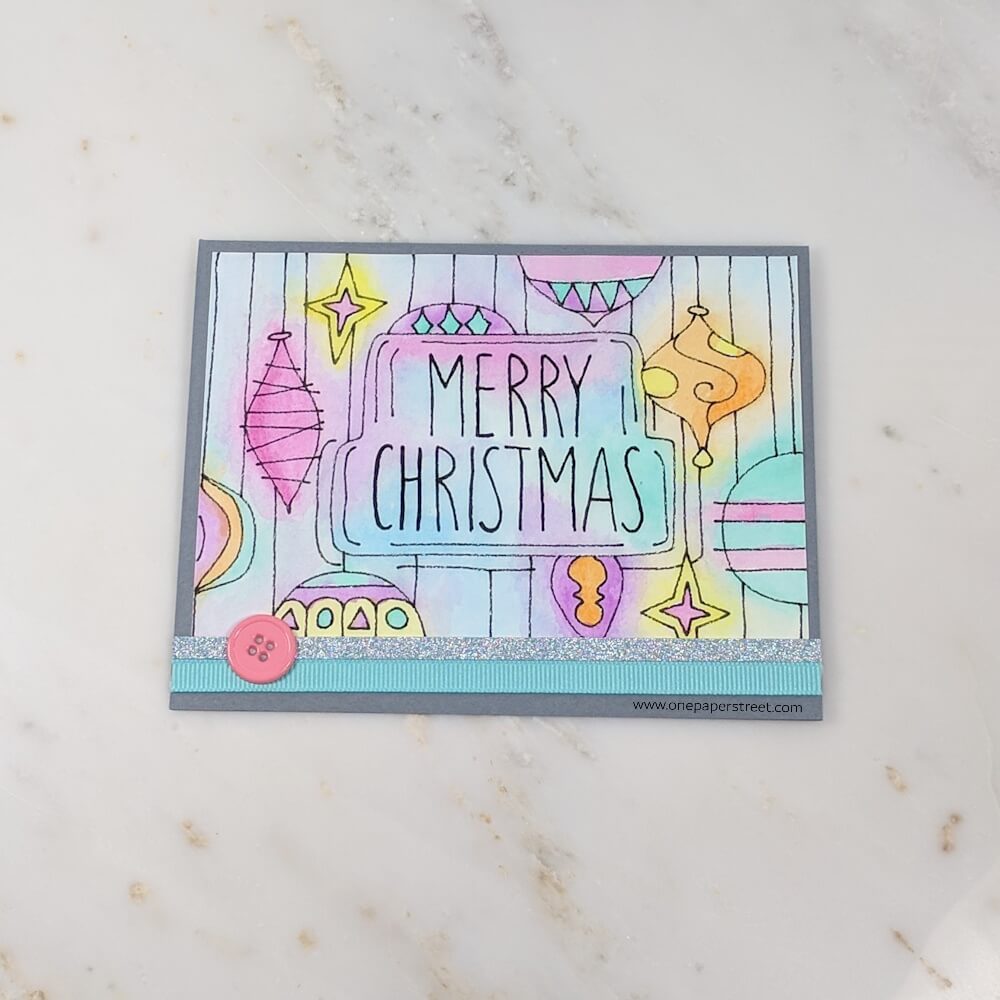
Once the first layer was dry I went back and started adding a little bit more detail to this watercolor Christmas image. I added more color to some of the ornaments to give them a shaded look. I also added more detailing using different colors to each ornament to really give them a fun modern look. Lastly, I went through and added some additional blue hues to the background to finish off the look.
Step 5. Prep the card base and add the finishing touches.
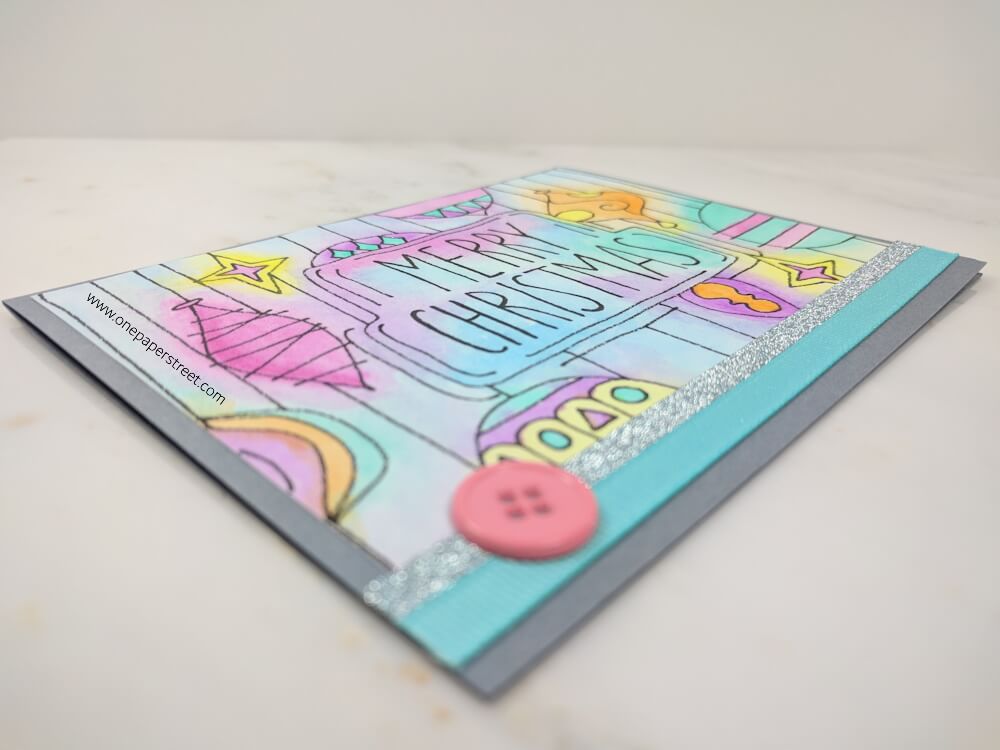
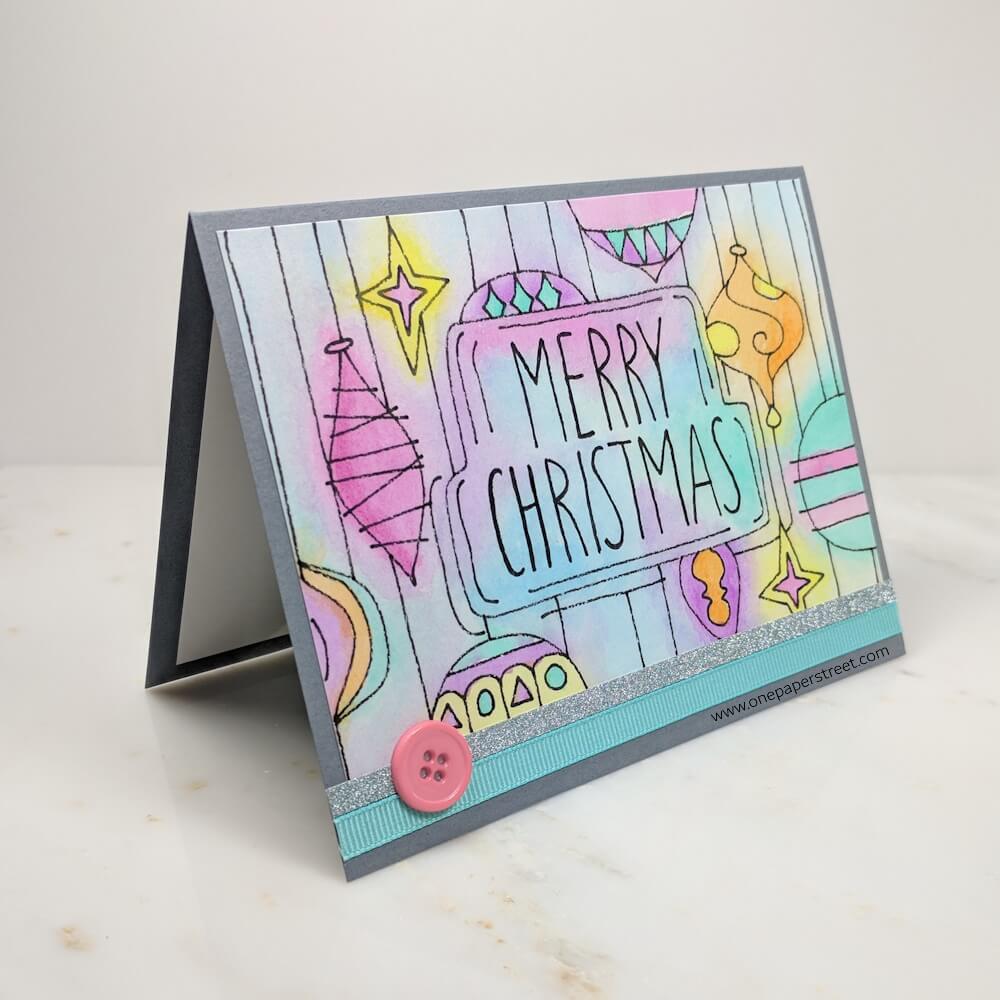
I let the image dry overnight and then I prepped the card base on the following day. I trimmed and scored a 5.5′ x 8.5′ sheet of gray cardstock to make an A2 card base. Then, I trimmed down the watercolor Christmas image so that it would fit on the base while leaving a little bit of space to show the gray card base as a border. Next, I added a small strip of glitter cardstock and an aqua blue ribbon at the bottom of the card. The final accent I added was a pink button on the lower left-hand side!
I hope you enjoyed this card, and that it inspires you to make your own watercolor card. If you’re looking for more inspiration, you can find more watercolor tutorials here. Also, don’t forget to follow me on Instagram, Facebook, or Pinterest for the latest updates! You can also shop all the handmade cards that I’ve designed here.