
As we celebrate the holiday season, I thought it would be a good idea to make a Christmas card that reminds us all of why we celebrate this time of year. Christmas is not just about going shopping for the perfect gifts, or the ugly sweater parties. Sure, those things are fun, but it’s also about spending time with loved ones, whether they be family or friends. It’s about showing kindness to those around us. I really enjoy this sentiment, “let there be peace on earth” because it is such a great reminder to treat each other with kindness.

Peace On Earth Materials Used:
Additional Materials Not Shown Above:
Gray Striped Cardstock
Let There Be Peace on Earth Stamp – Recollections Brand from Michael’s
Snowflake Embossing Folder – Recollections Brand from Michael’s

Peace On Earth Walkthrough:
Step 1.
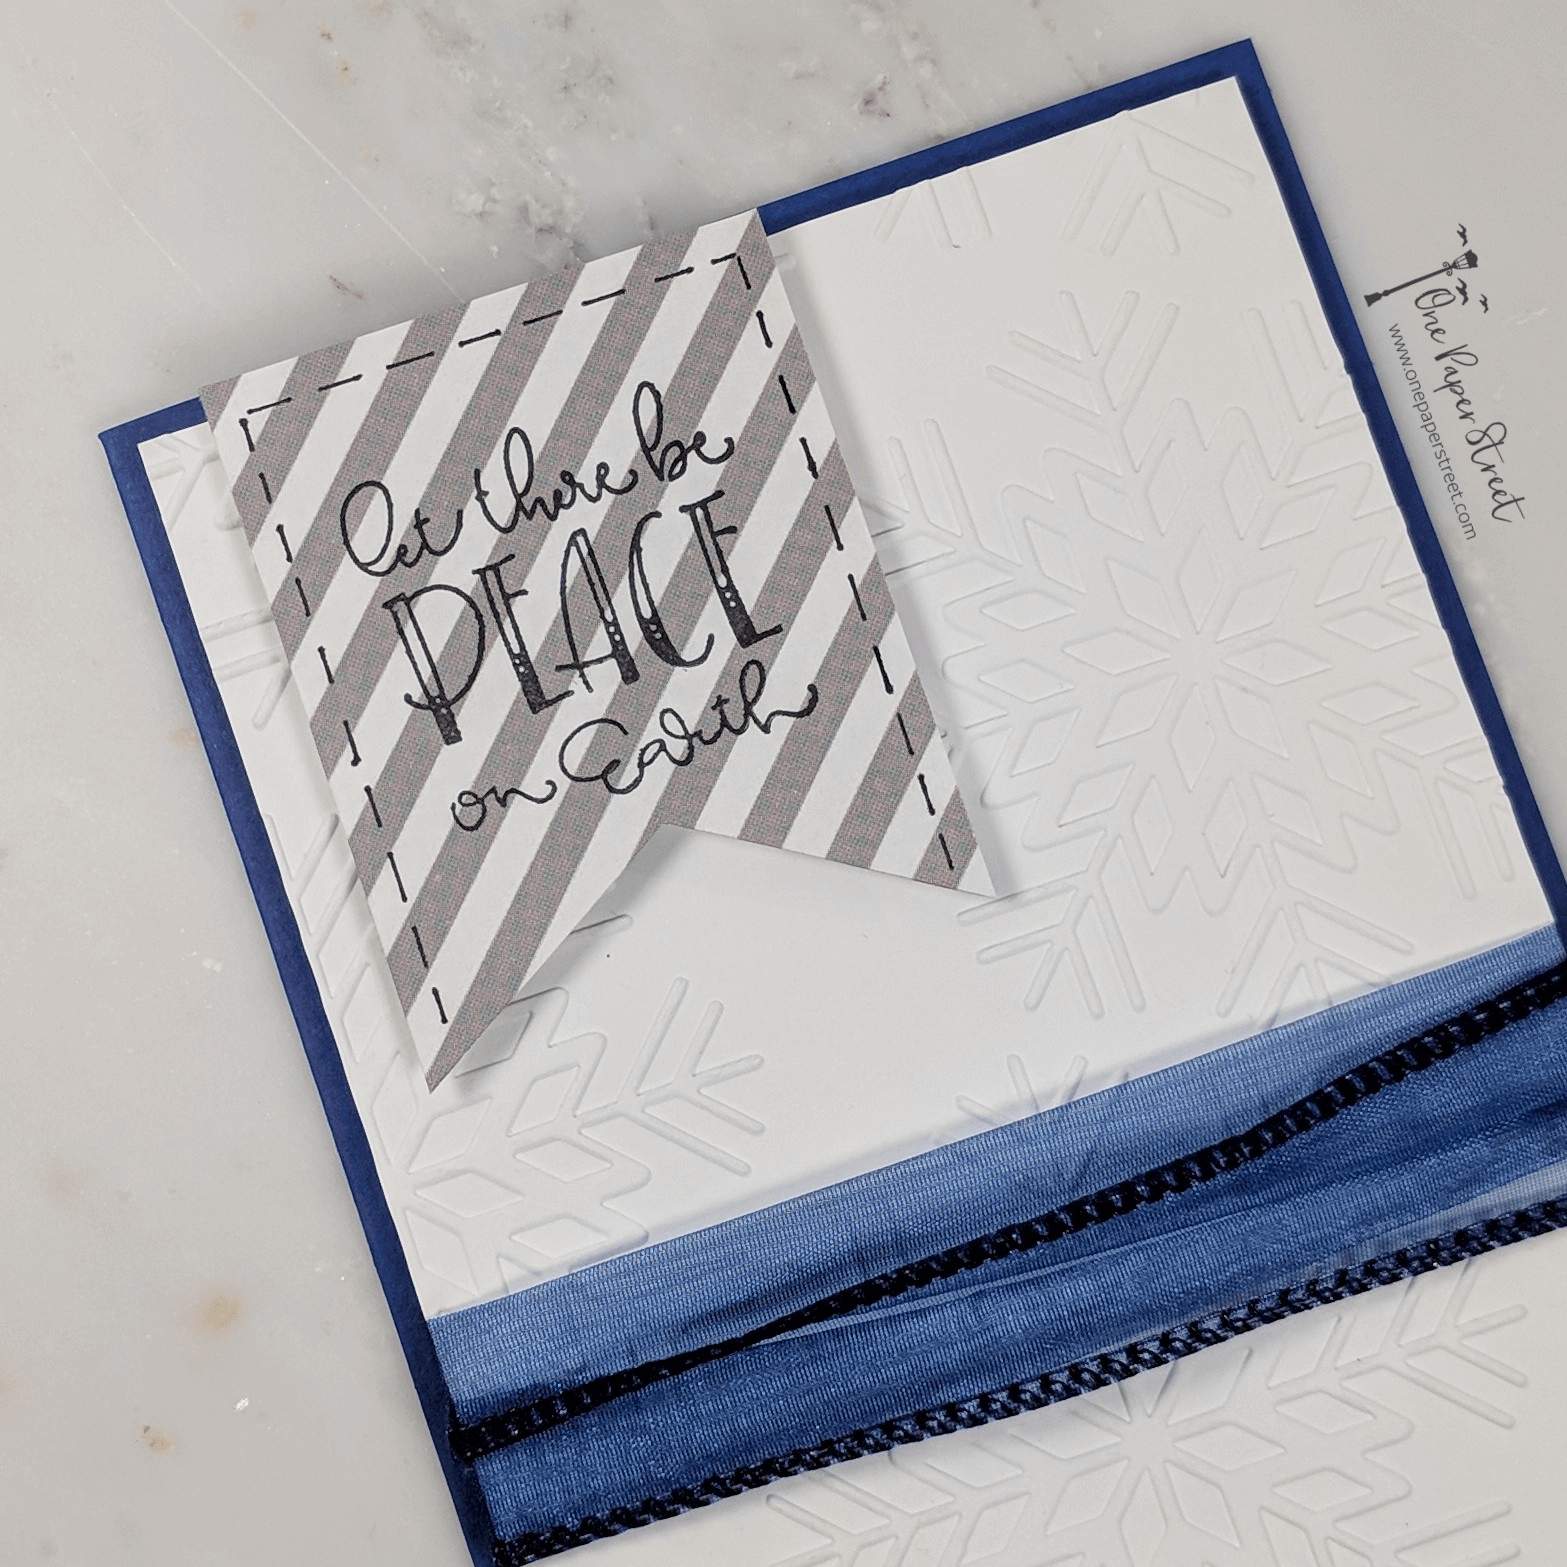
Cut a sheet of cobalt blue cardstock to be 5.5 x 8.5 inches in size, to start creating this Peace On Earth Christmas card. Fold the cardstock in half using a scoreboard so that it will end up being a 5.5 x 4.25 inch A2 sized greeting card.
Once the card base is cut, Grab your Sizzix Big Kick machine and your favorite embossing folder. I used the snowflake embossing folder by Recollections for this Christmas Card. I found it at Michaels during their Black Friday doorbuster sale. Take a sheet of white 4’x 5.25′ cardstock and place it inside the embossing folder.
Follow the instructions on the big kick multi-purpose platform, as different embossing folders may require slightly different techniques. Here’s a great YouTube video that walks through some different folder settings. I used tab one on the multi-purpose platform for this particular embossing folder. Then I placed a standard plastic plate underneath the embossing folder and a second plate above the embossing folder then ran it through the machine.
Tip: When using the Sizzix big kick you’ll know that you’re using the right tabs when the machine applies just enough pressure to create a beautiful embossed design. If the paper is ripped then the machine is applying too much pressure. Likewise, if the image isn’t clear enough that means you’re not applying enough pressure.
Step 2.
Next, take a 2.5-inch wide ribbon and cut it to be about 6.5 to 7 inch in length. Crumple the ribbon up, so that it looks like it’s only about half an inch wide. Wrap the edges of the ribbon behind the white cardstock so that you can adhere it to the back of the embossed paper. Use whatever kind of adhesive you want, to keep it in place. Since the white cardstock won’t lay flush to the cobalt card base, I recommend adding some 3D foam adhesive to the back of the embossed cardstock to make it pop beautifully off the page.
Tip: To view other Christmas Card Tutorials, click here
Step 3.
I chose to add the ‘Let There Be Peace on Earth’ sentiment on some gray striped paper. The striped paper was about 3.5 inches tall by 2 inches wide. It was a piece of scrap paper that I had laying around, but it worked perfectly for this Christmas card. I chose Wicked Black archival ink to stamp the sentiment on to the paper.
After that, I still thought it needed a little something more. So, I grabbed a ruler and a black archival ink marker from Micron and lined the edges with some dashes. Next, I added a dot to the center of the page just a little bit below the sentiment. I would use that dot to scissor cut banner tails on my striped gray cardstock.

Step 4.
I chose to put 3D foam adhesive on the back of my freshly cut banner to make it pop slightly off the page. This was a good choice since the crumpled ribbon also has a bit of a 3D effect. I placed the banner on the upper left-hand side of the page so that it just barely goes past the edge of the embossed white cardstock, but stays below the edge of the cobalt cardstock this gives it just a little bit of extra dimension.
feel free to add some buttons or some extra embellishments if you feel like your card needs it, and then lastly add an interior insert to the card so that you can write a special note to someone you love.
Thanks for stopping by! I hope you enjoyed this tutorial. please leave a comment below letting me know what you think. you can find more tutorials on this blog so feel free to look around and subscribe to the newsletter. Or you can follow me on Instagram.