
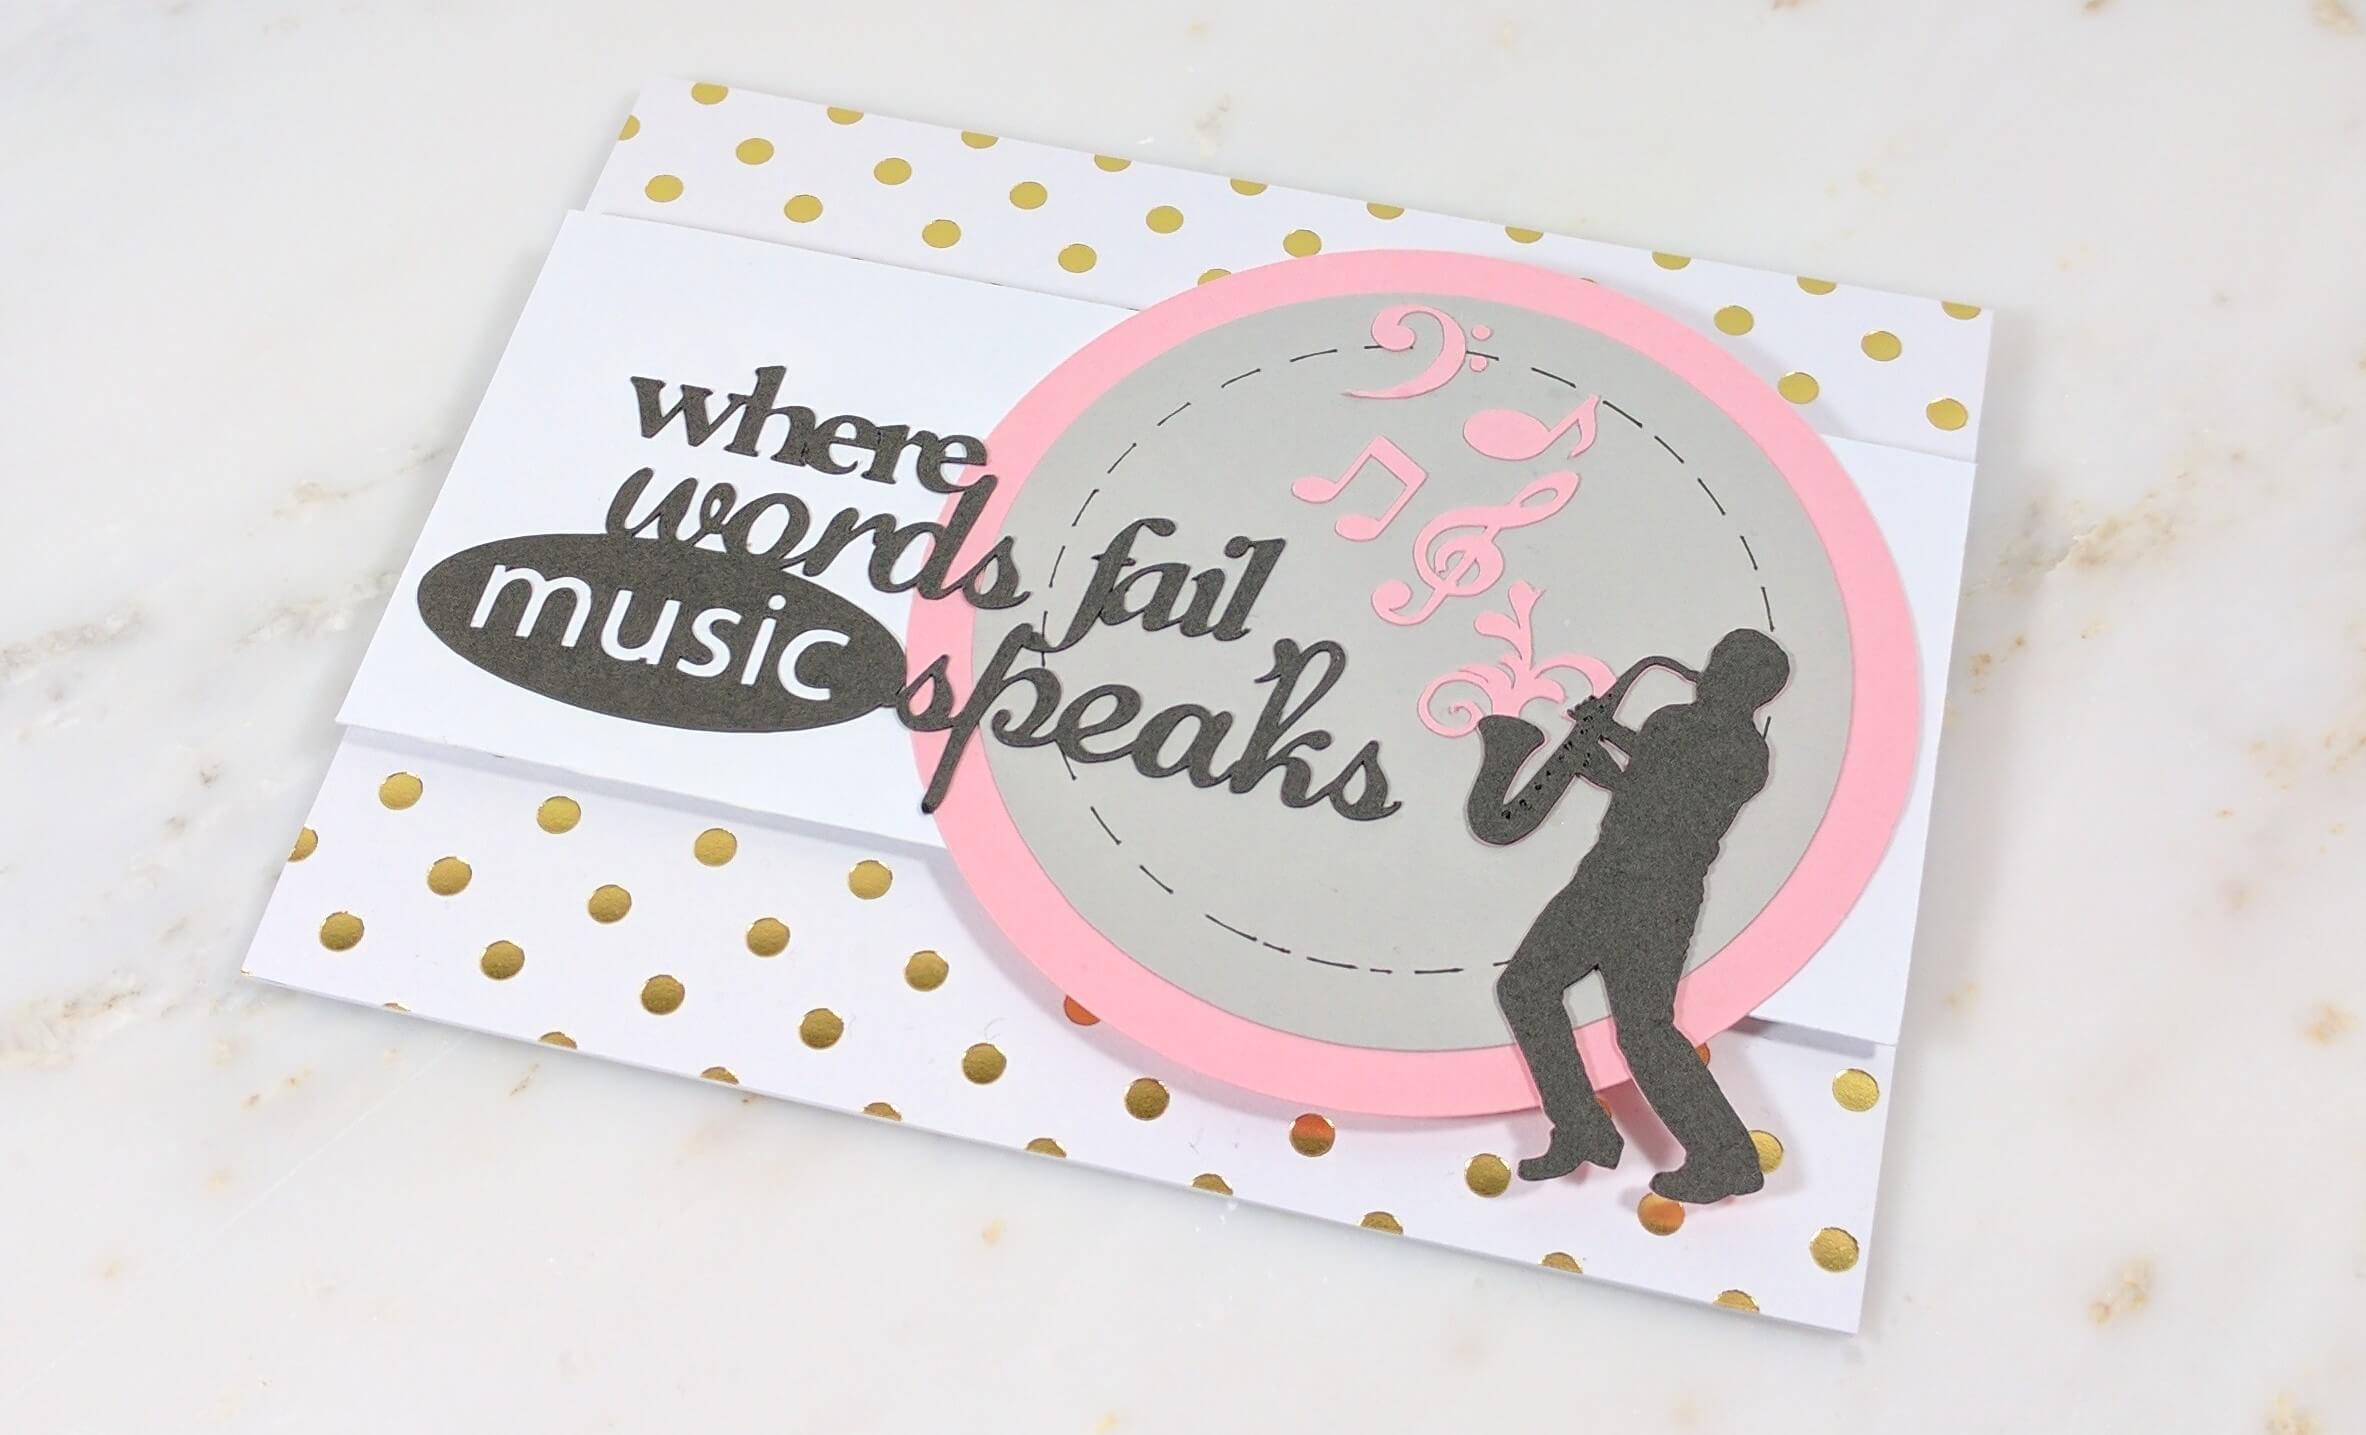
I was browsing through the Cricut Craft room earlier this week, and stumbled upon the Quarter Note cartridge. I fell in love with the images of music notes and musicians that I just had to use it for my next Cricut card making tutorial. You can find the dimensions of this project, a video tutorial and the materials list below.
Watch the Music Speaks Cricut card making tutorial on YouTube.
Materials Used:
White Cardstock (5.5″x8.5” folded in half)
Polka dot cardstock (5.75”x4.5”)
White Cardstock (5.5”x2.5”)
Black Cardstock – For Salutation (4”x6”)
Pink Cardstock for musical decals (4”x4”)
Pink Circle (3.6” Diameter)
Grey Circle (3.12” Diameter)
Stencil for Hand Drawn Border (if needed)
Black Fine Point Marker – Hand Drawn Border
Double Sided Sticky Tape
Dimensional Tape
Scissors
Tweezers (if needed)
Cricut Images Used:
Where Words Fail, Music Speaks (Quarter Note cartridge)
Sax Player (Quarter Note cartridge)
Half Rest Note (Quarter Note cartridge)
8th Note (Quarter Note cartridge)
Treble (Quarter Note cartridge)
Bass (Quarter Note cartridge)
1 Standard Square (For Background)
1 Standard Square (For Background of Sentiment)
Walk Through:
I started by cutting white cardstock to use as the base, measuring 5.5″x8.5” in size and folded in half. I then used double sided tape to make a boarder around the outer rim of the card. Doing this allowed me place the polka-dot paper on the front to make the background of the design.
The words on the card, along with the musician, notes, circles and rectangle were all cut by my Cricut machine. After all the designs came off of the machine, it was time to start pulling all of the pieces together. I traced a circular template Fiskers template to draw a black border on the grey circle to add a some embellishment to it. I placed the grey circle on top of the pink one, then placed those on top of the white rectangle.
Tip: View the exact specifications of this project in the Cricut Design Studio here.
The final steps of the process is adding the wording and the musician to the rectangular design. Since each piece is so detailed, this took the most time to complete. I recommend adding the the full design to the polka-dot cardstock last, so that if you do make any mistakes, you can fix them without scrapping the whole design.
All opinions and editorial decisions are my own. This post is not sponsored.