
I’m so jazzed to share today’s watercolor pencil Christmas Card tutorial with you! I recently purchased a set of Faber-Castell Albrecht Durer Watercolor Pencils and I used them to make this watercolor Christmas card. I loved mixing the colors on these poinsettias and holly leaves and seeing how they turned out. Hands down, I’ll be using these pencils for many more tutorials!
I’ll also do a separate video that walks through best practices when using the watercolor pencils themselves but until then, please enjoy this Watercolor Christmas card tutorial below and let me know what you think by leaving a comment below.
Watch this Watercolor Pencil Christmas Card YouTube tutorial here.
Watercolor Pencil Christmas Card Materials Used:
This blog may use affiliate links when they’re available. If you choose to make a purchase through one of these links, I may receive a small commission at no cost to you. I don’t make recommendations lightly, and will only link to products I know and trust.
Faber-Castell Albrecht Durer Watercolor Pencil Studio Gift Set, Box of 36 Colors [Blick] [Amazon]
(Colors Used: 121 Pale Geranium Lake, 219 Deep Scarlet Red, 225 Dark Red, 264 Dark Phthalo Green, 112 Leaf Green, 168 Earth Green Yellowish, 184 Dark Naples Ochre)
Fabriano Artistico – Extra White 140 lb. Cold Press Paper [Amazon]
Golden Fleece Synthetic, Round, Size 2 [Cheap Joe’s Art Supply]
Golden Fleece Synthetic, Round, Size 4 [Cheap Joe’s Art Supply]
Golden Fleece Synthetic, Round, Size 8 [Cheap Joe’s Art Supply]
A Cloth or Rag (to wipe your brush on)
A Cup of Water
Neenah Classic Crest Solar White 80 lb Cardstock [Scrapbook.com] [Amazon]
Sakura Pigma 05 Micron Blister Card Ink Pen Set [Amazon]
EK Tools EK Scoring Board 12×12 [Amazon]
Feather No.55 Switch-Blade Shear, 5.5 Inch [Amazon]
Fiskars Recycled Bypass Trimmer, 12 Inch [Amazon]
Misti Stamp Tool Original Size Stamp Positioner [Amazon]
Ranger Archival Ink Pad, Jet Black [Scrapbook.com] [Amazon]
Sticro 5 Sizes Self-adhesive Rhinestone Sticker 4950 Pieces [Amazon]
Scrapbook Adhesives Initially Repositionable Mounting Squares [Scrapbook.com] [Amazon]
Forever In Time 3D Pop Dots Square Dual-Adhesive Foam Mount, 1/2-Inch [Scrapbook.com] [Amazon]
Watercolor Pencil Christmas Card Tutorial:
Step 1.
To get started, I used a Christmas Poinsettias stamp set that I bought from Michael’s last year. Though I couldn’t find a link to share with you, any floral Christmas themed stamp would work.
I laid these stamps on my Misti stamping tool and used Jet Black Ranger archival ink to stamp the image onto some Fabriano Artistico Extra White 140 lb cold press watercolor paper. I stamped the image down a couple of times to make sure that the lines were crisp on the paper. Then I set the paper aside to dry while I got my pencils out.
Step 2.
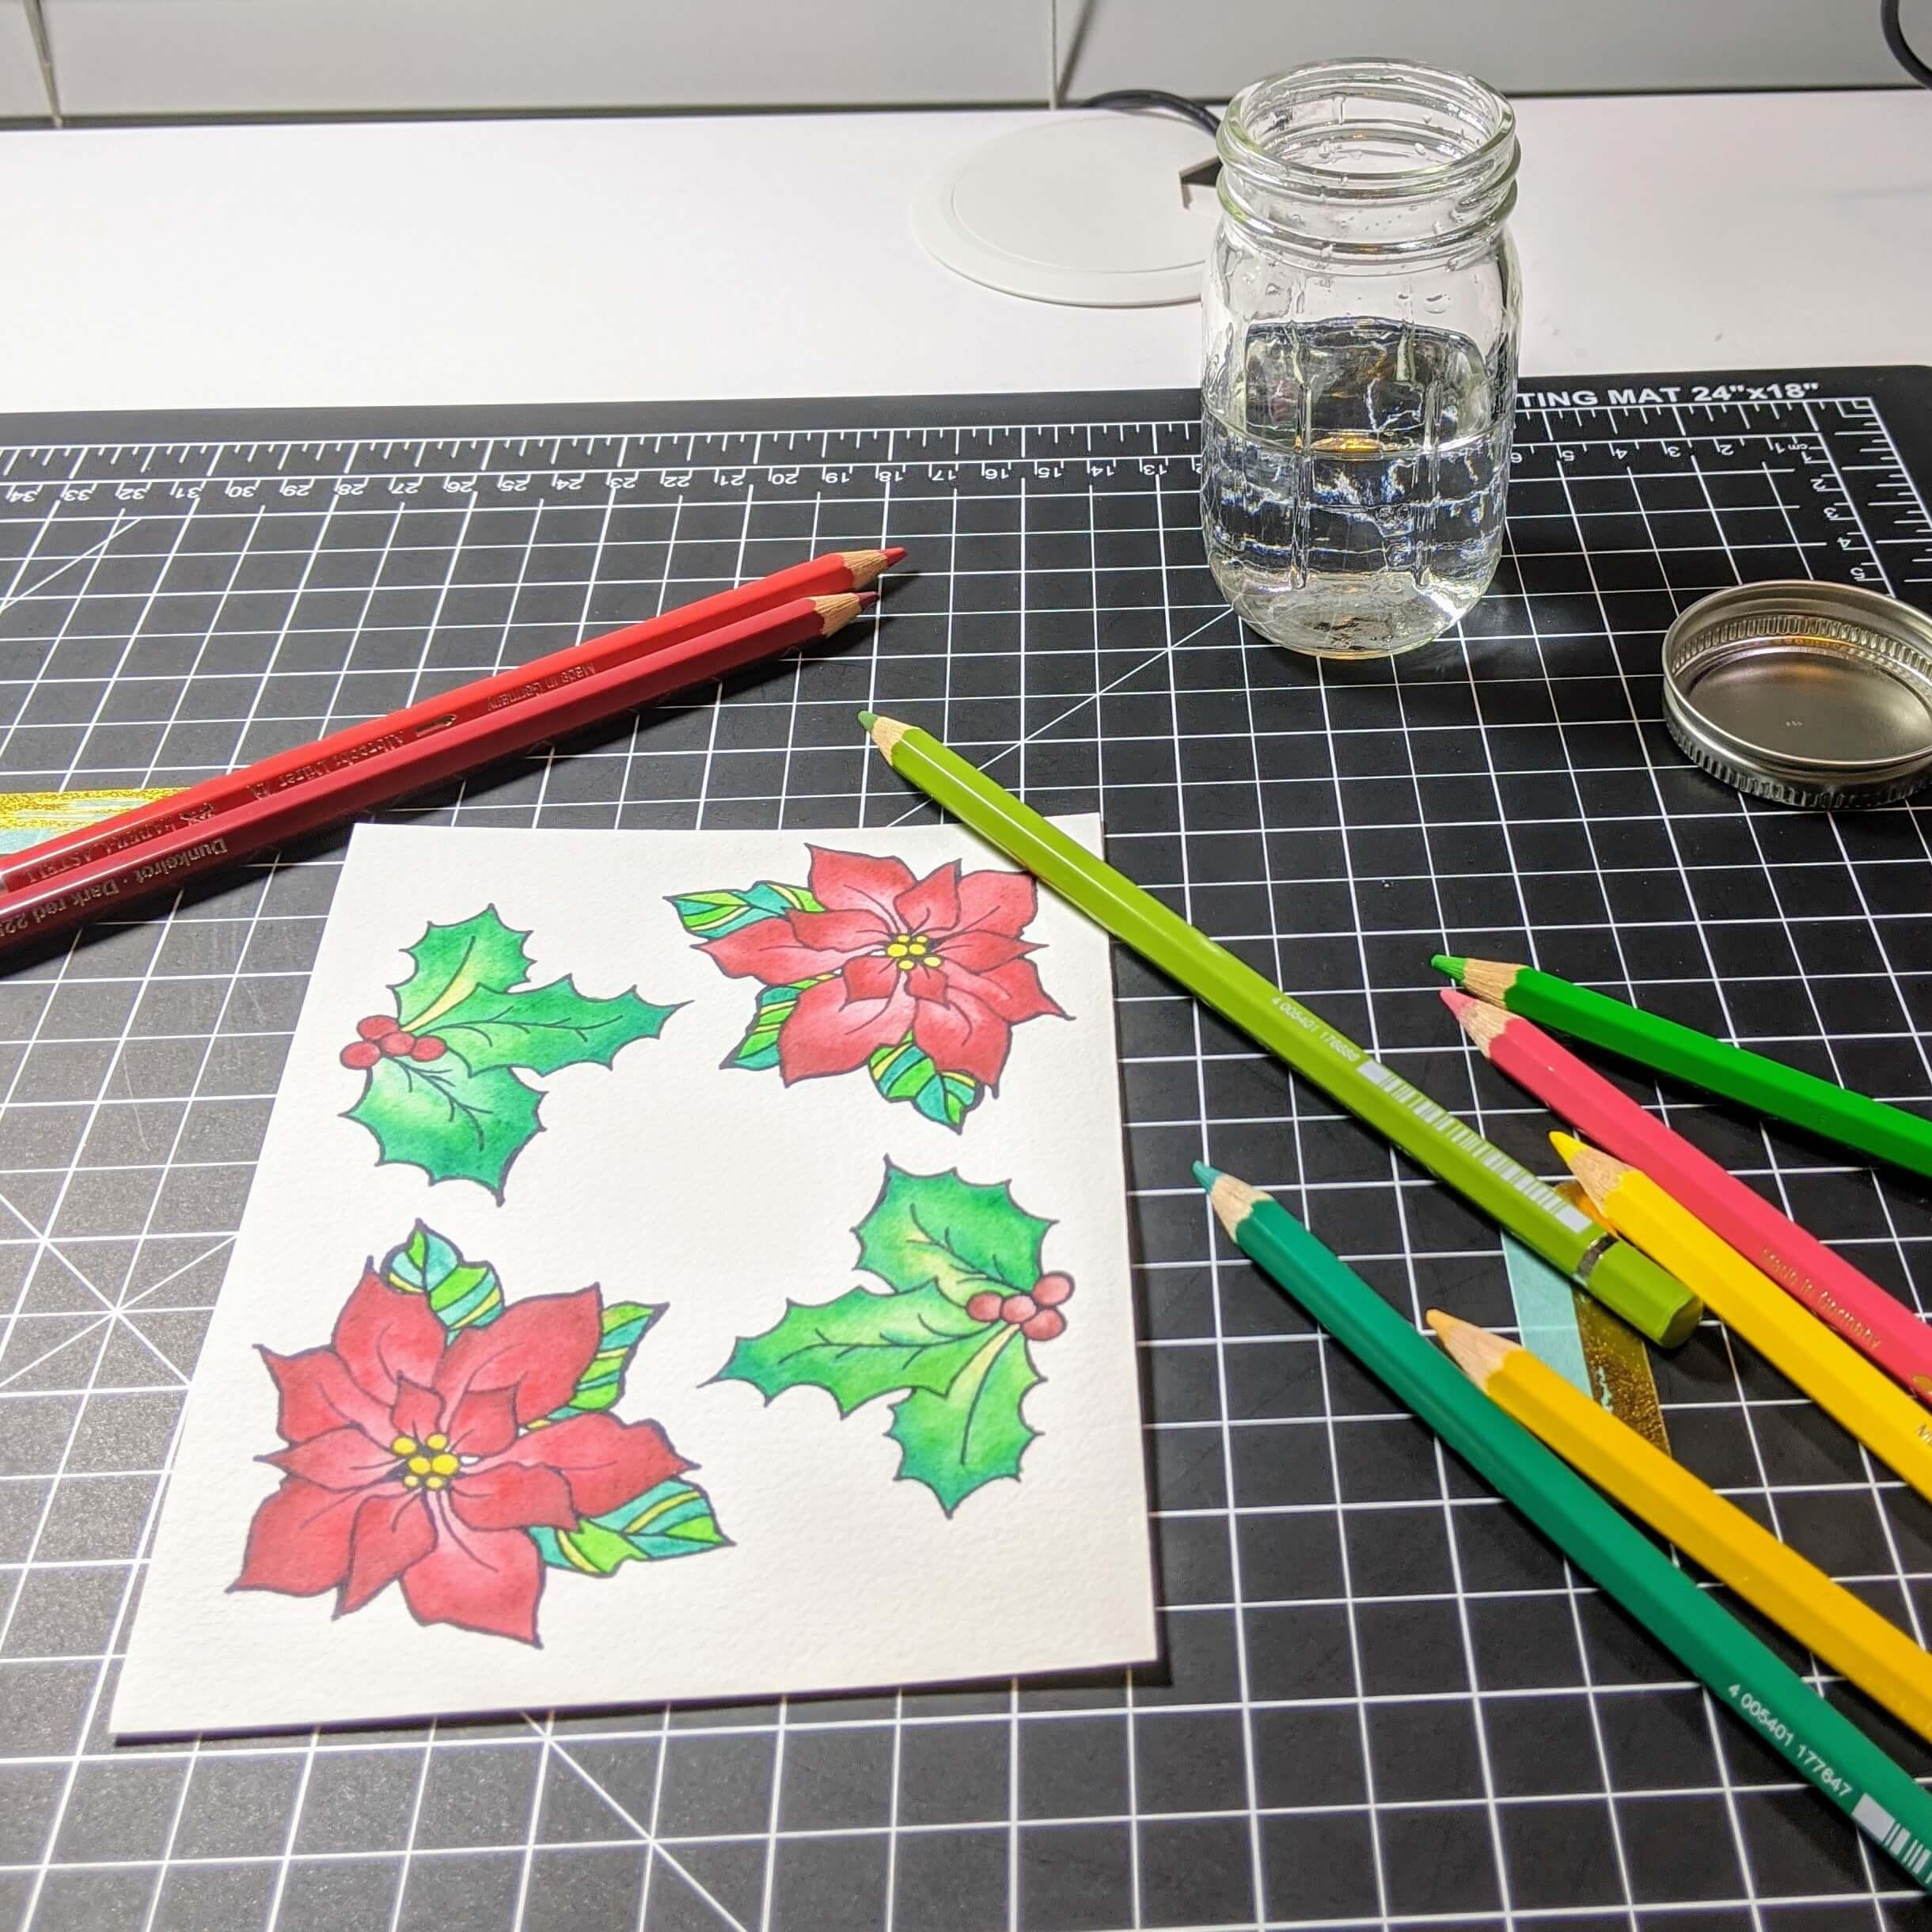
The first image I tackled was the holly leaves. I used Dark Phthalo Green (264), Leaf Green (112), and Earth Green Yellowish (168), and Dark Naples Ochre to paint the leaves. I also used Dark Red (225) to make the berries.
Using the watercolor pencils, I colored the berries first. I lightly layered the pencil on the paper being careful to not press down too hard. When you apply the pencil it’s imported to not put too much pressure down on the paper. More pressure will apply more paint, but it will also make it harder to hide your pencil lines. Once the color was in place, I grabbed my size 2 round brush. I started where the color was least concentrated then moved towards the most concentrated areas. this allowed me to give it the appearance that light was shining on it.
Step 3.
While the berries were drying I moved over to the leaves, applying Dark Phthalo Green (264) to the placed on the leaf that I wanted to look the darkest. Next, I used Leaf Green (112) to be the mid-tone color on the leaves. Earth Green Yellowish (168) was also used in the places that should look the lightest. Once all the colors were on the page, I followed the same process that I did with the berries using my size 8 round brush.
Tip: Be sure to check out the video tutorial for a more detailed overview of this watercolor pencil painting process.
Step 4.
While the holly leaves were drying I began coloring the poinsettia in. I used Pale Geranium Lake (121) on the interior of the petals, then Deep Scarlet Red (219) as the mid-tone color while the Dark Red (225) was saved for the outermost part of the petals. I followed the same steps that I mentioned with the holly leaves to keep a similar look and feel. Lastly, I used single shades to color in each of the leaf sections on the poinsettia to keep it simple.
This process was honestly so easy that I really feel like anyone with a little time on their hands could follow this same process.
Step 5.
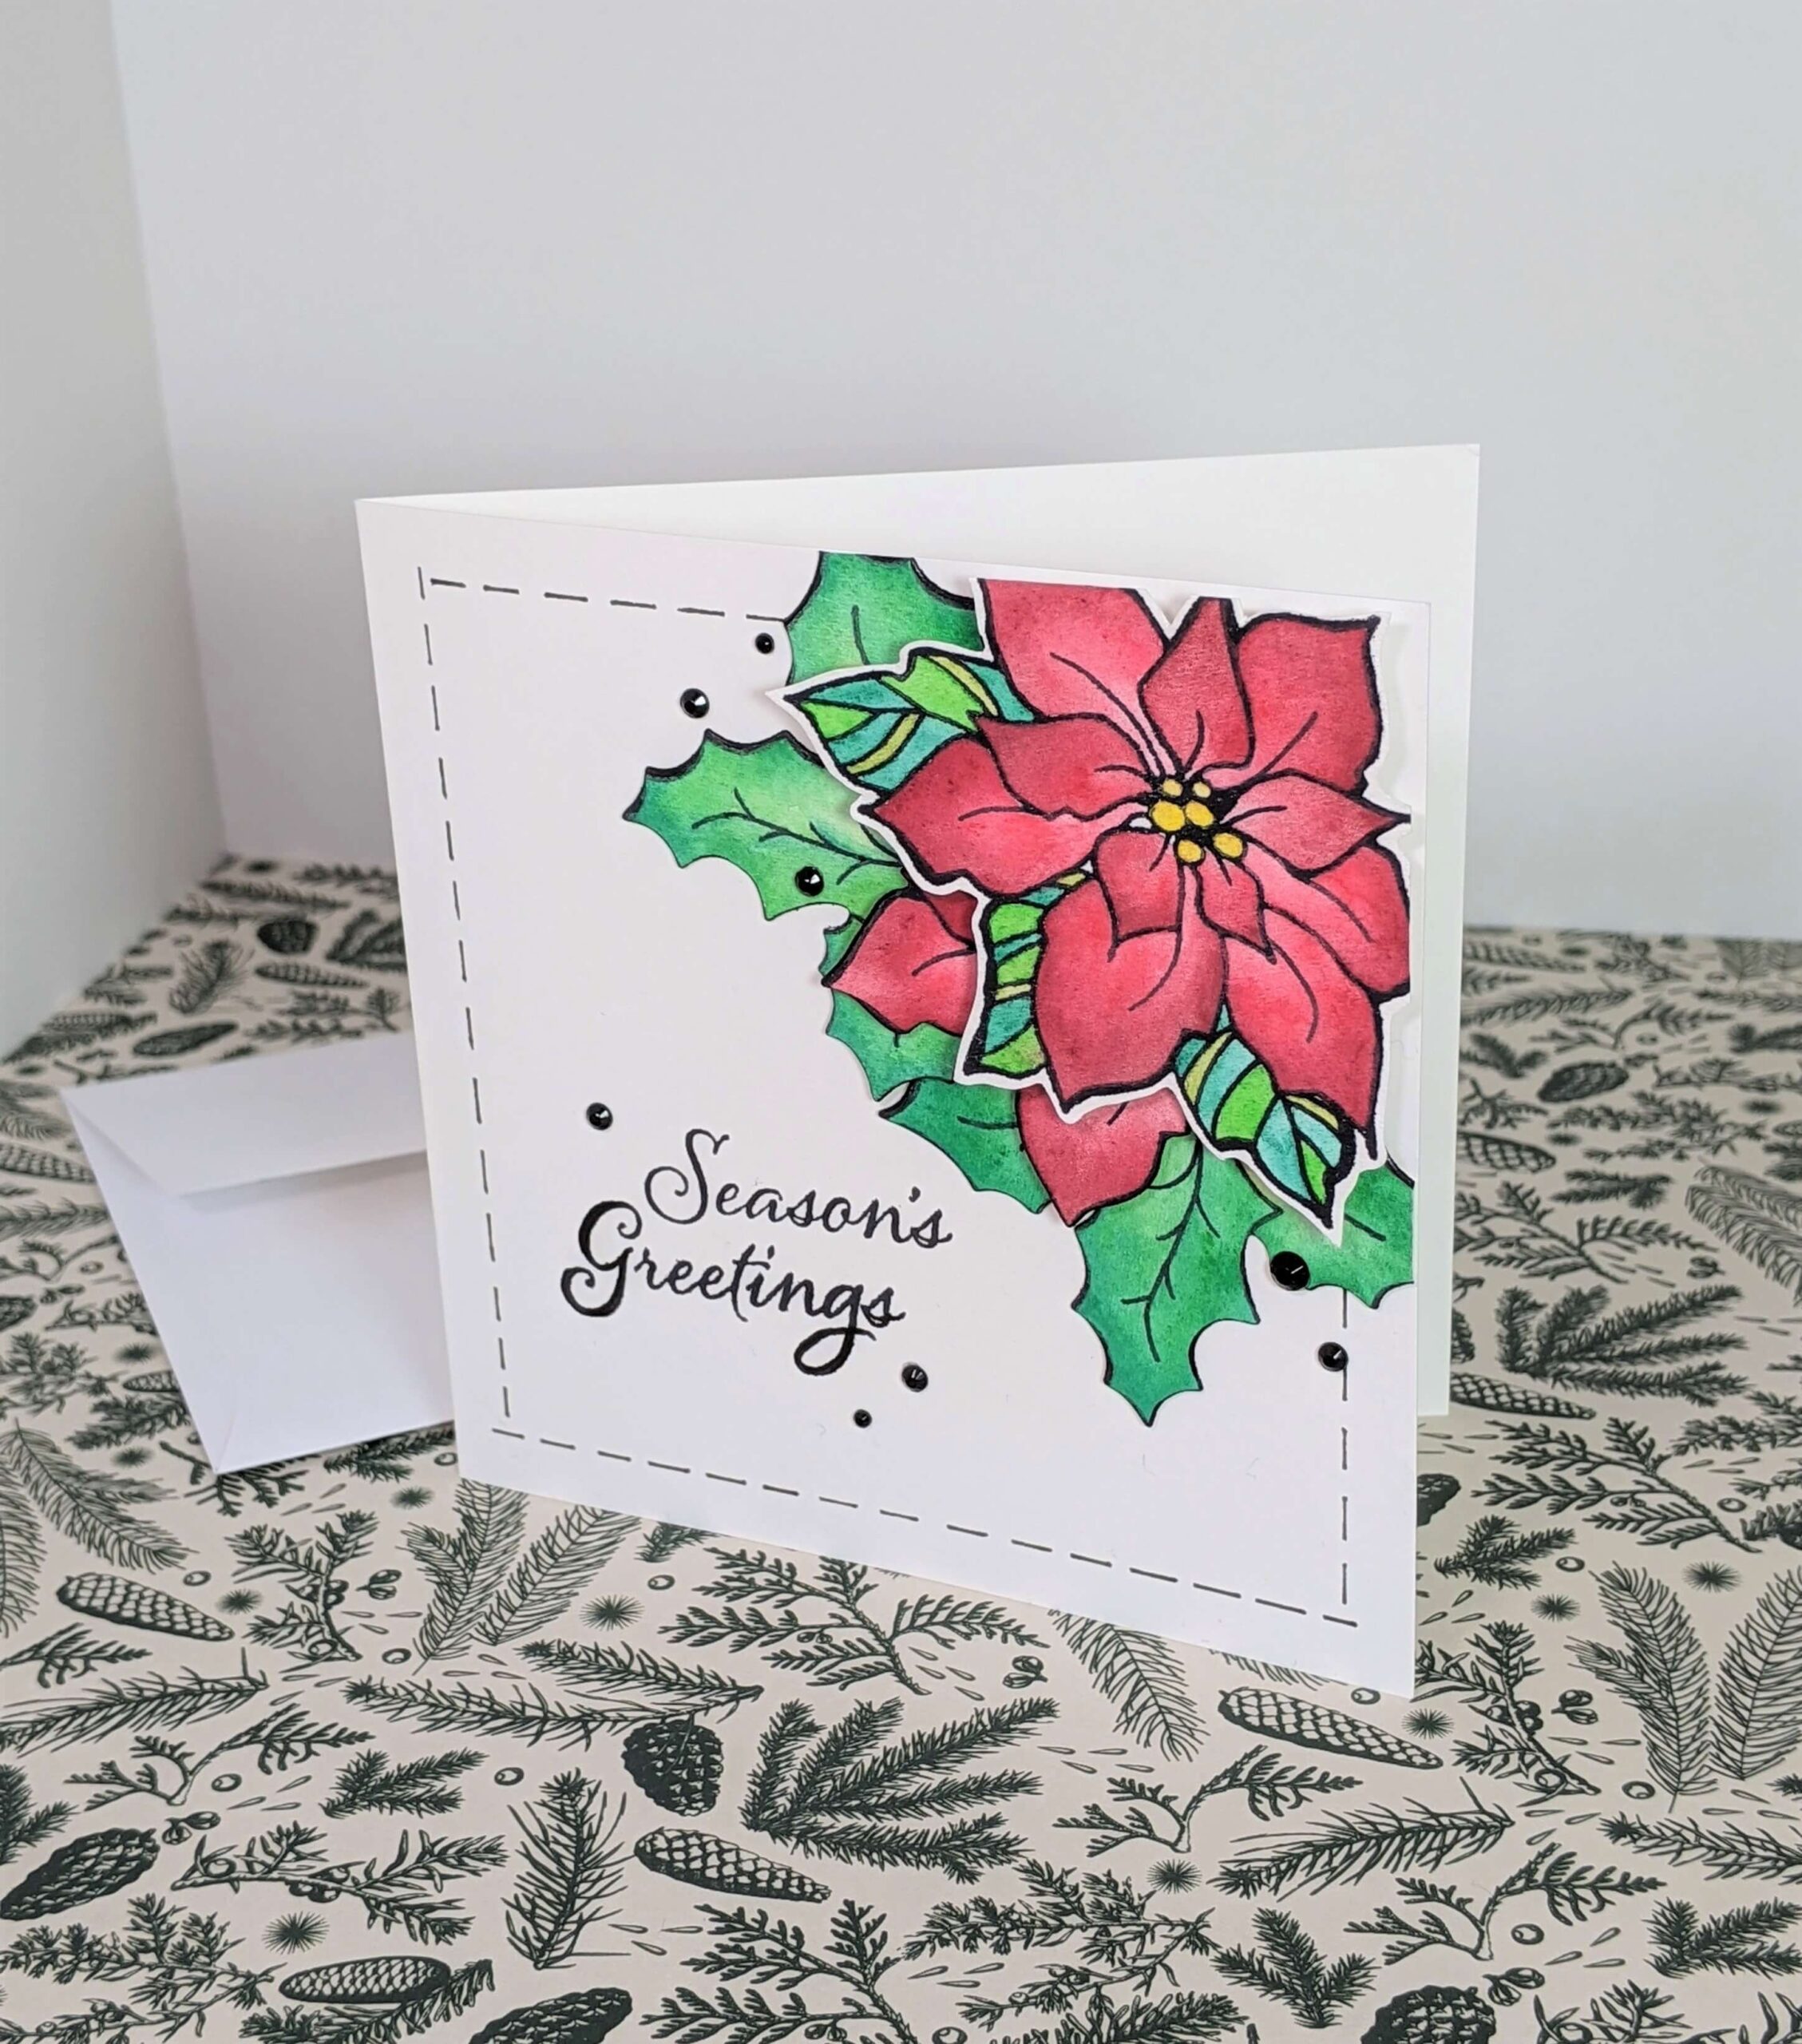
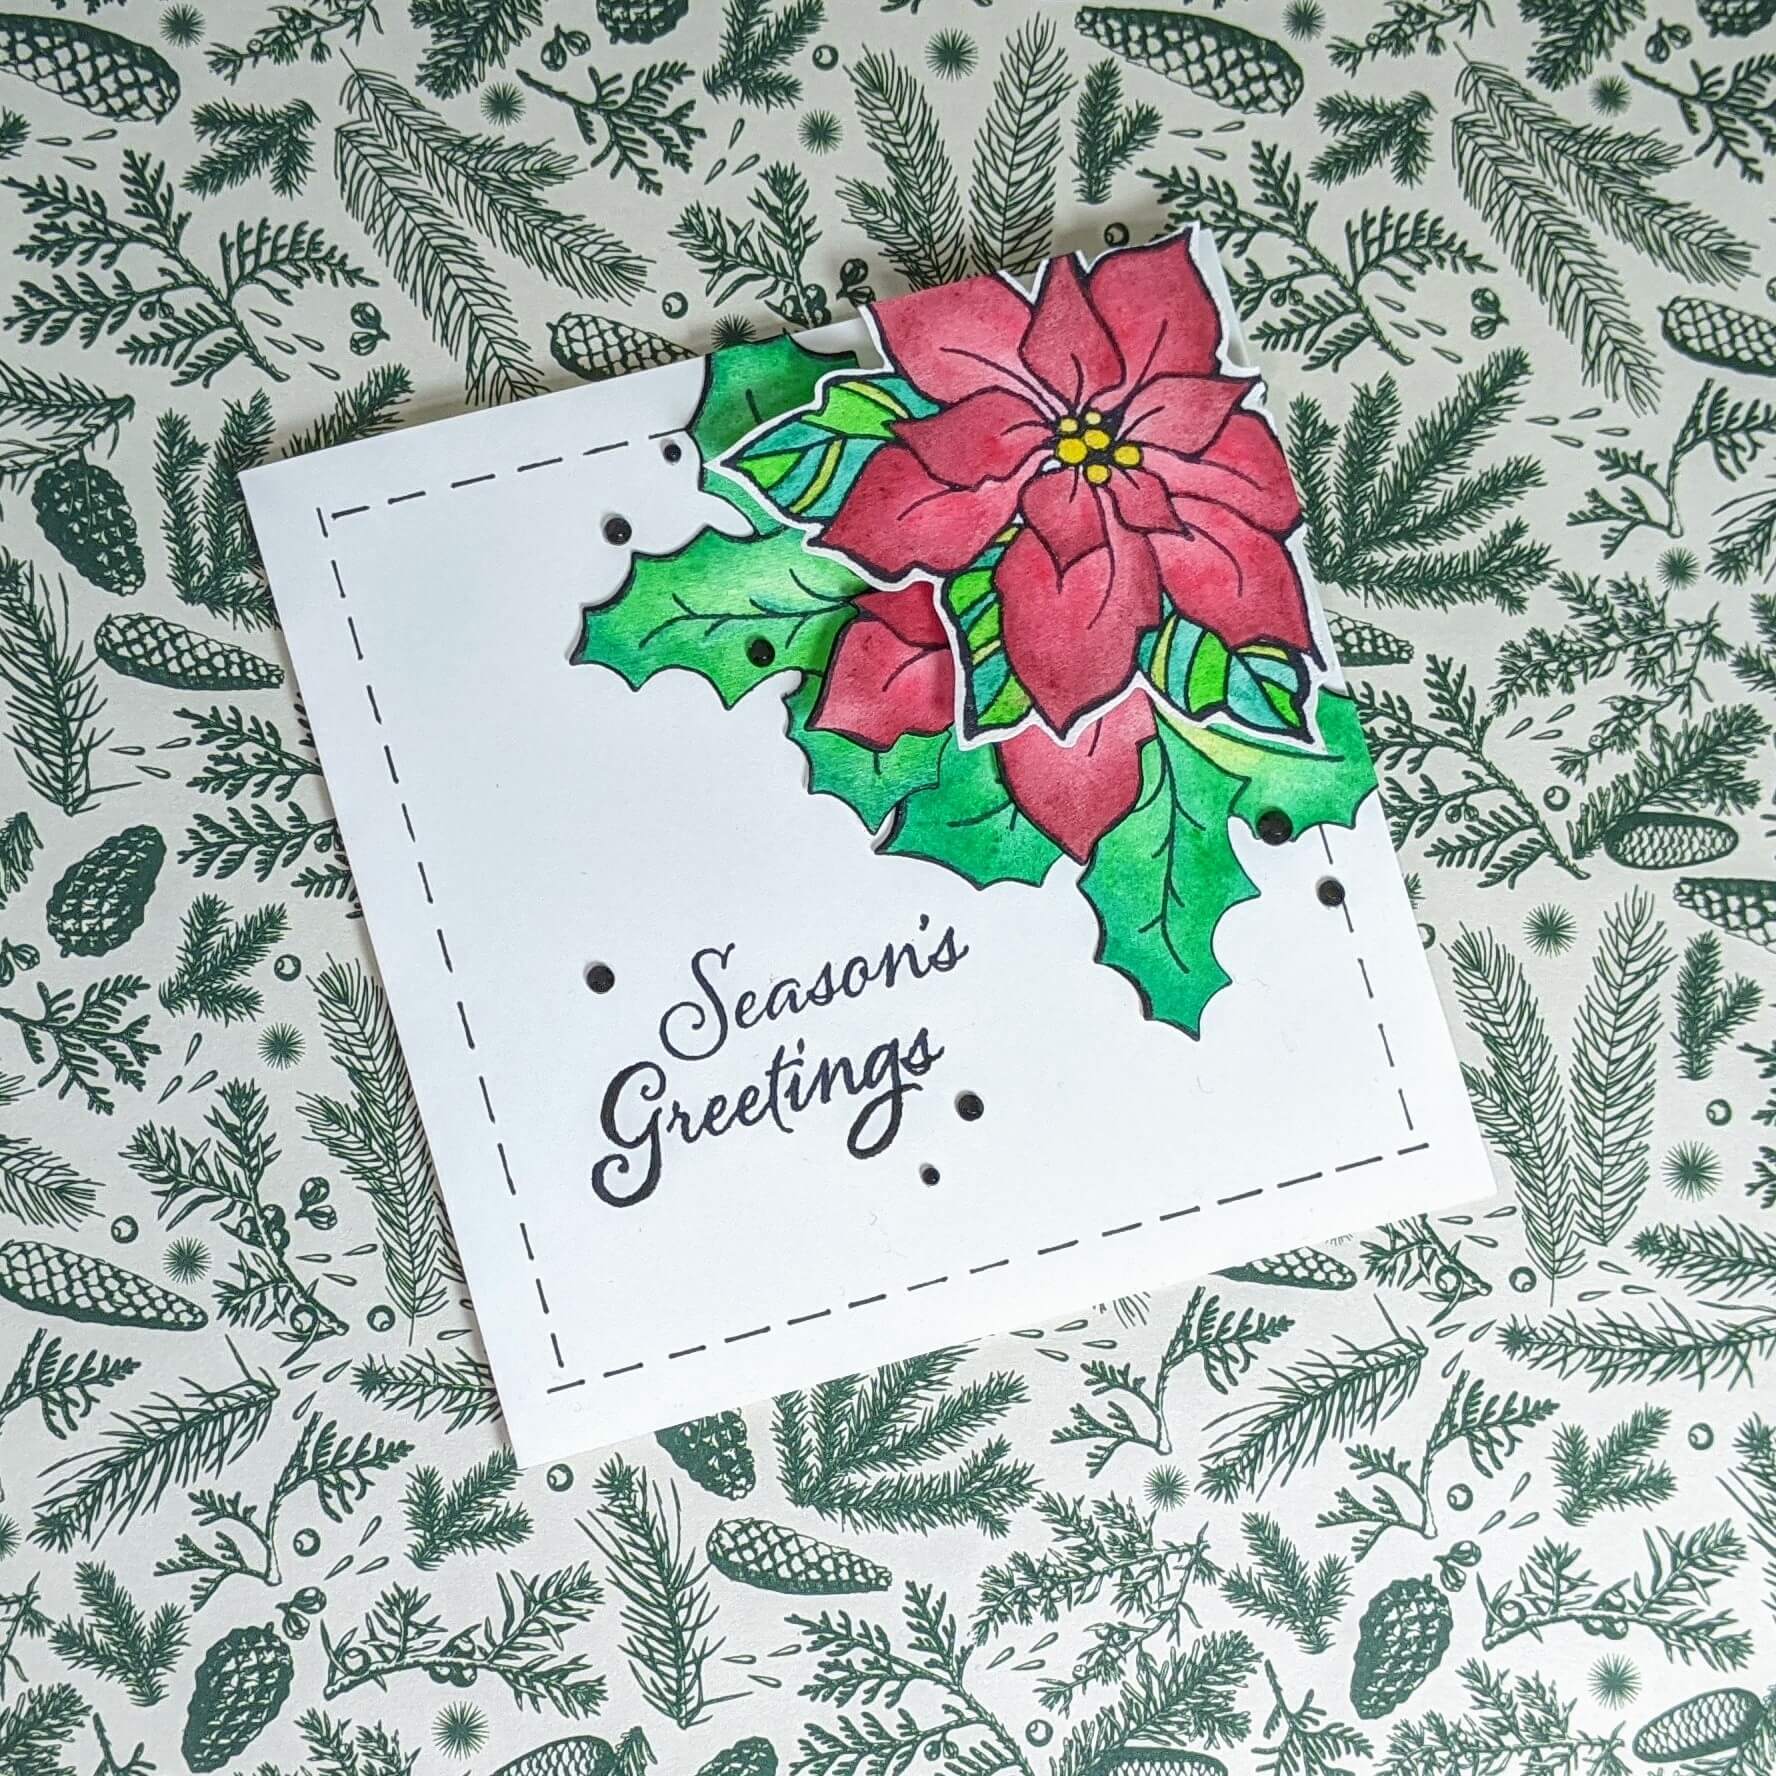
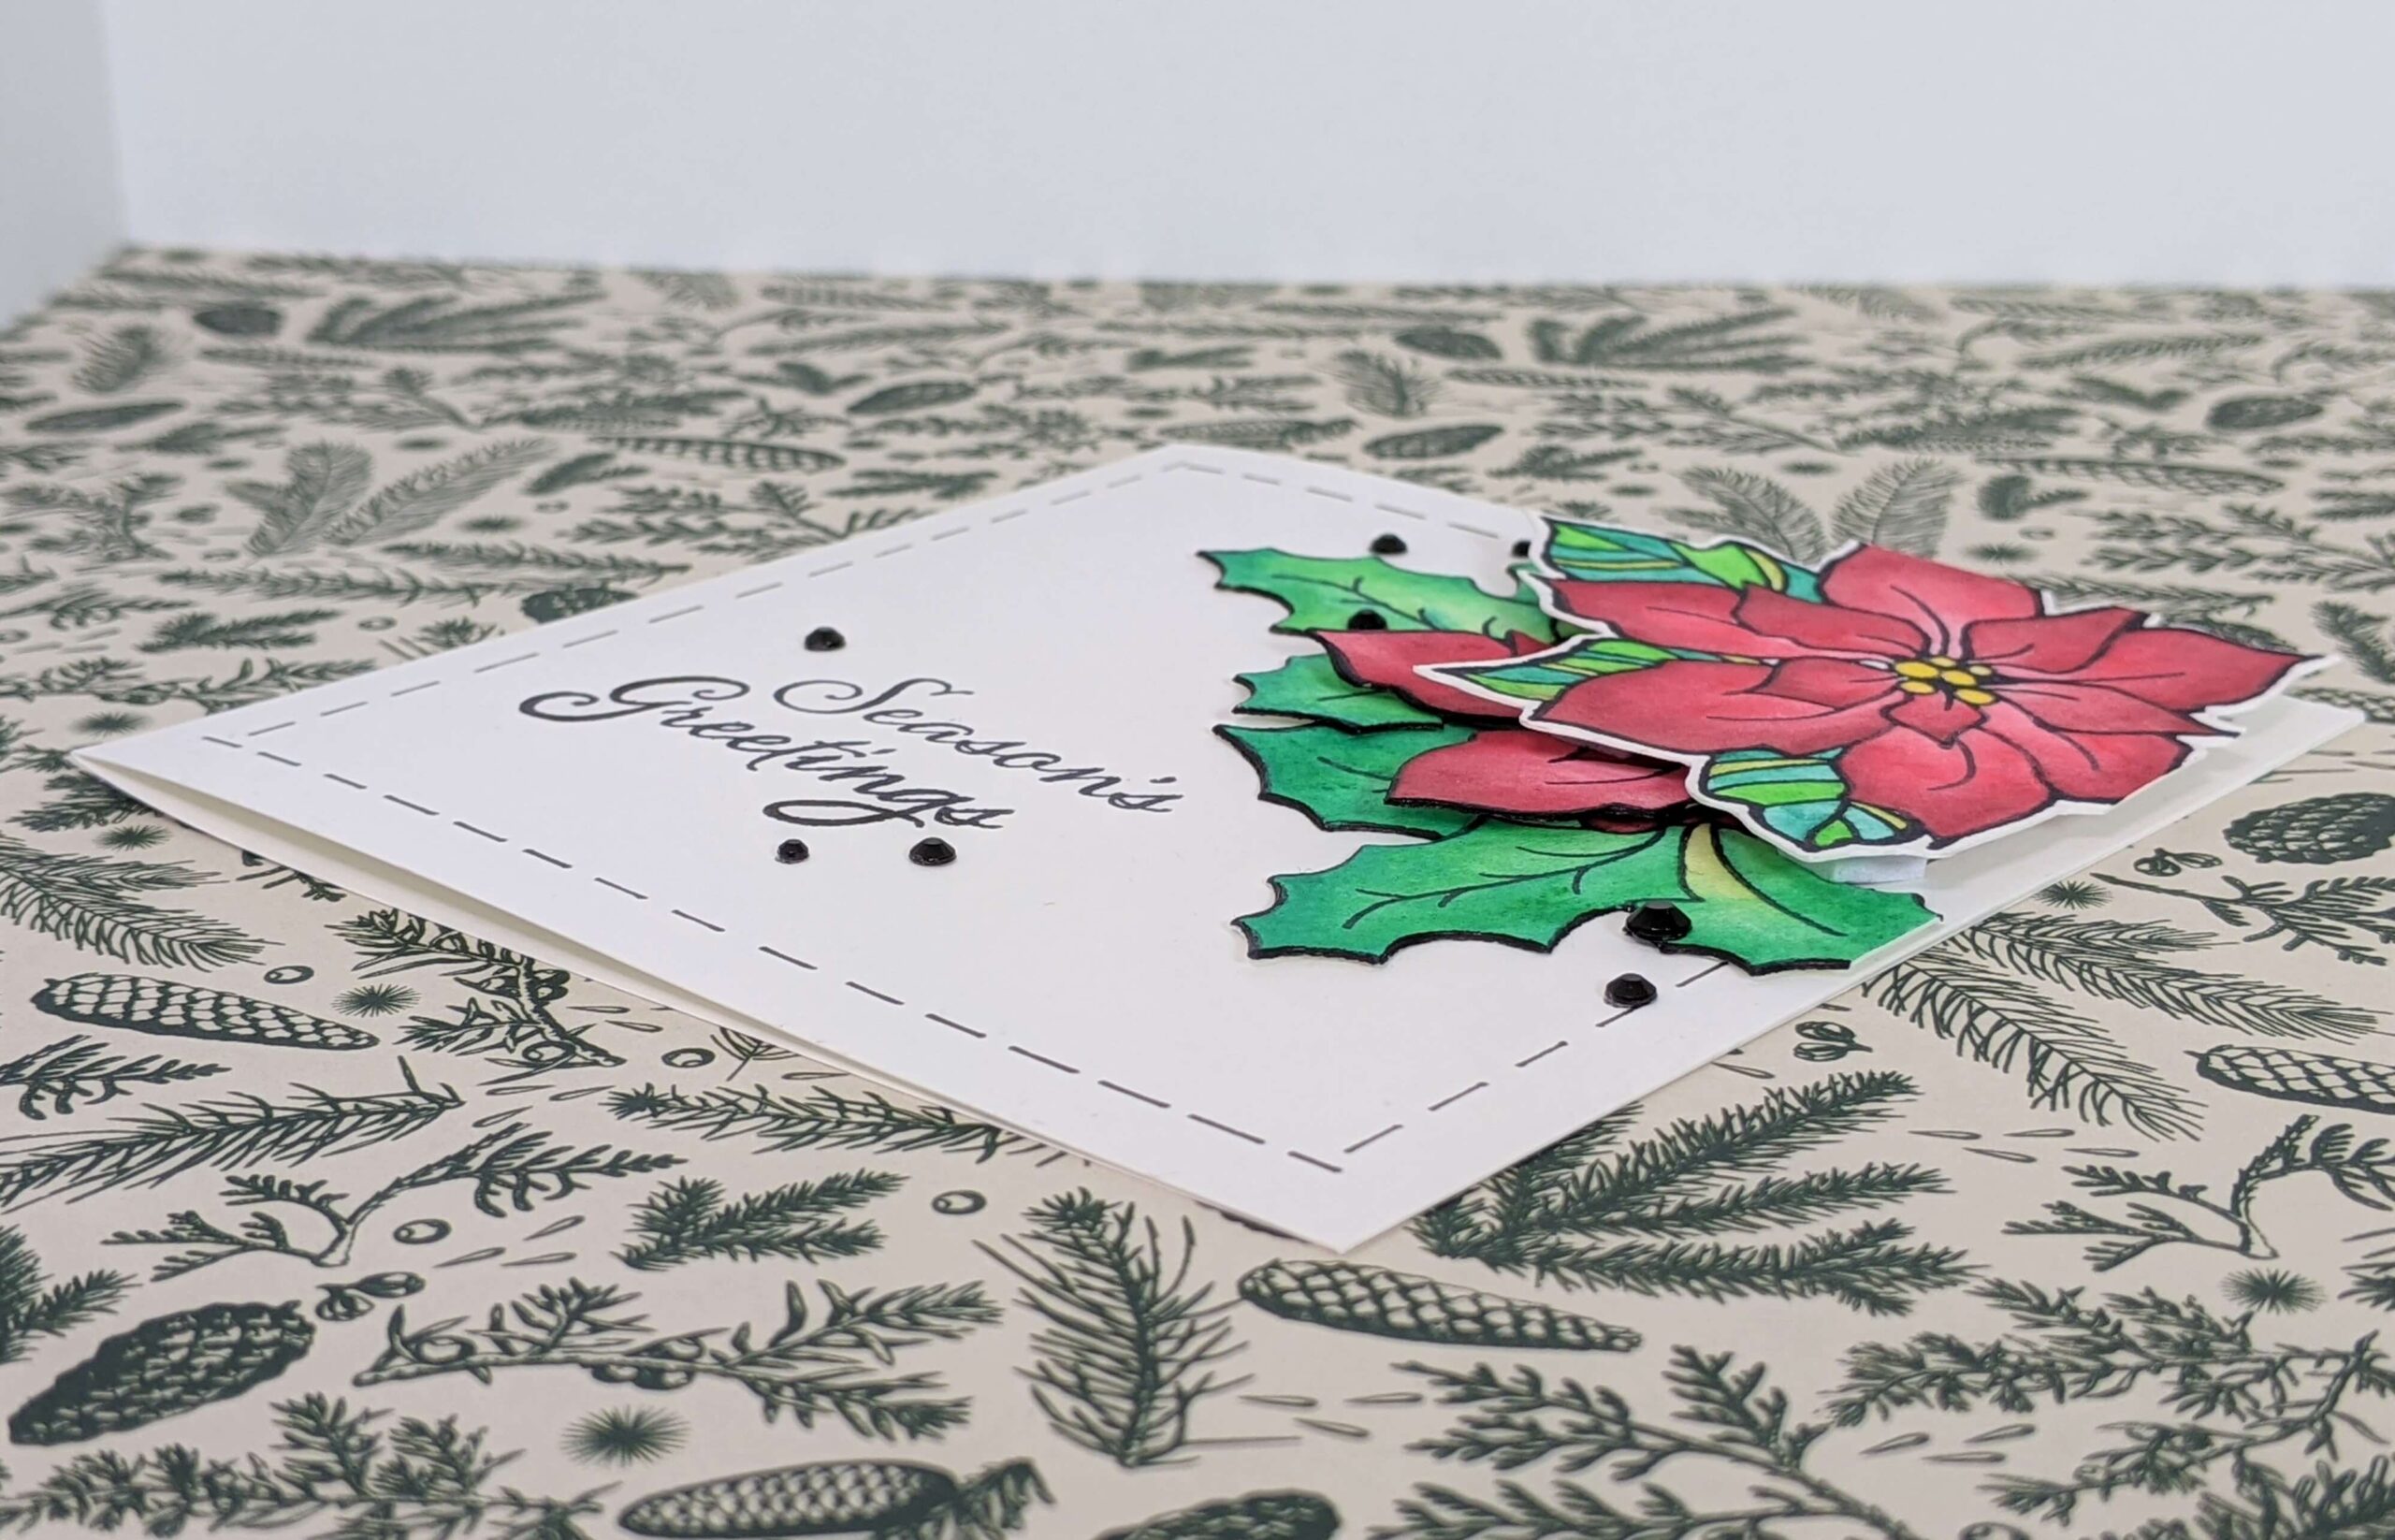
I let everything dry while I stepped away from my project to make dinner. When I came back, I cut and scored the card base using Neenah Solar White 80lb cardstock. I then placed the card base on my Misti and stamped “Seasons Greetings” on the card using the same Jet Black Ranger archival ink.
I also felt like my card needed some accents, so I added some lines around the edges of the cardstock using my Sakura Pigma 05 Micron pen. Next, I used the corresponding dies to cut out the watercolor Christmas images. I then applied them to the upper left-hand side of the greeting card. I used some Scrapbook Adhesives mounting squares to keep the holly leaves in place and used Forever In Time 3D Pop Dots to lift the watercolor poinsettia off the page a bit.
Lastly, I finished of the card with some carefully placed black rhinestone around the sentiment and the flowers. I put them in clusters of 2-3 wherever I felt like they wouldn’t look too symmetrical.
I hope you enjoyed this tutorial! If you’d like to see more watercolor designs, please check out the watercolors section of the site. and don’t forget to follow me on Instagram, Facebook, or Pinterest for the latest updates! You can also shop all the handmade cards that I’ve designed here.