
Are you new to card making and looking to learn how to use your stamps? Stamping is a fun and easy way to create beautiful cards that are perfect for any occasion. Whether you’re looking to make a birthday card, thank you card, or just a card to say hello, stamping can help you create a unique and personalized card that your friends and family will love. In this post, I’ll cover the basics of stamping for card making so you can start your next project with confidence.
Note: This blog may use affiliate links when they’re available. If you choose to make a purchase through one of these links, I may receive a small commission at no cost to you. I don’t make recommendations lightly, and will only link to products I know and trust.
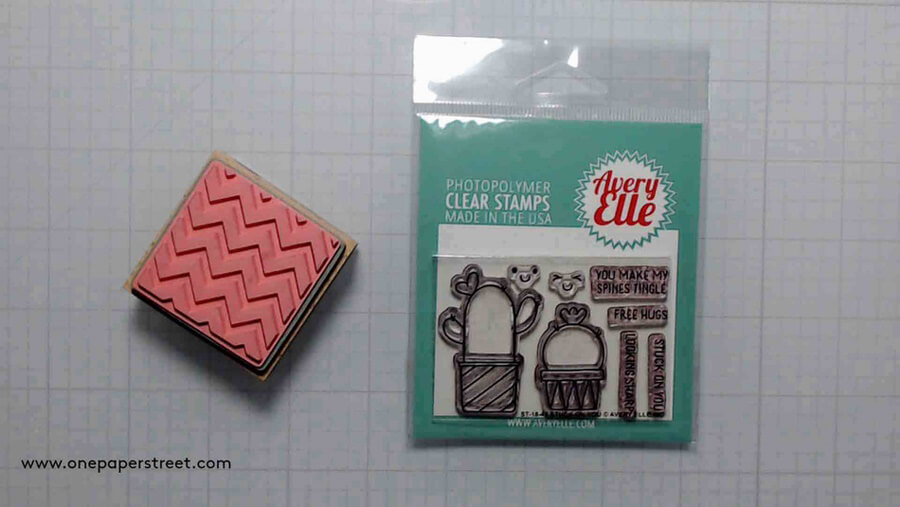
Rubber Stamps vs. Clear Stamps
The two main types of stamps used for card making are rubber stamps and clear stamps. Rubber stamps are made from rubber and are normally mounted on a wooden block, while clear stamps are made from photopolymer or silicone and can be attached to an acrylic block by you, the artist, once purchased.
Rubber stamps can typically be bought individually and are easy to use since they’re already mounted on wood, but you can’t see the exact location of the stamp on the paper as you’re working, and you’re not able to use them with stamping tools, like a Misti. Clear stamps, on the other hand, allow you to have more accurate positioning on the paper, Since you can see through the stamp. They can be paired with other stamping tools (like the Misti), as well. A stamping tool allows you to stamp an image multiple times in the same spot on your paper if the image doesn’t come out cleanly on the first try.
Best Ink for Beginners
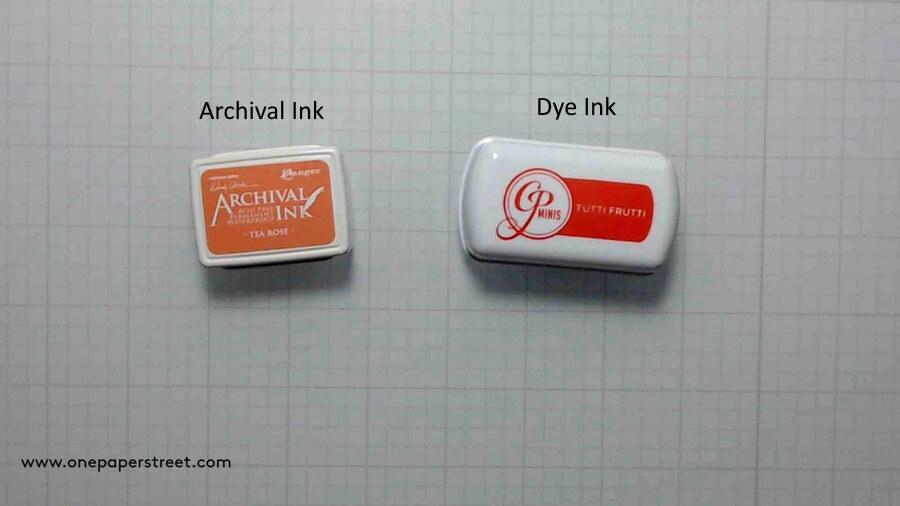
When you’re getting started as a card maker, it can be difficult to know which ink is right for your project. So let’s talk about 3 common types of ink and how you could use them. They are archival ink, dye ink, and pigment ink.
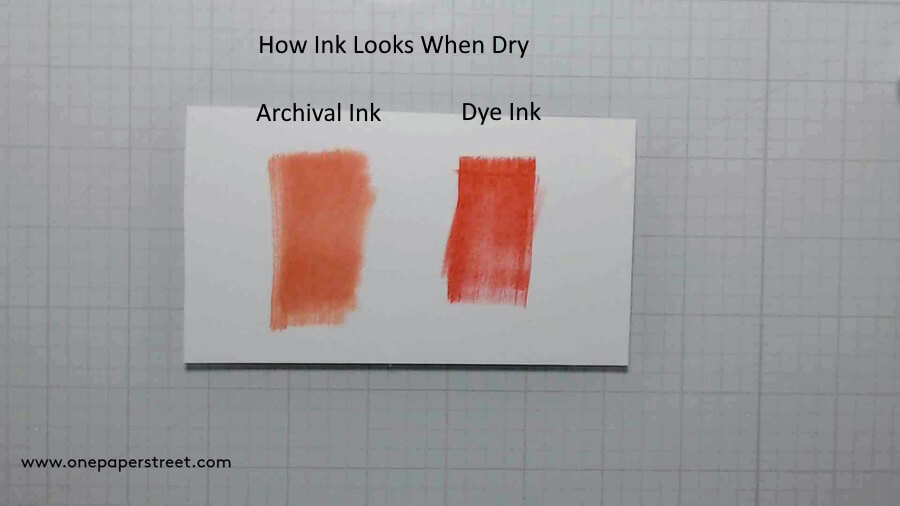
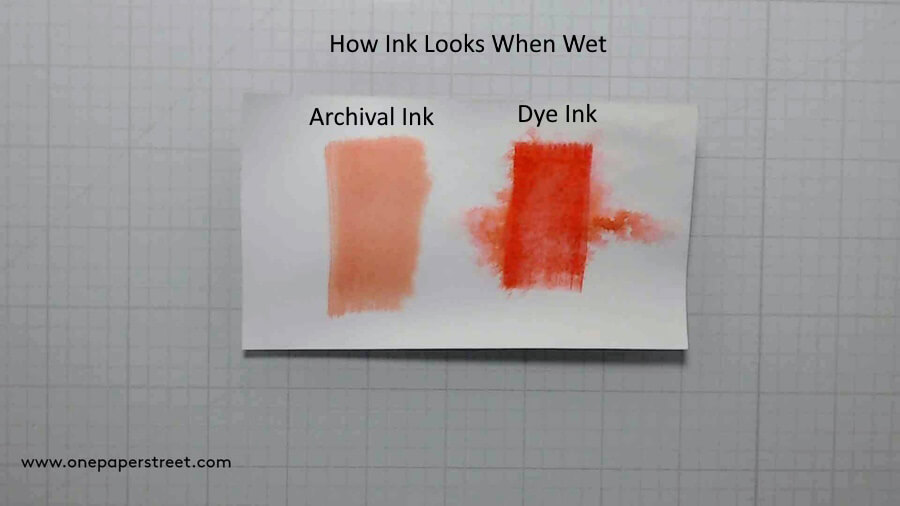
Archival ink is a waterproof ink that dries quickly. It’s great if you’re planning to use wet mediums like watercolor or markers overtop of the stamped image. Note that alcohol markers (like Copics) are the exception here. Consider using distress ink with these markers because of their chemical makeup.
Dye ink is water-based and dries quickly, but not as quickly as archival ink. many dye inks can be blended and layered. But it’s really cool if you want to spray it with water or use it like watercolor paint. Because it’s water soluble, it will reactivate when wet.
Pigment ink is a thicker ink that dries very slowly. It’s perfect for embossing. Setting this ink and embossing powder with heat will allow its beauty to shine through. Wanna try embossing, but you’re not sure if you want to buy all the different colors of embossing powder? Get clear powder and use colored pigment inks instead!
How to Clean Your Stamps
Cleaning your stamps after each use is helps ensure their longevity. Dye inks and pigment ink can be cleaned with soap and water. Archival ink requires a stamp cleaning fluid to remove it from your stamps. I also typically use soap and water after the cleaning fluid when using Archival ink. Always remember to let your stamps dry before you put them away too. I usually typically let them sit out for about 10 minutes or so after cleaning.
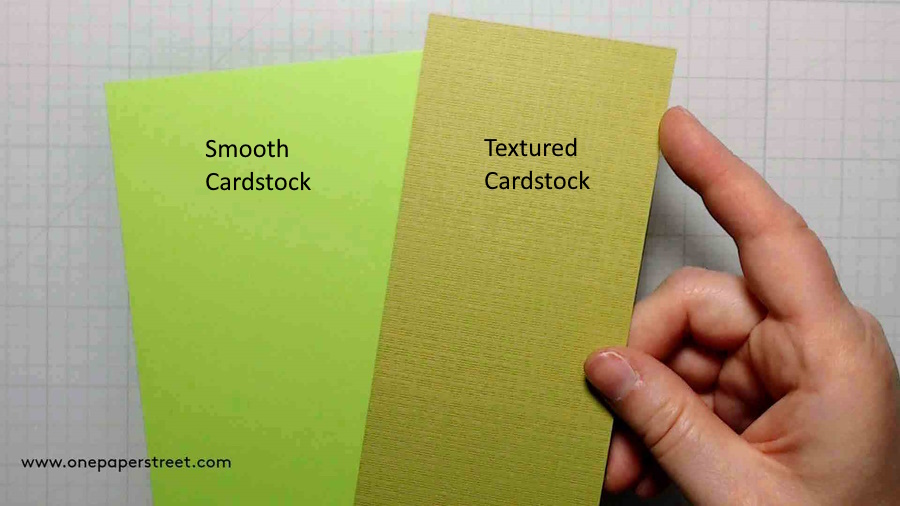
Best Types of Cardstock for Stamping
You can stamp on so many different types and brands of cardstock, but as you’re getting started consider smooth cardstock for stamping. It allows for a clean and clear image. I would avoid using textured cardstock. Test it out to see what style you’re looking for. But stamped images will typically look splotchy on a textured surface because the stamp can’t make contact across the whole image evenly.
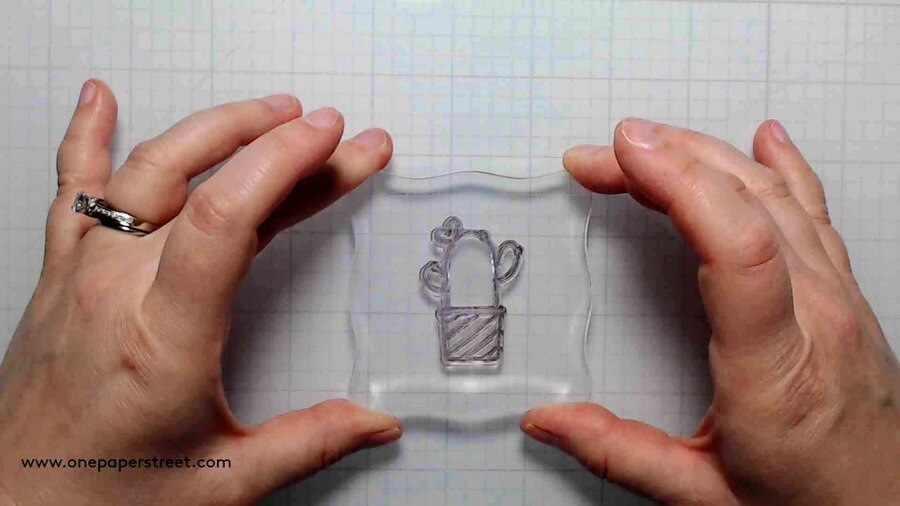
How to Mount a Stamp on an Acrylic Block
If you’re using a rubber stamp with a wooden block attached, you don’t need to mount it. However, for clear stamps, you need to attach them to an acrylic block. To do this, lay the stamp on the table facing down, place the acrylic block over it, and apply some light pressure to create suction. Clean it and peel the stamp from the block once you’re finished.
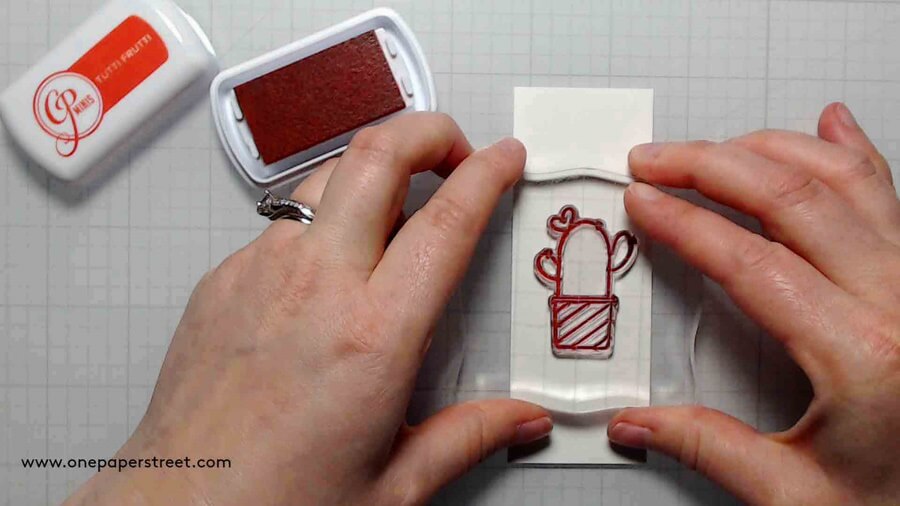
How to Ink a Stamp
There are two ways to ink a stamp. Chose your personal preference. For me, it depends on the size of the ink pad and stamp.
Option 1: If you have a large ink pad, set it on the table, pick up your stamp attached to the acrylic block, and gently press it face-down into the stamp pad. Use an up-and-down motion to move the stamp around on the ink pad until it is completely covered.
Option 2: If your stamp is larger than your ink pad, place your acrylic block on the table with your stamp facing up. Pick up your ink pad, turn it face-down, and apply ink to your stamp, again using an up-and-down motion. Move the ink pad around until the stamp is fully covered with ink.
Creating a Clean Stamped Impression
Once you’ve inked your stamp, it’s time to make your impression. To create a clean stamped impression, press the stamp pad onto a sheet of test paper to see how your image turned out. The first image usually looks the worst, so make sure to test it before stamping on your final project. The most important step is to make sure that you’re pressing your stamp on the paper evenly. Avoid laying one side down before the other.
I hope you walk away from this article feeling inspired to try your own stamping project. Stamping can be such a fun way to express your creativity. Don’t be afraid to give stamping a try and let your imagination run wild! Don’t forget to follow me on Instagram and Pinterest for more card making inspiration! You can also shop all the handmade cards that I’ve designed here.