
Recently, Christmas cards have been my creative focus. I wanted to design something that was simple and quick to make. There was some leftover ribbon from a previous project I’d worked on and wanted to use it up. I combined these two ideas and came up with this Christmas cards using the leftover ribbon. I really enjoy the way it turned out, and it’s one of my personal favorites, it’s also meant to be easy to replicate.

MATERIALS USED:
- Explore Air 2 Machine, Cricut
- Adhesive Cutting Mat, Standard Grip, Cricut
- Midnight Black Marker – From: Cricut Antiquity Color Pen Set
- 3/4 Inch Blue Crafting Ribbon
- 3/4 Inch Purple Crafting Ribbon
- Scor-Pal Scor-Tape 1/8 Inch
- Recollections White Heavyweight (8.5’x5.5’)
- White Textured Cardstock (4’x5.25′)
- Light Blue Cardstock (3.5’x2′) –From: Recollections Cardstock Paper, 8 1/2′ X 11′ Cape Cod Blues
- Any Christmas Sentiment Stamp (for internal message)
- ColorBox Wicked Black Archival Ink
- Small Stamping Block –From: Krystal Acrylic Block Set Of 5
- 1/2-Inch Forever In Time 3D Pop Dots Square Dual-Adhesive Foam Mount
- 1/4-Inch Forever In Time 3D Pop Dots Square Dual-Adhesive Foam Mount
- Trim Slant Tip Tweezers
- Feather No.55 Switch-Blade Shear, 5.5 Inch
CRICUT IMAGES USED:
- Christmas Tree (Tablescraps Fall & Winter cartridge)
- Banner (Bits and Pieces cartridge)
- Standard Square
- Bookmark Font
View the exact specifications of this project in the Cricut Design Studio.
Christmas Cards with Leftover Ribbon Tutorial:
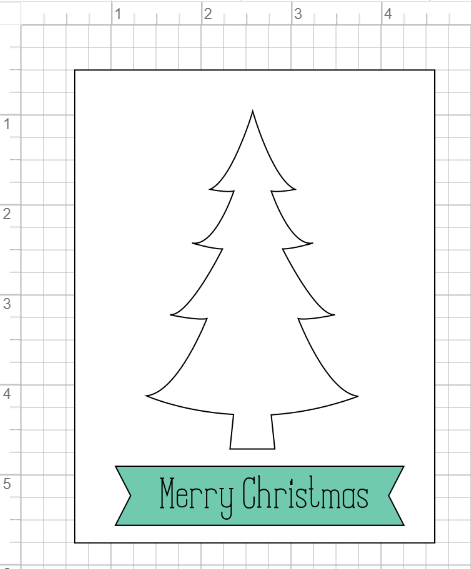
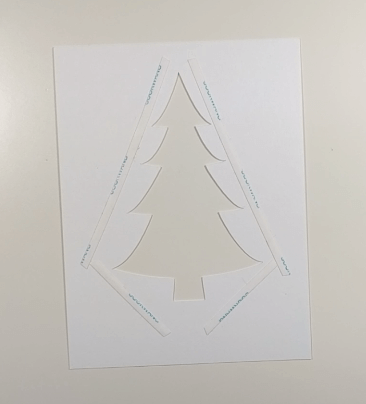
I started this design by cutting an 11’x8.5’ piece of cardstock in half and folding it to make an A2 sized card base. Then I used my Cricut machine to cut out a large image of a Christmas tree and a 5.25’x4’ square around that tree onto textured white cardstock. I didn’t actually use the cutout of the tree; I decided to save that for another project. Instead, I used the negative of the tree as the focal point for this design.
Tip: I used my Cricut Machine to make the Christmas tree design, but you could use any pine tree die cut to mimic this project.
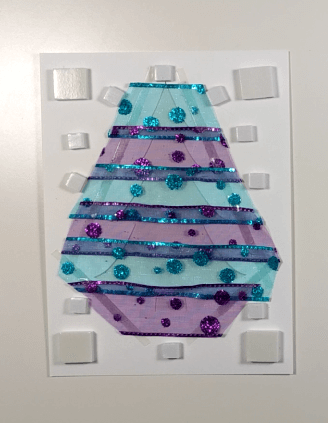
Once the textured cardstock was cut, I turned over the negative and lined the tree with Scor-Pal Scor-Tape. Since this tape is really sticky, I could lay ribbon down right across the open tree design, and it would stay firmly in place. Since my ribbon was see-through I chose to overlap my layers, but you could also lay the ribbon side by side if you prefer.
Once I positioned all of the ribbon, I trimmed the excess from the sides of the tree and placed Forever In Time 3D Pop Dots Adhesive on the back of the cardstock. This allowed me to place the tree on the base of the card, while still giving the ribbon space to move in-between the two pieces of cardstock.
I then made the banner that said “Merry Christmas”. All of my Christmas stamps were too large, so I created the banner and sentiment using the Cricut Design Studio. This was easy since the tree was already in my Cricut project. I could measure it against the tree to make sure it was the right height and width. Once the sentiment was written and cut by my Cricut machine, I also put that on some Pop Dots Adhesive, and placed it on the front of the card under the tree.
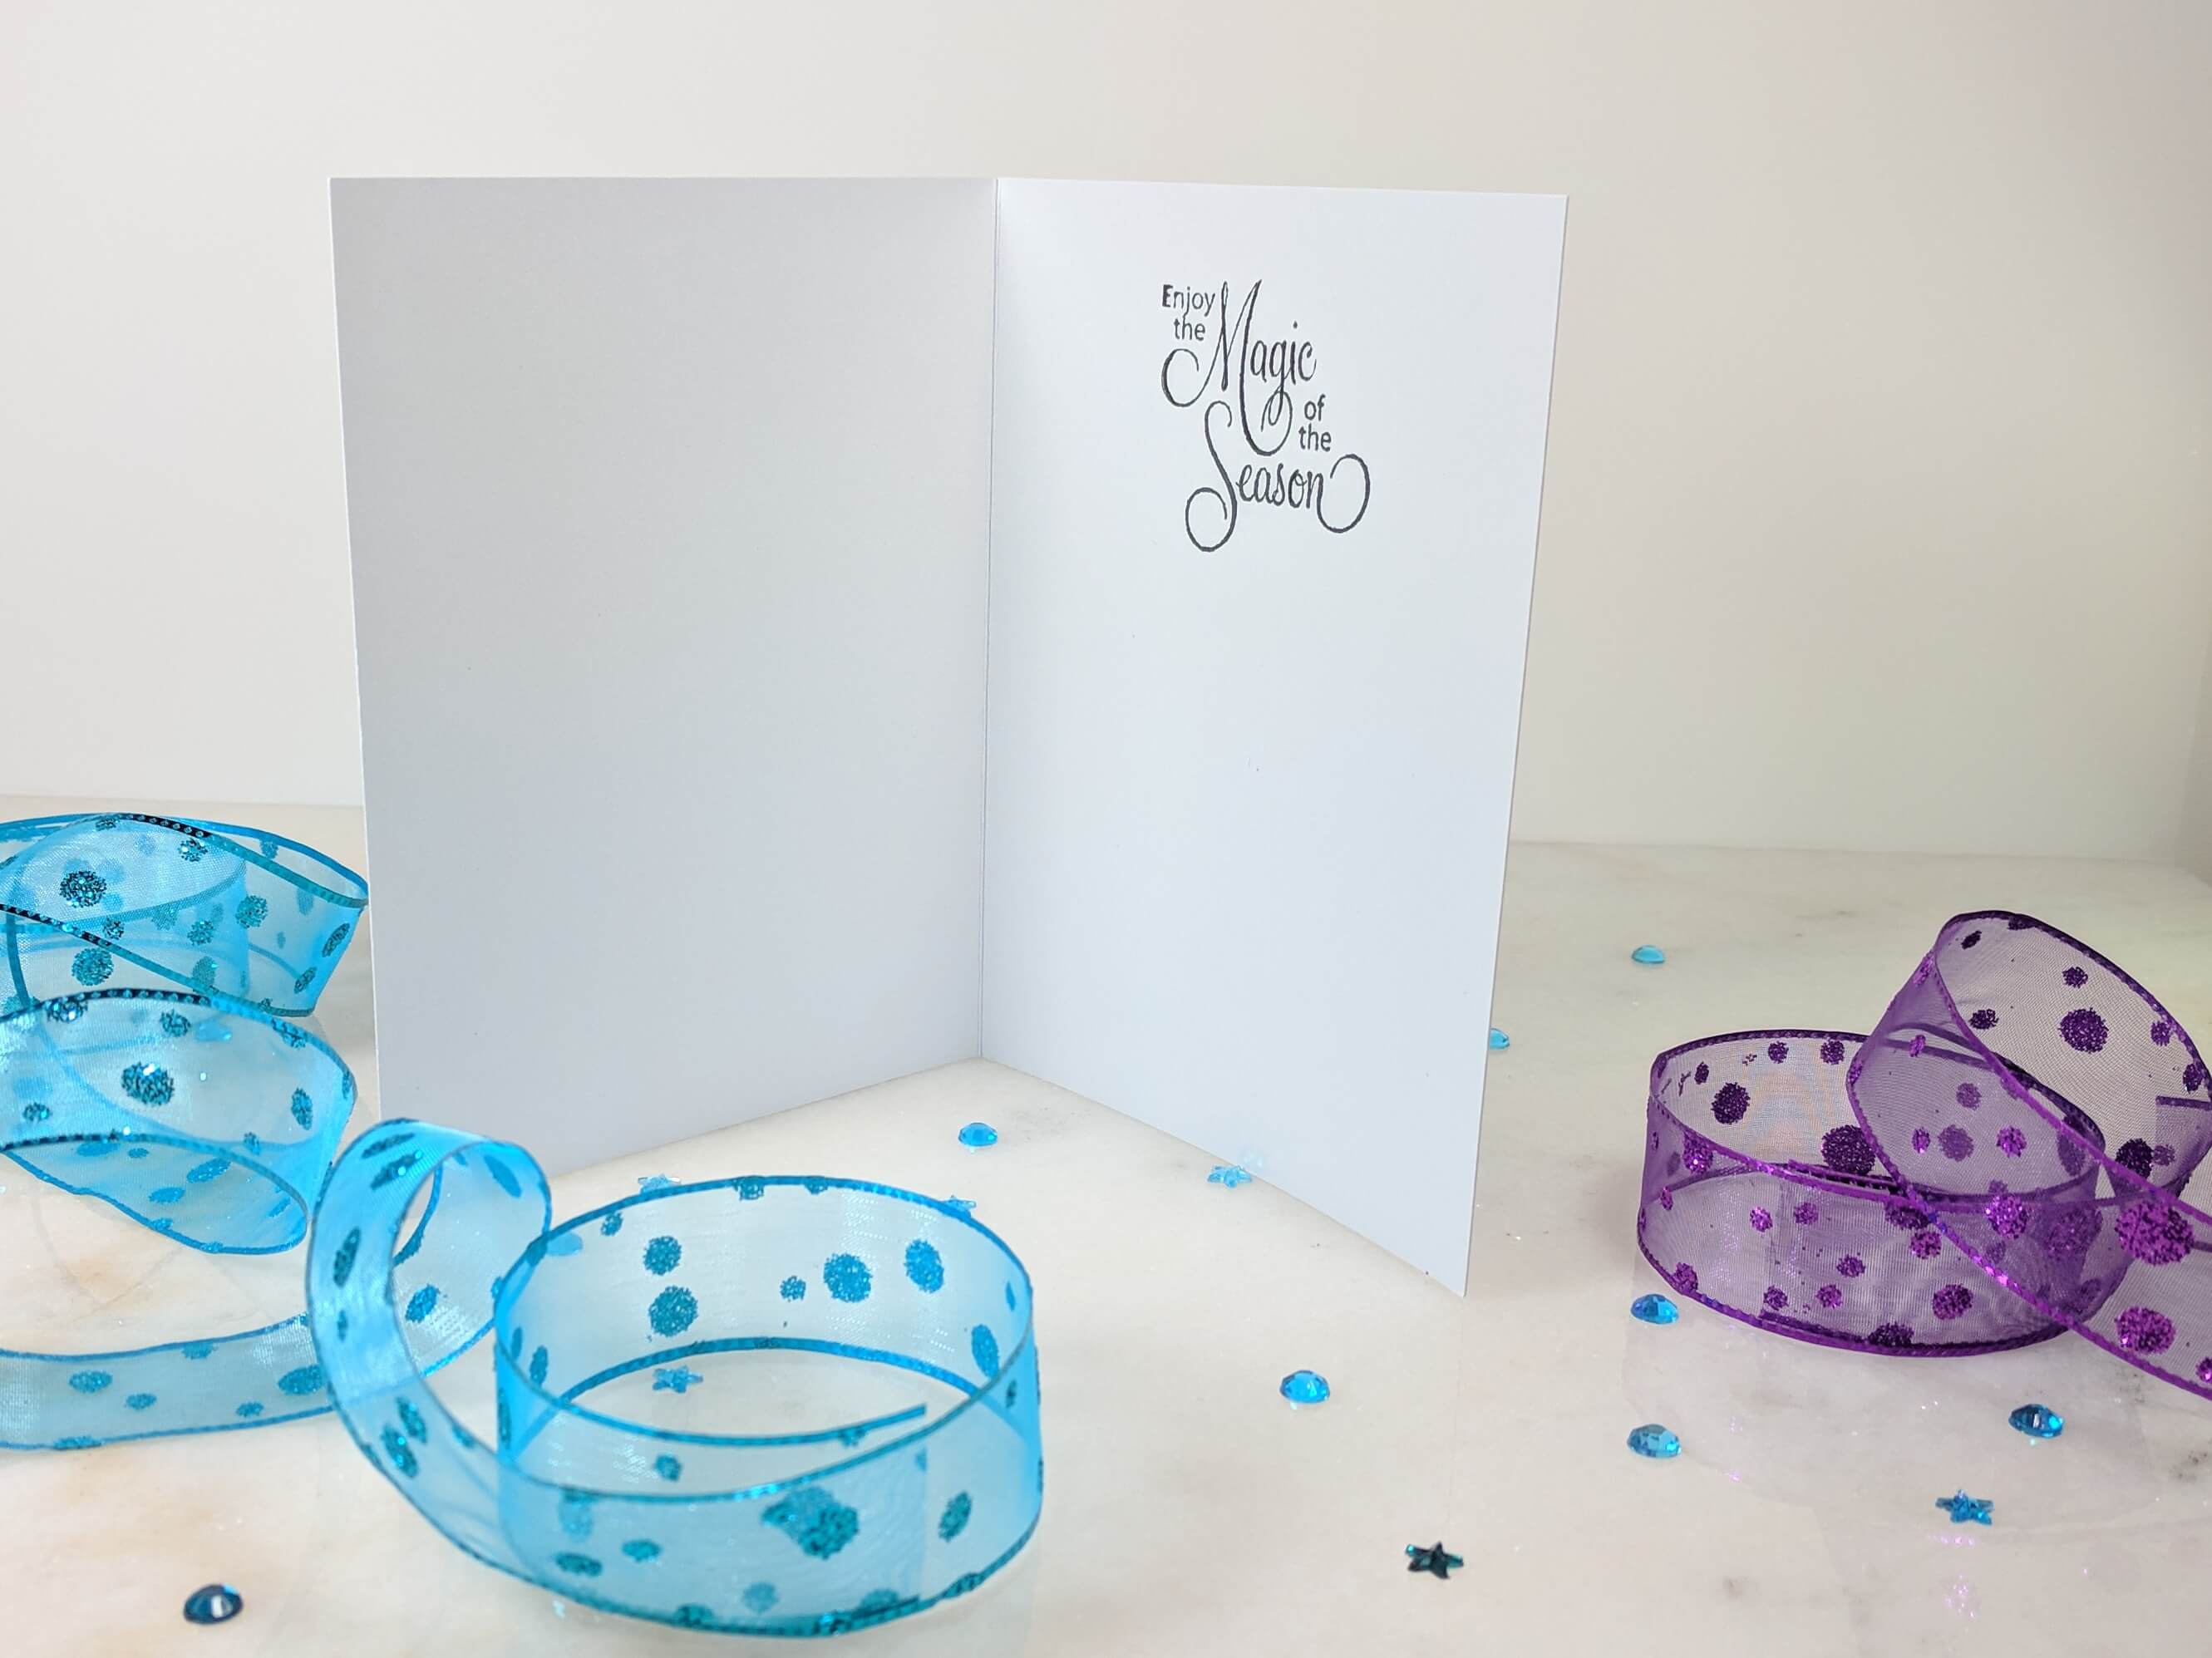
Lastly, I opened the card and stamped a little Christmas sentiment where the inside message belongs in to put the finishing touches on this card. I hope this was helpful, and please let me know what you think! If you decide to replicate this design when making Christmas cards for your own friends and family, I’d love to see your project, so please send me the link!
This blog uses affiliate links when possible. If you choose to make a purchase through one of these links, I may receive a small commission (at no cost to you). I don’t make recommendations lightly, and only link to products that I know and trust. Thank you for your support.
2 comments
Love this idea
Thanks Denice! 🙂